Continuous integration and continuous delivery (CI/CD) with Bitrise
## Continuous integration and continuous delivery (CI CD) One of the main problems that a team of developers working on the same project usually encounters is the fact that, when the code of each one of them is merged, conflicts between different developers’ code, errors, etc. can occur, which makes this process slow. To solve this point, continuous integration and continuous delivery comes into action to automate the deployment of applications. In this article we are going to learn how to automatize the deployment of iOS applications with Bitrise.
Introduction
In a previous article we already saw what Continuous Integration is (CI), what Continuous Delivery (CD) is, and alos, what Continuous Deployment (CD) is, and how it could be done with a new GitHub tool: GitHub Actions.
In summary:
- Continuous Integration. Continuous integration is a technology that allows different developers to upload and merge code changes in the same repository branch on a frequent basis. Once the code has been uploaded, it is validated automatically by means of unit and integration tests (both the uploaded code and the rest of the components of the application). In case of an error, this can be corrected more simple.
- Continuous Delivery. In the Continuous Delivery (CD) the new code introduced and that has passed the Continuous Integration process is automatically published in a production environment (this implementation may require manual approval). What is intended is that the repository code is always in a state that allows its implementation in a production environment.
- Continuous Deployment. In Continuous Deployment (CD), all changes in the code that have gone through the previous two stages are automatically implemented in production.
Use of Bitrise
As it was seen in the article that we have commented before, there are numerous tools to configure and carry out the entire process of continuous integration and distribution (Jenkins, CircleCI, Visual Studio App Center…). In this case we will see how Bitrise works.
What I liked about Bitrise is:
- It is specifically designed for applications.
- The user experience on the website is very good.
- It allows you to easily configure workflows.
- It allows to deploy the compilations to Testflight and the App Store.
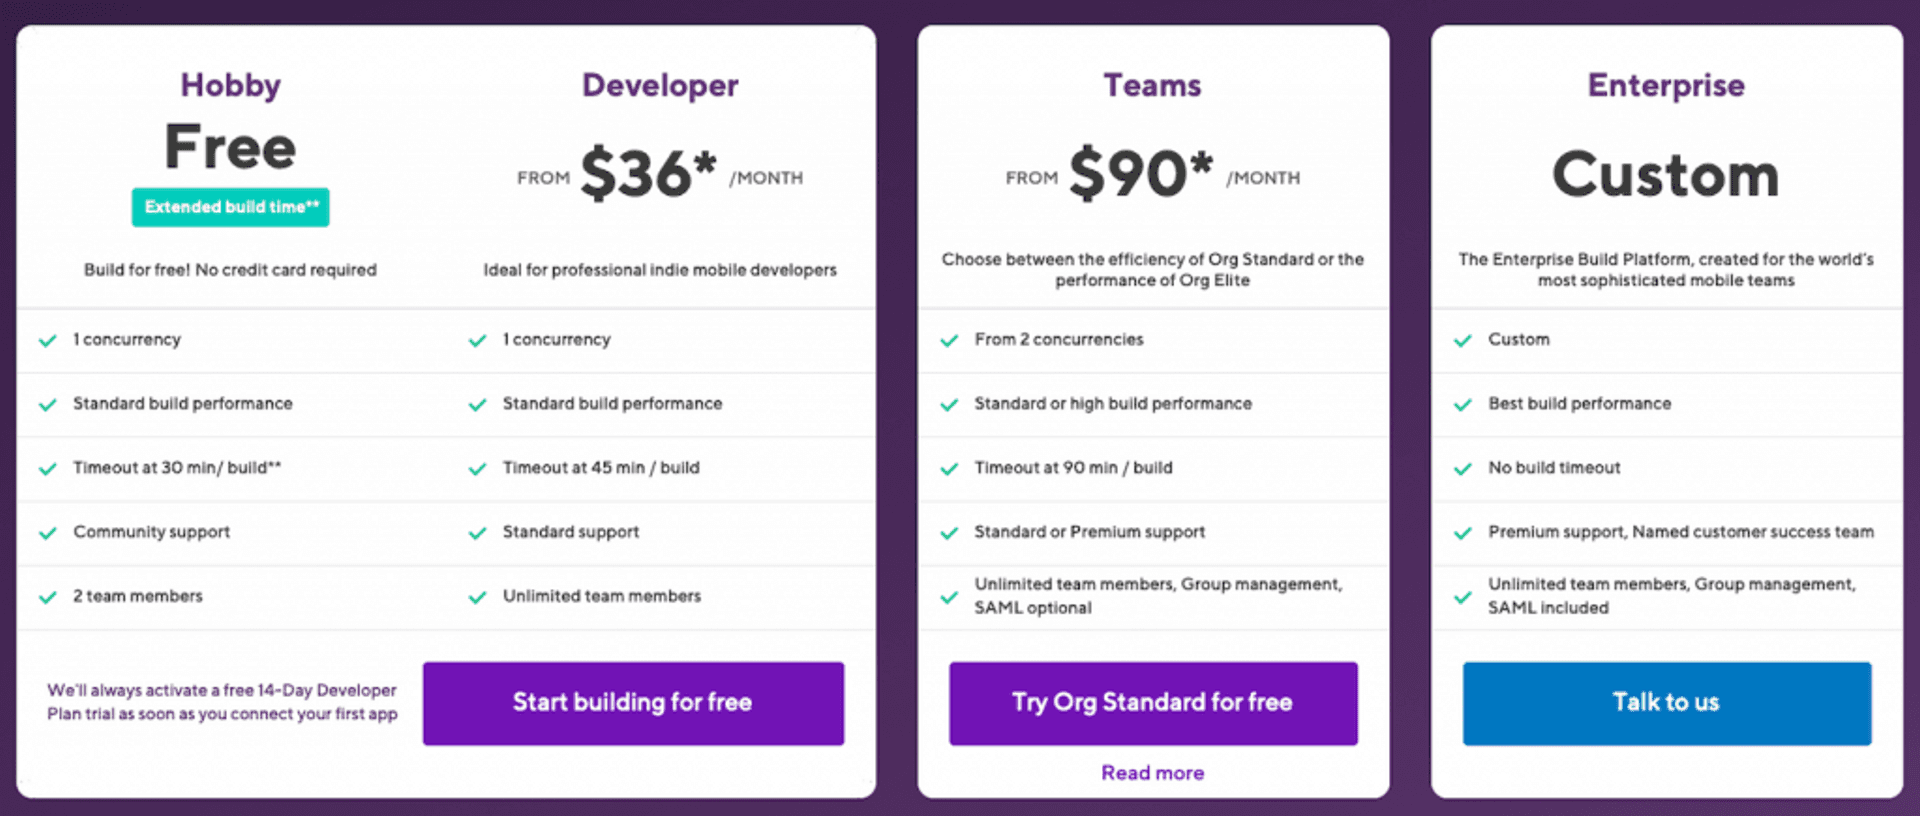
Bitrise is a paid tool, but there is a free version for us to try:
Bitrise registration
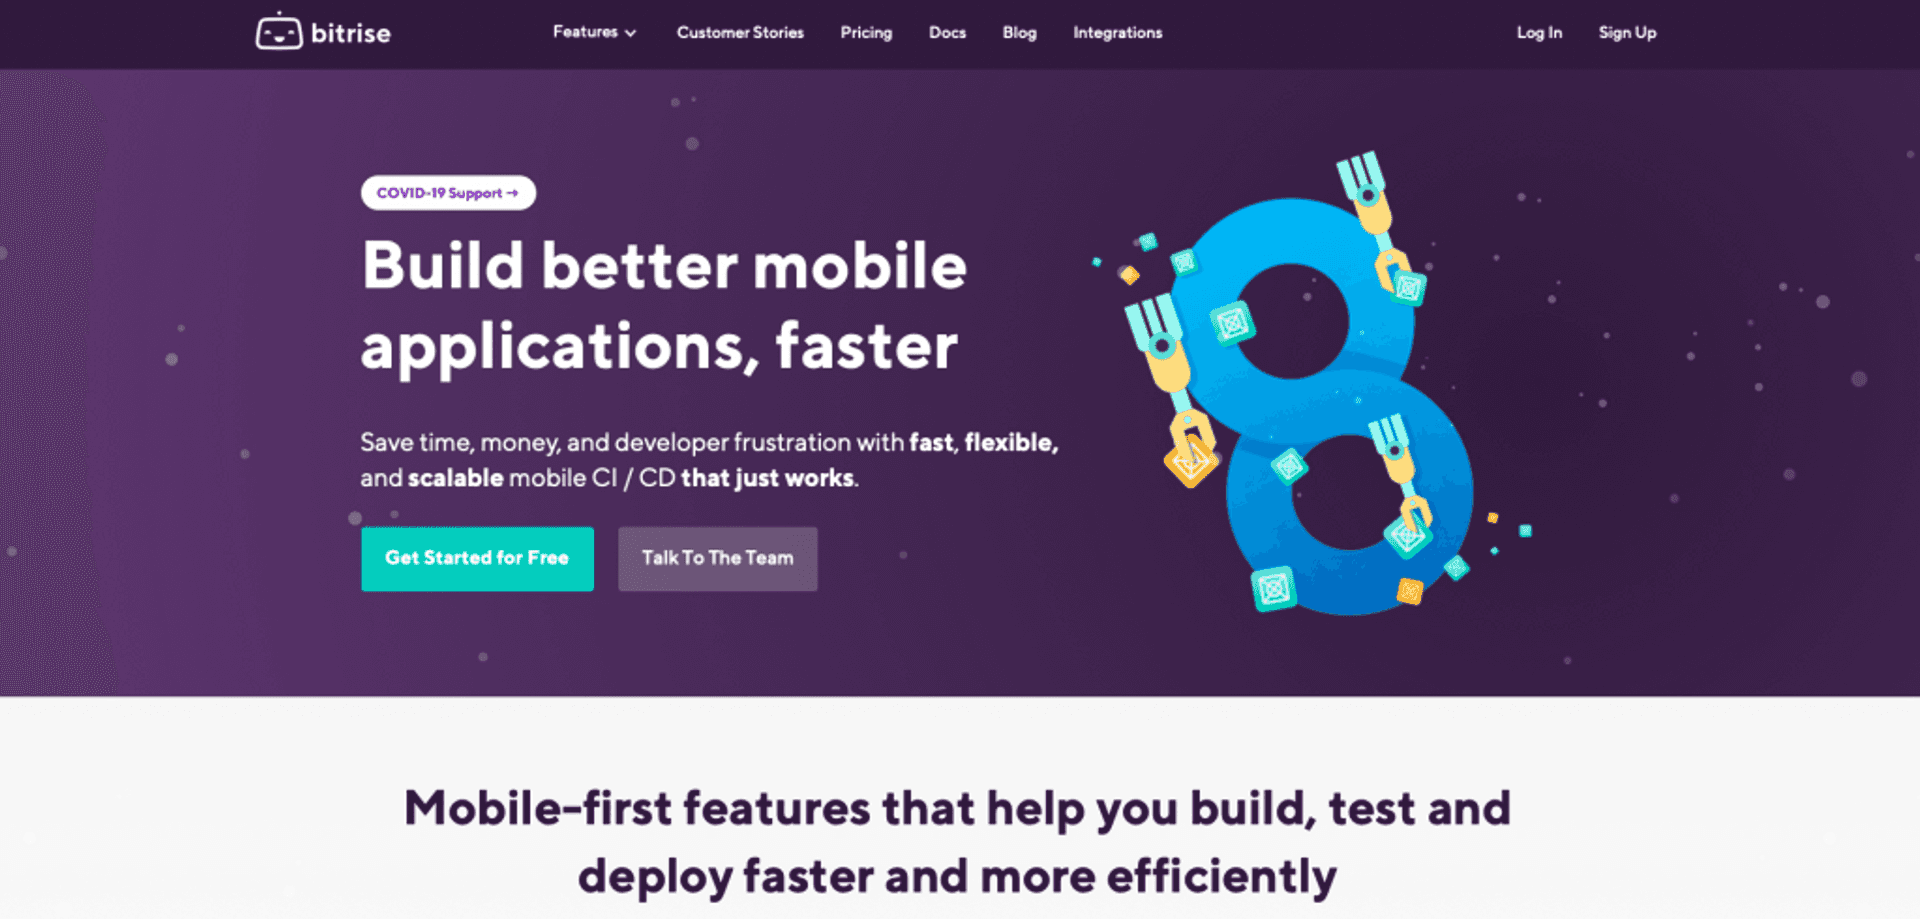
Registration at Bitrise is easy. We simply go to their website, and select ‘Get Started for Free‘:
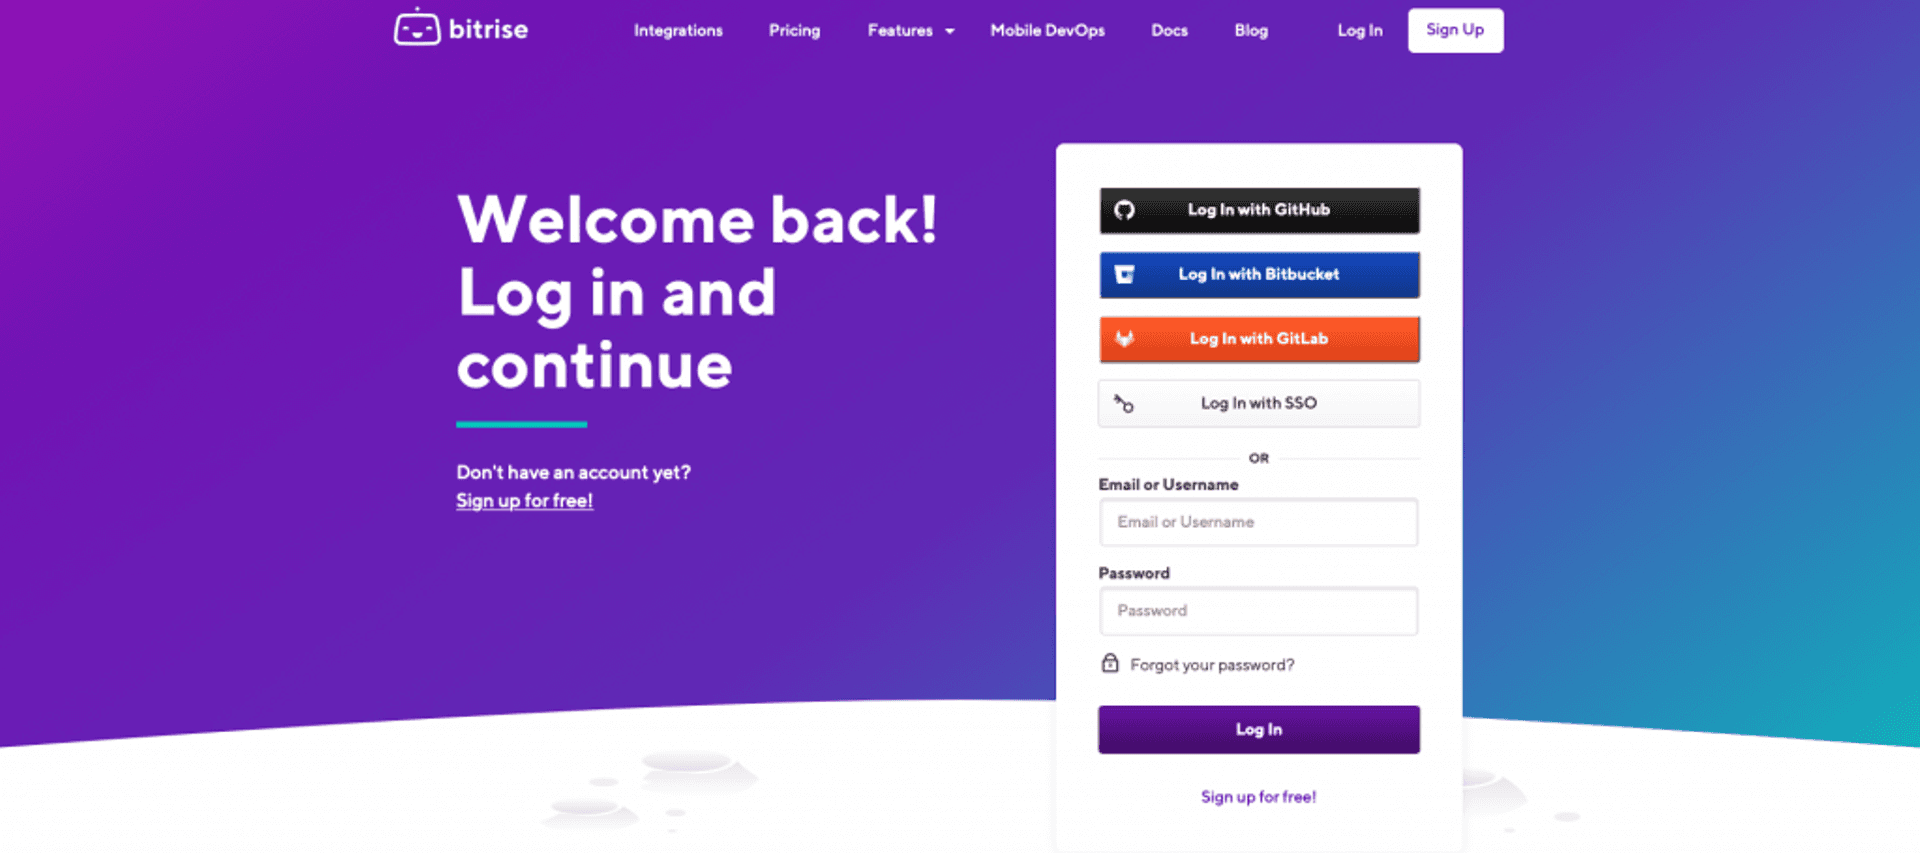
On the registration page we can use different options, starting with using accounts on GitHub, Bitbucket or GitLab.
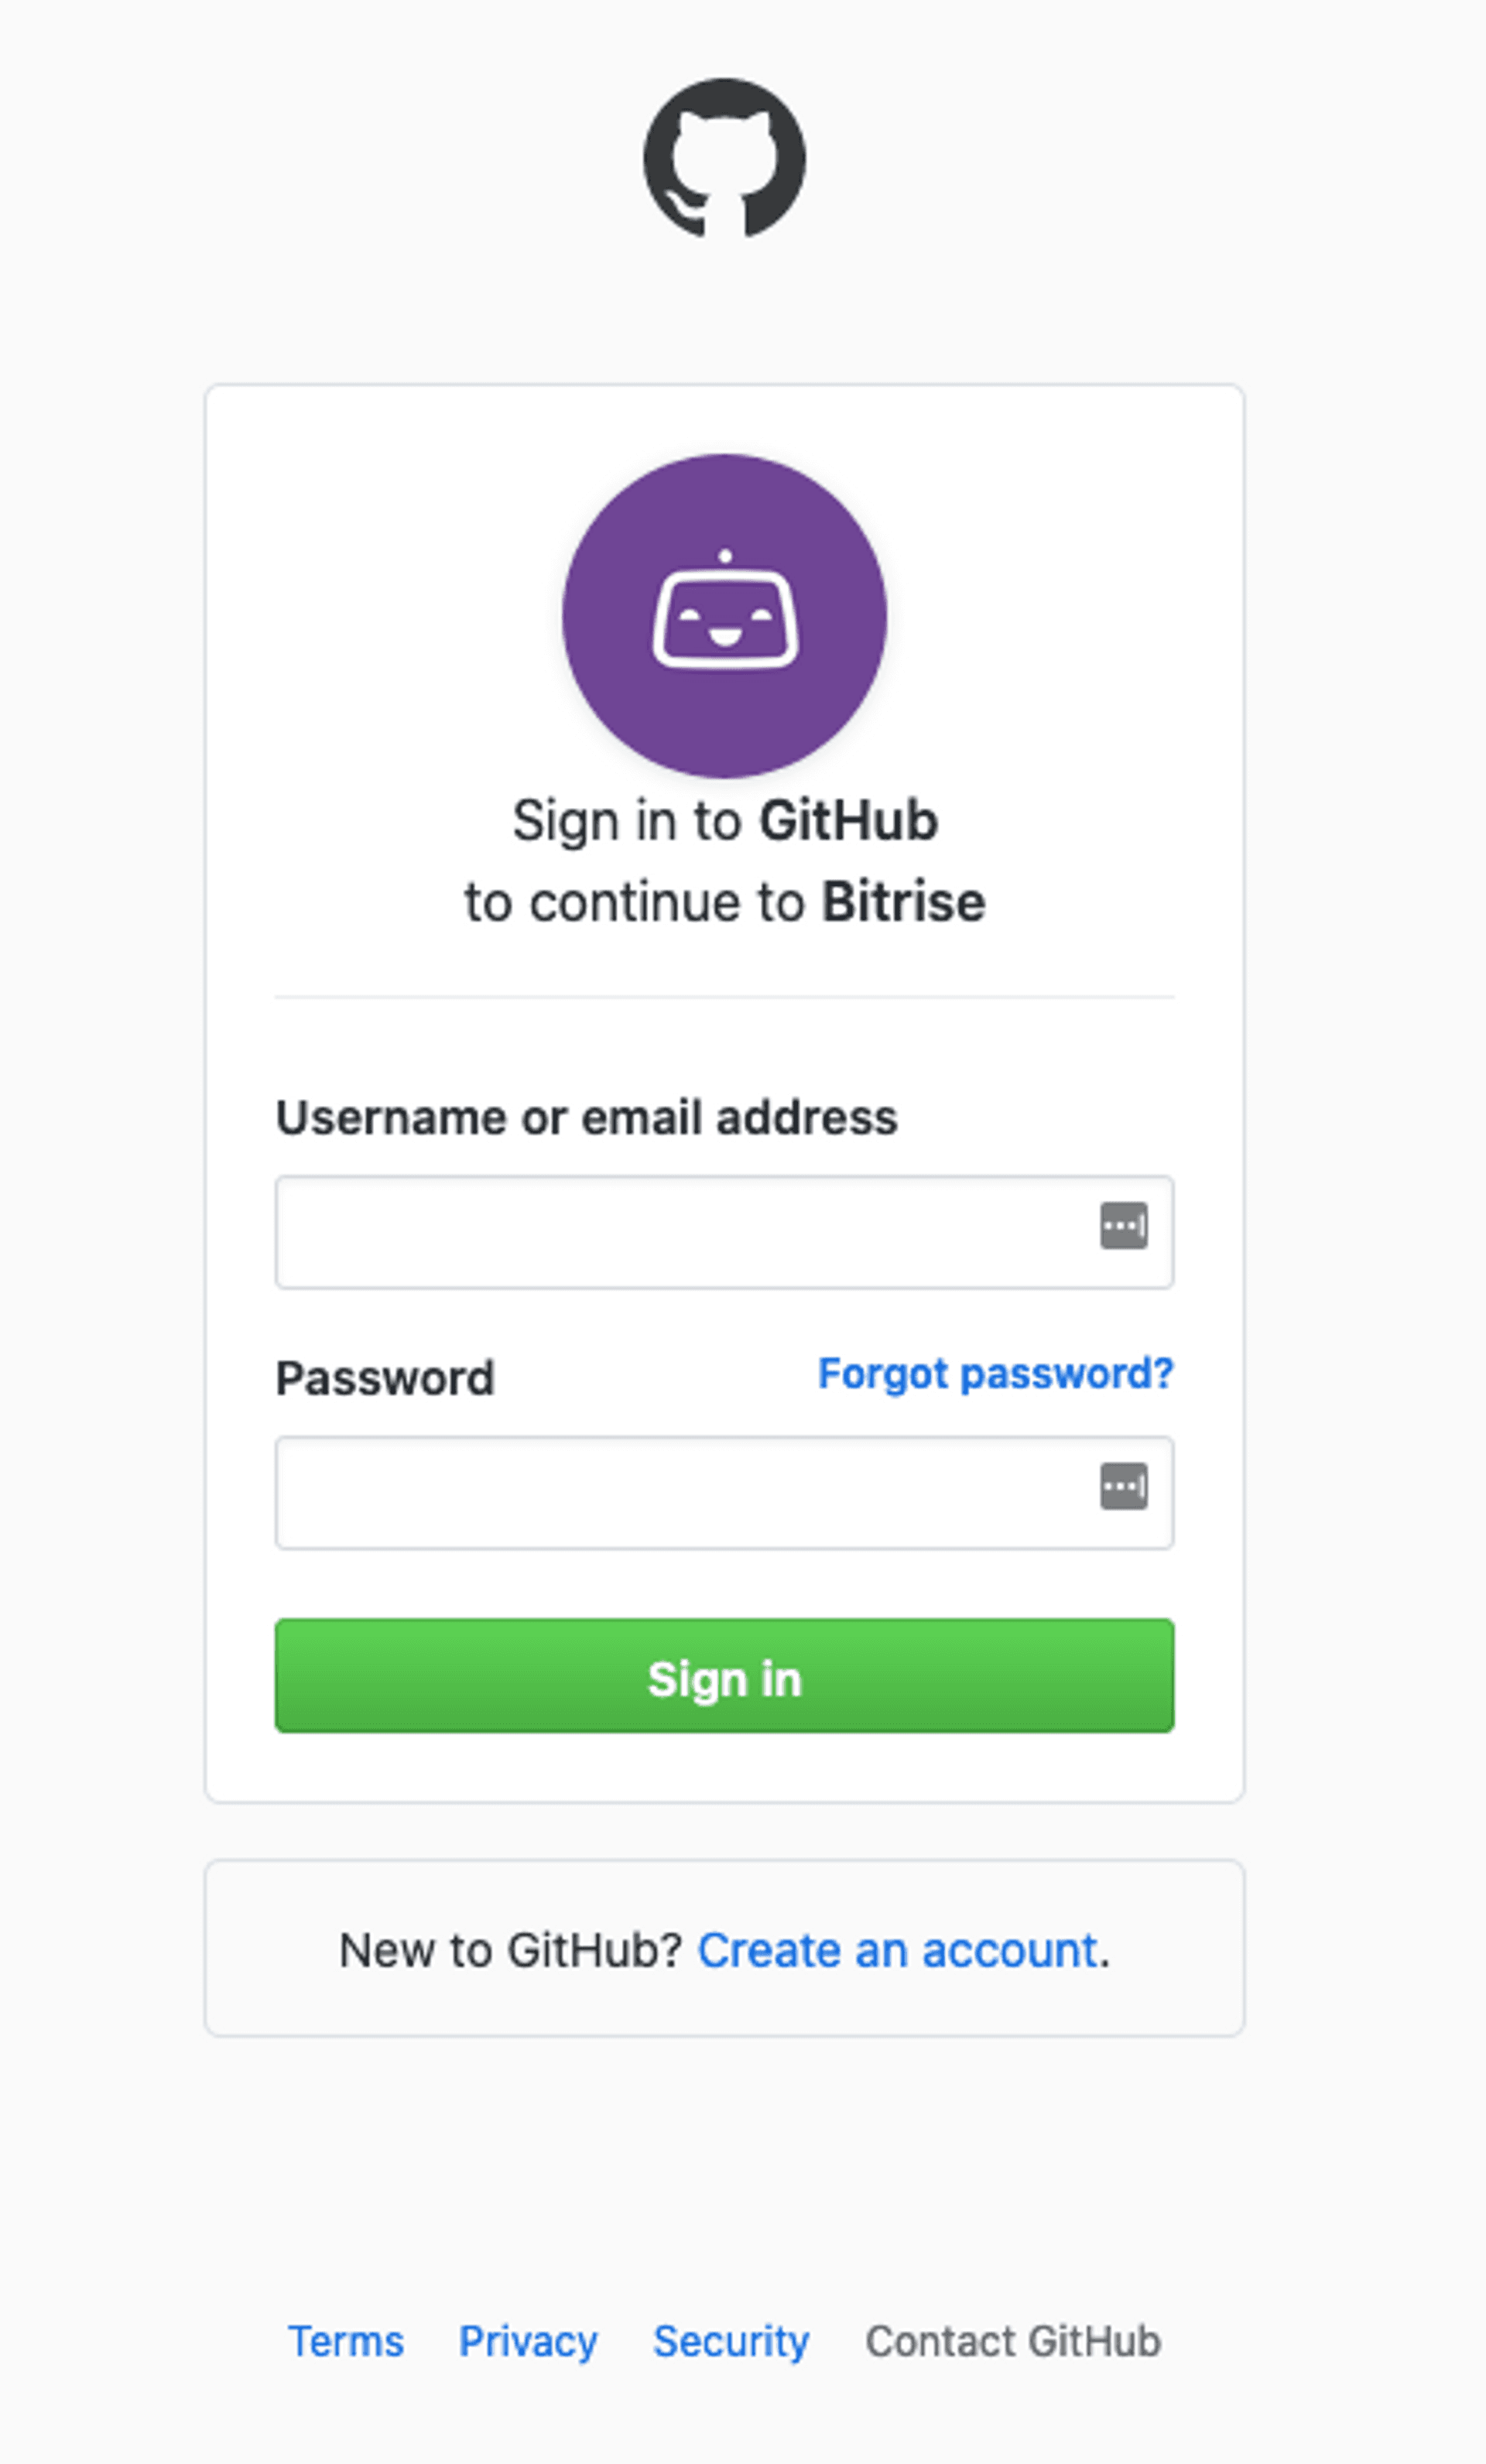
In this case we will use the registry through GitHub, since it will be the repository that we link to Bitrise.
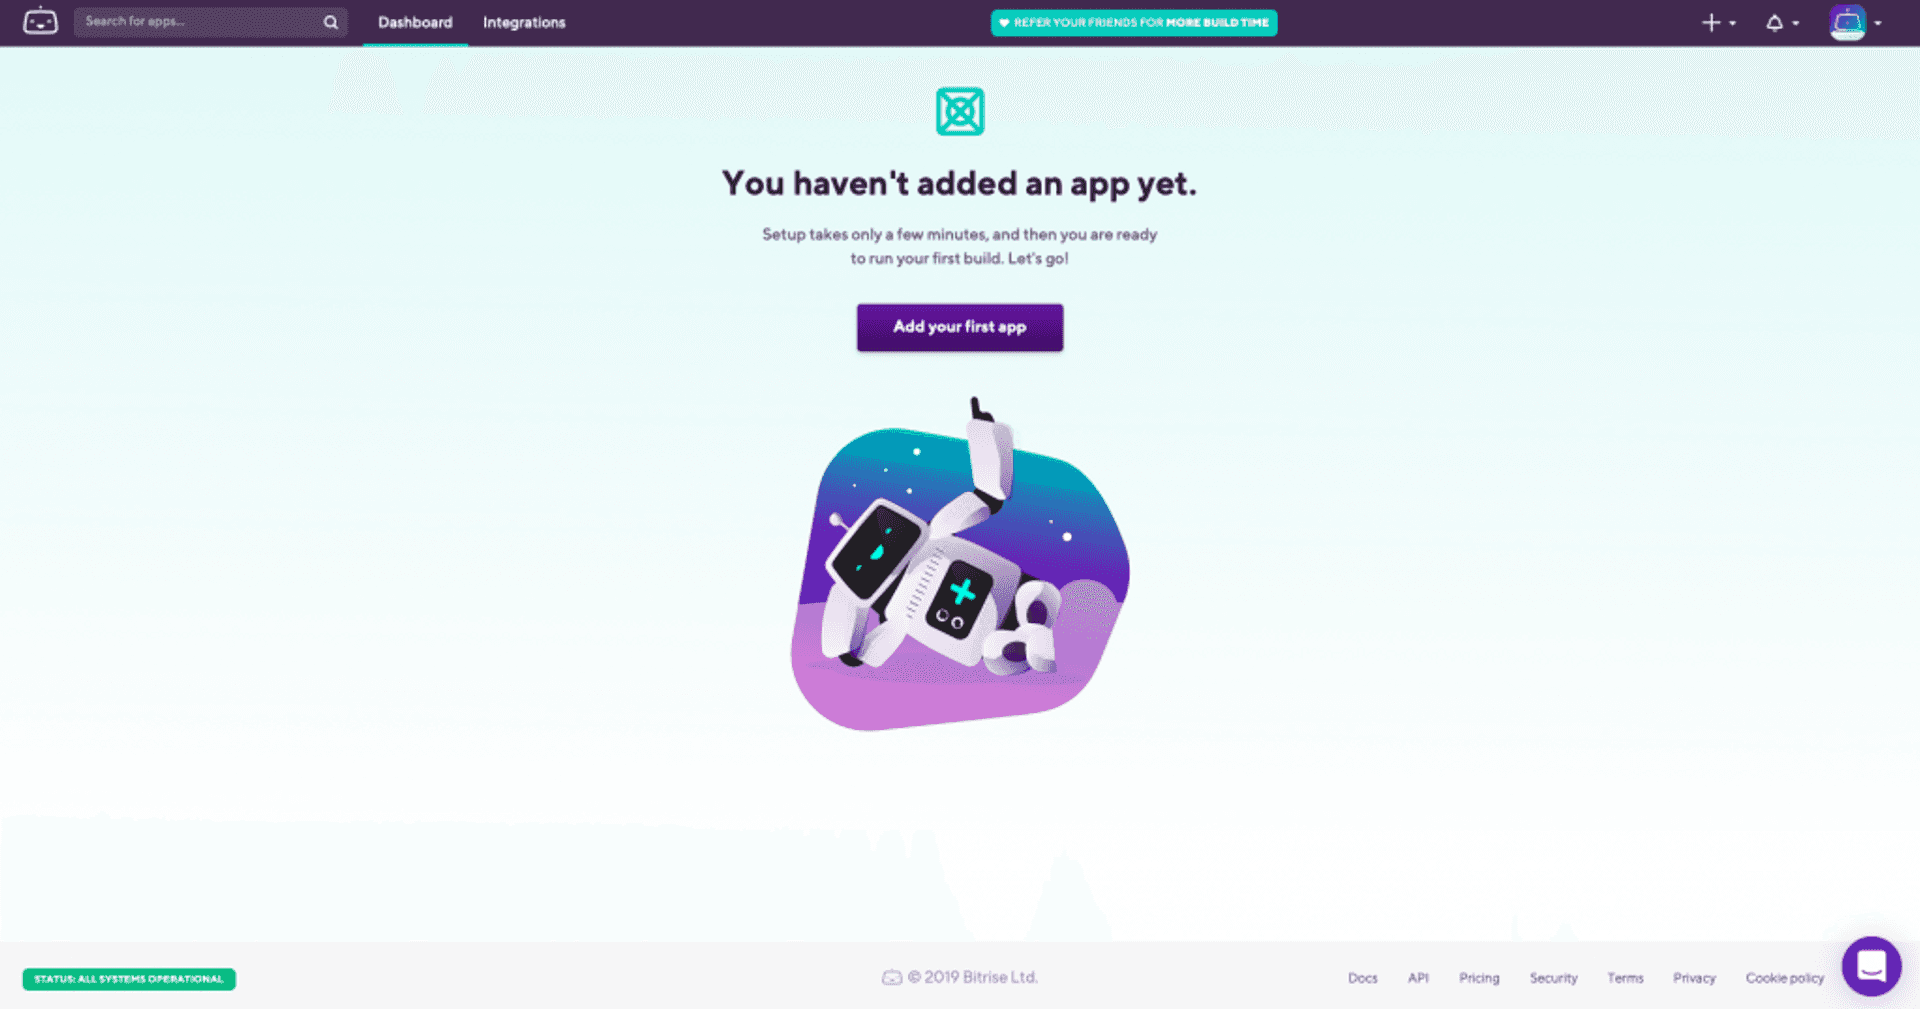
Once registered, a screen will appear indicating that we have not added any application yet and invites us to do so.
Add an application to Bitrise
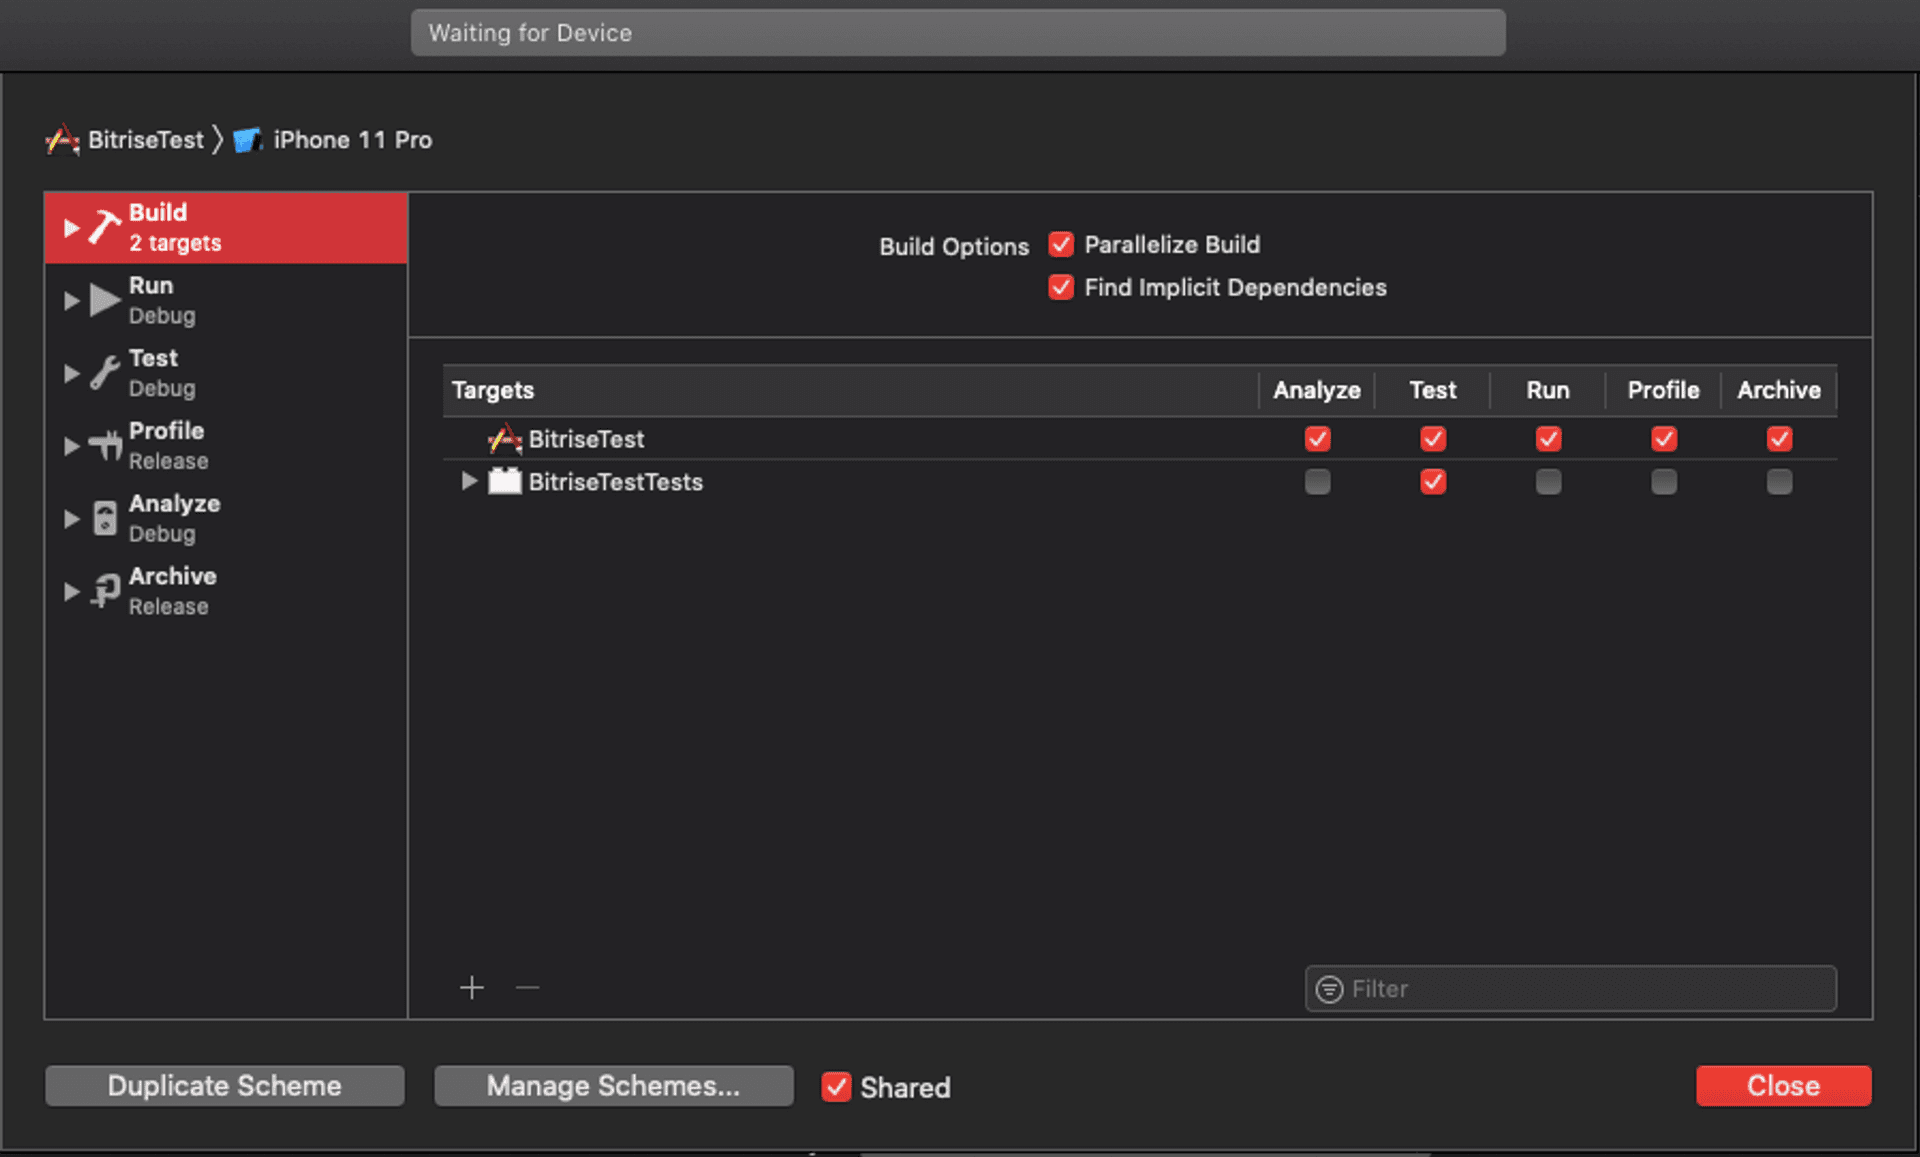
In order to test Bitrise, we first create a project in Xcode (which we will call BitriseTest) and upload it to a repository (in this case, GitHub). It is important to edit the schema and activate the ‘Shared‘ option, which will avoid validation problems later when adding the application to Bitrise. In addition, when creating the project we will select the unit tests box, which will allow us to test the workflow with Bitrise when any test fails.
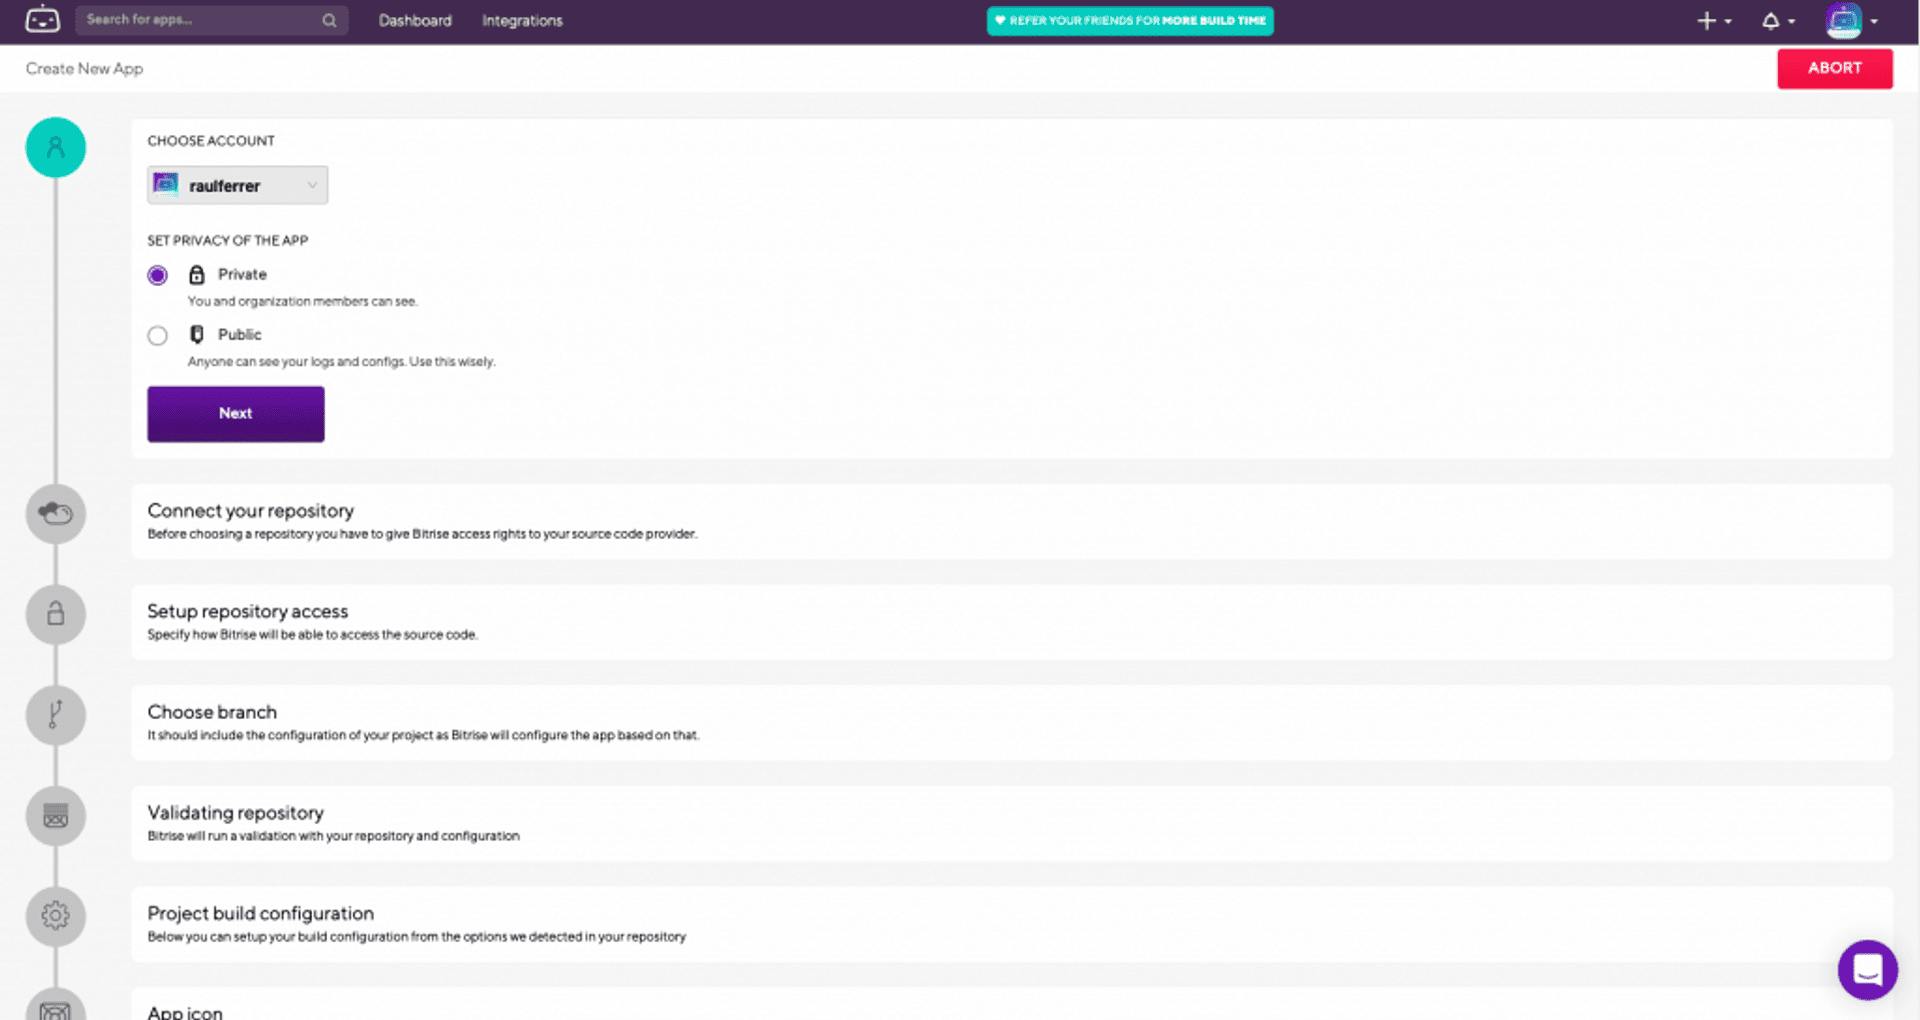
When we select to add an application, we are shown a series of steps that must be performed to add and configure the workflow.
Privacy. First, select the type of privacy for the application process (public or private). In this case we select private.
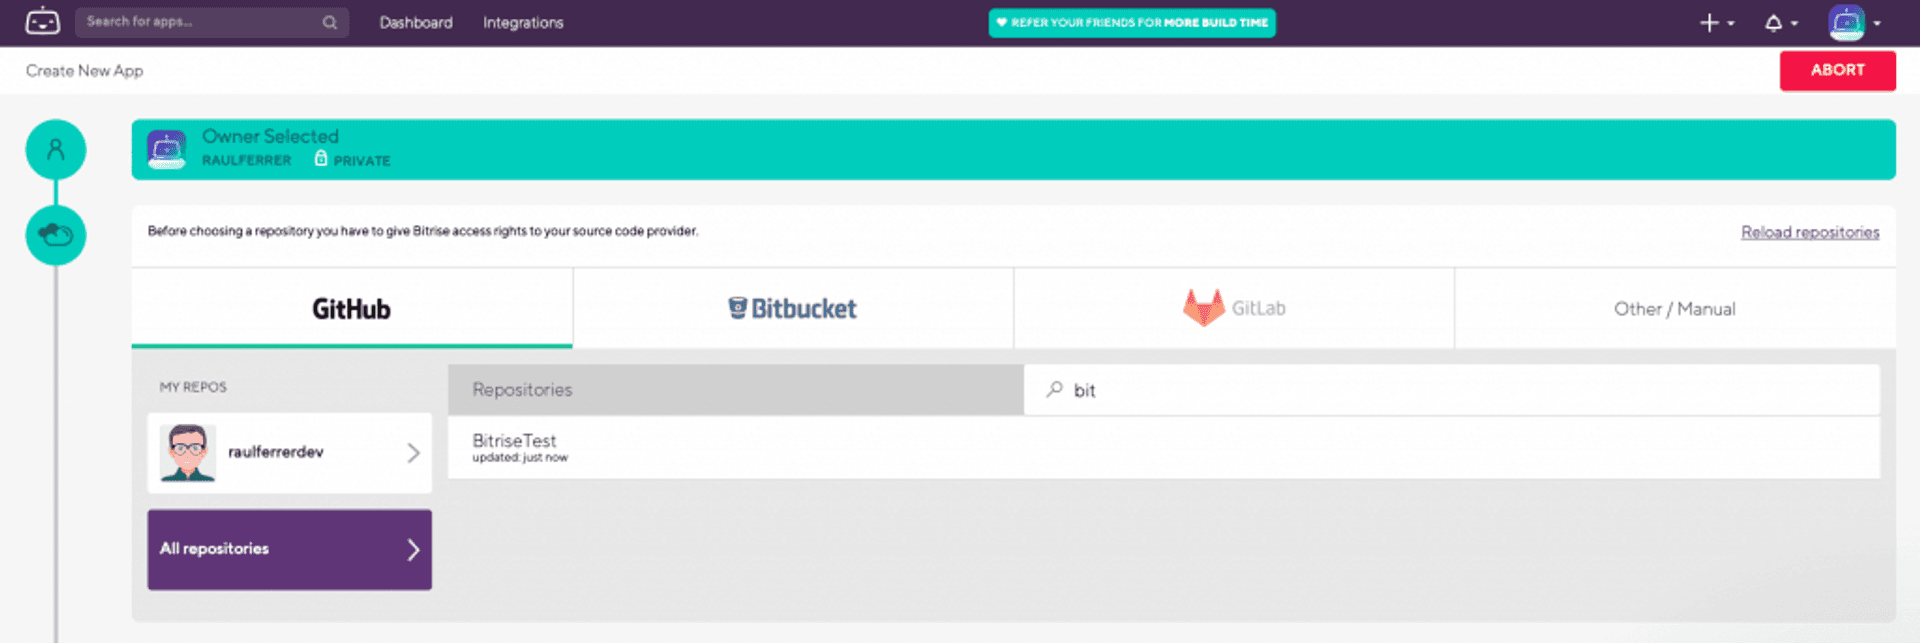
Repository. The next step is to select the repository that contains the application. As we have the account linked with GitHub, all our repositories appear (if we have many projects in the repository, we can do a search):
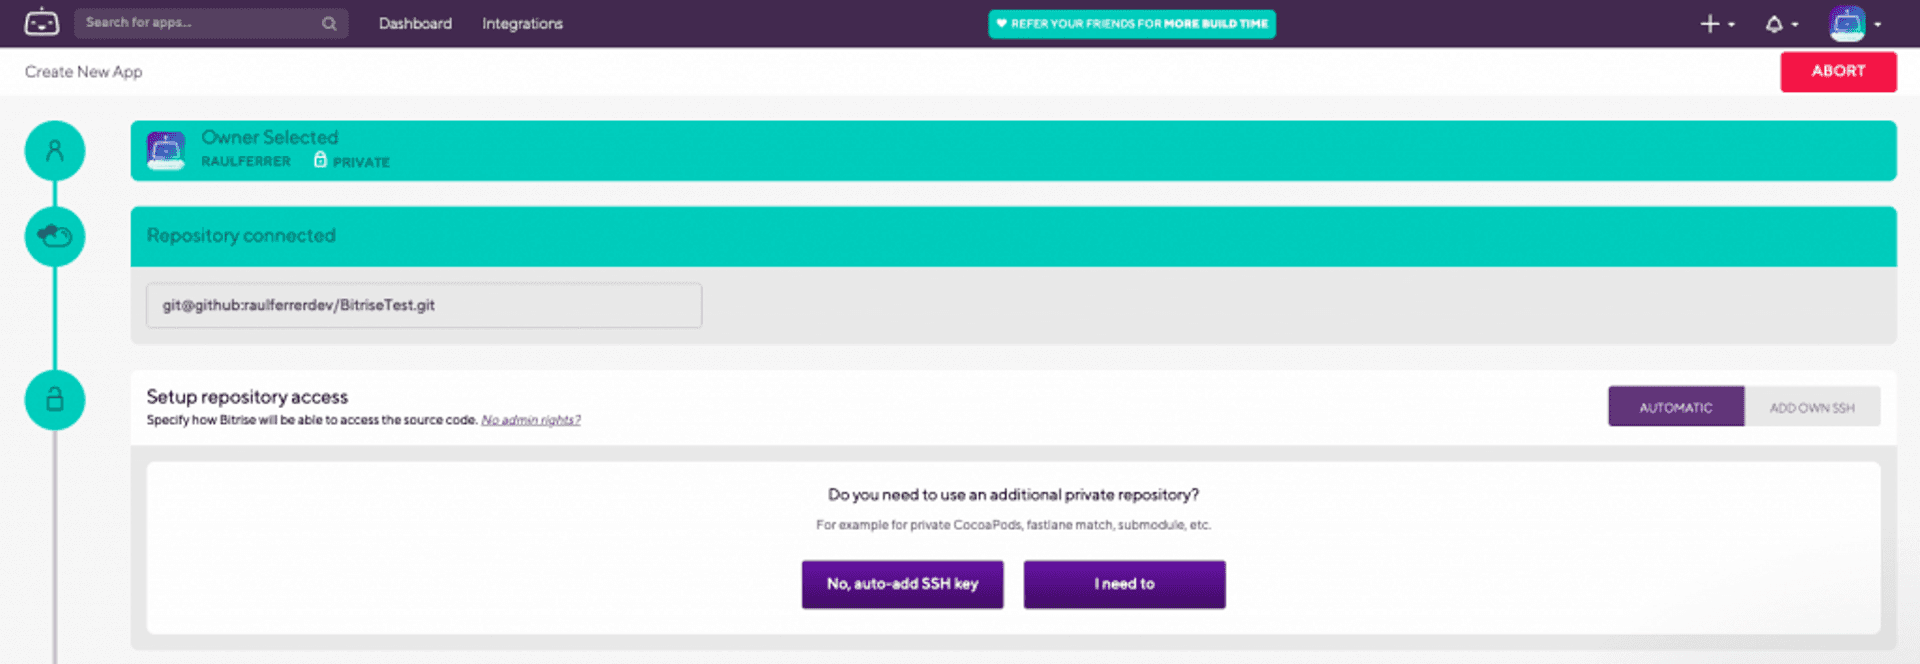
Repository access settings. When it asks if we want to add an additional repository (Cocoapods, submodules, etc.), we will select ‘No, auto-add SSH key‘, since it is a simple project. Otherwise, we must copy the SSH key supplied by Bitrise and add it on Github, in the SSH and GPG Keys section.
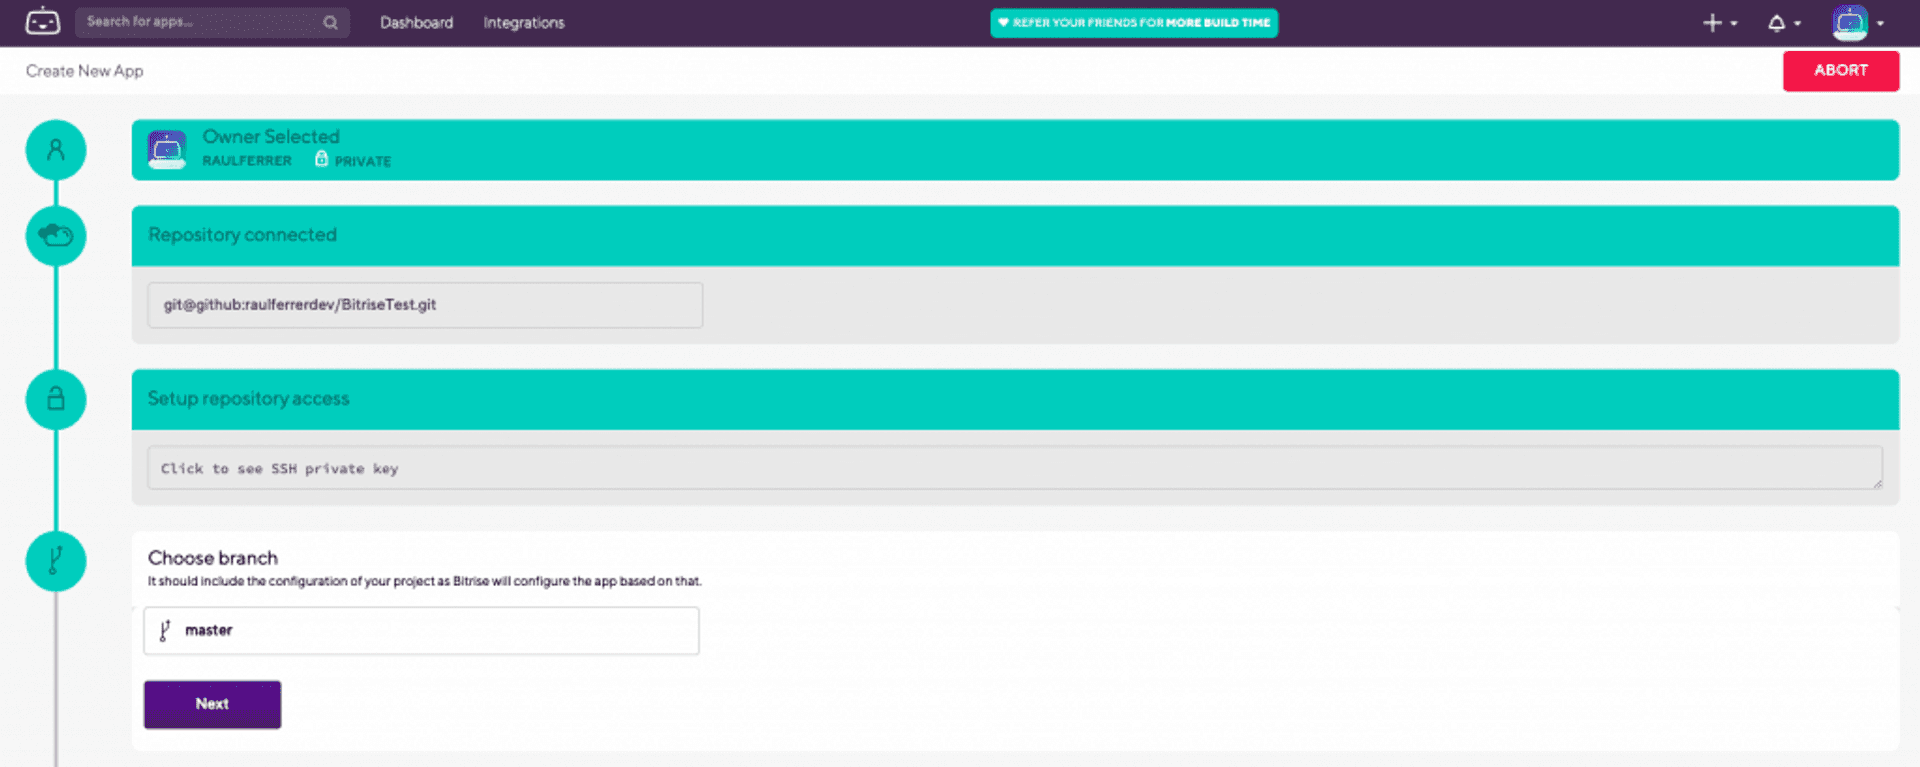
Repository branch selection. The next step is to indicate the branch of the repository that contains the project configuration (in this case, master).
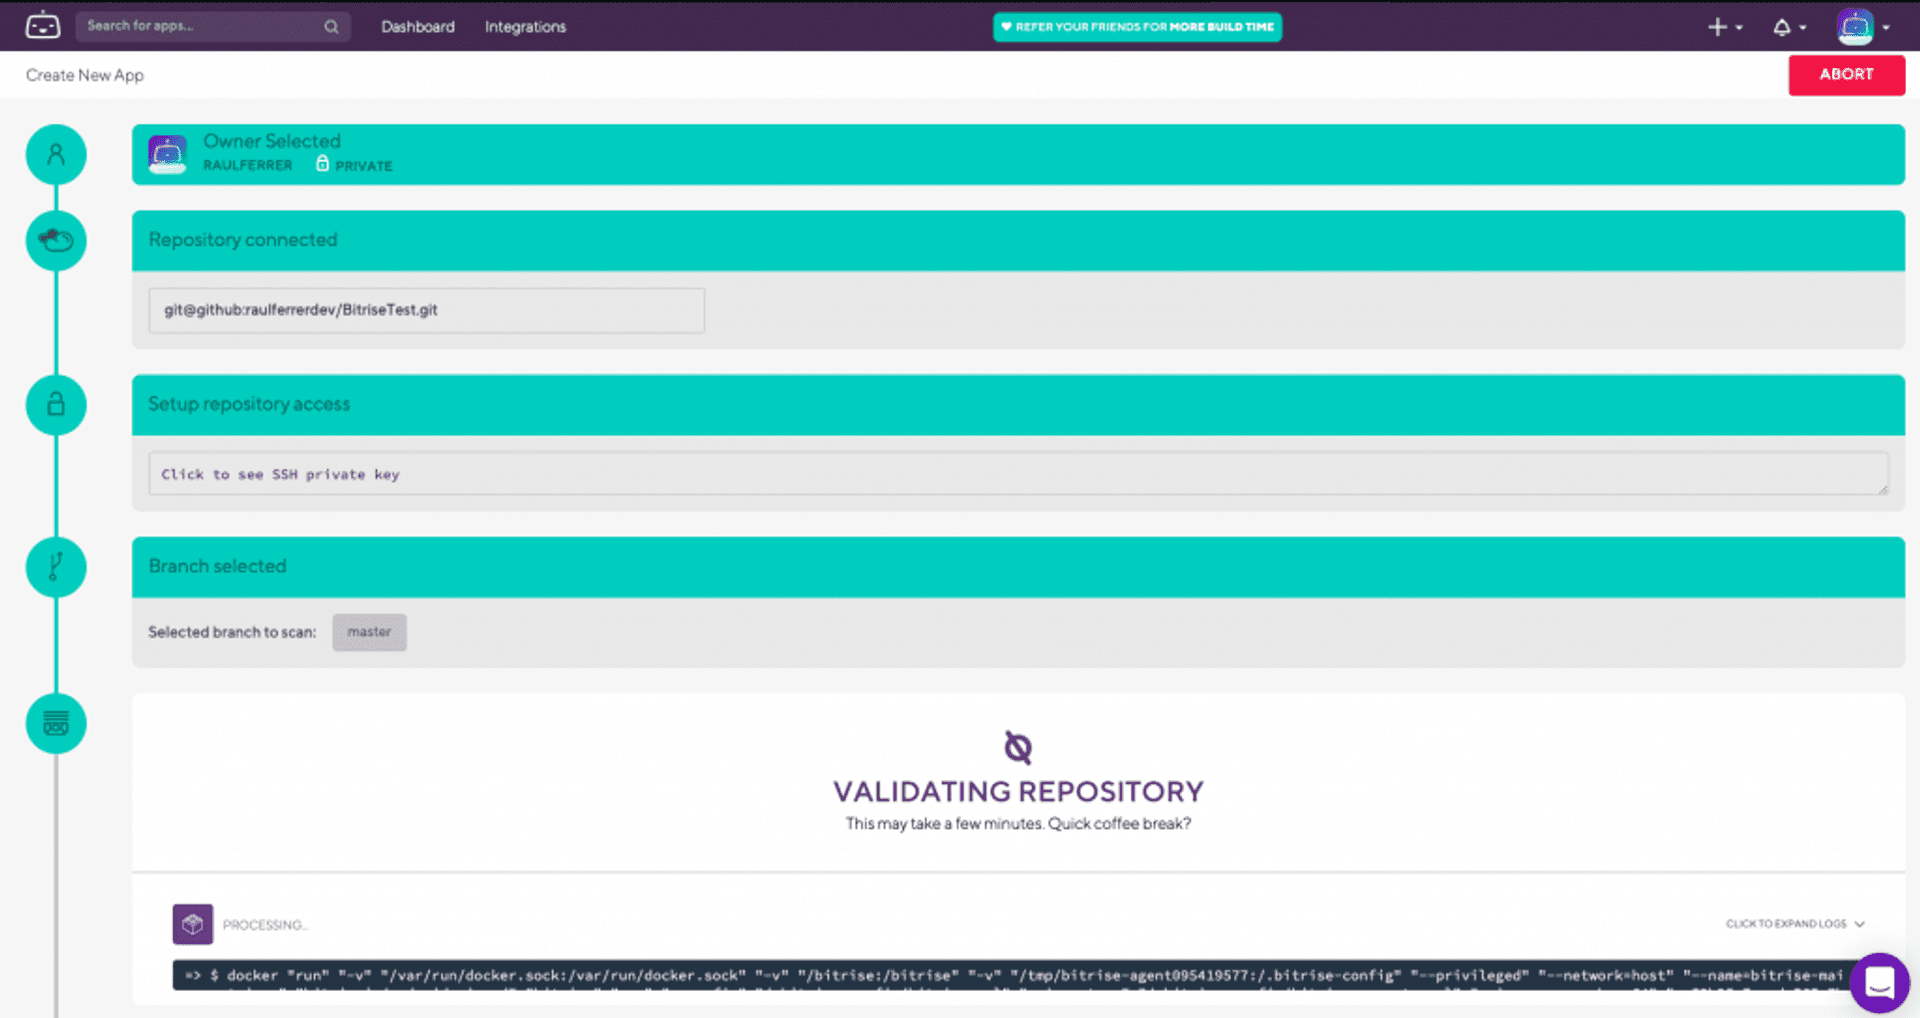
Validation. Once the repository branch is added, Bitrise performs a validation process (the validation will fail if we have not activated the Shared option in the Xcode project). During this process Bitrise searches for its configuration files and configures the application based on these (in the case of an iOS application, it looks for the .xcodeproj or .xcworkspace files.
Build configuration. Once the project is validated, we select the construction configuration of the project. In this case the project is BitriseTest.xcodeproj, the name of the schema is BitriseTest, as an export method for the .ipa we use development and as a construction system, Xcode 11.4.x in macOS 15.4 (Catalina). It is recommended to select an environment that is the same as the one we used to develop the application.
Adding an icon. In this step we can add an icon to the application in Bitrise.
Webhook configuration. Finally, we can add a webhook. Webhooks are user-defined processes (callbacks) that are triggered by some event, such as sending code to a repository. In this case we will use the option ‘Register a Webhook for me!‘.
First compilation. After the entire setup process is complete, Bitrise starts the first build.
As can be seen, the compilation of has produced without errors, since it is a simple project to which no unit tests had been added. Let’s see what happens now if we add a couple of simple unit tests.
Adding unit tests
We are going to carry out a couple of simple tests, which will be based on testing a data model. To do this we create a new file in the project that we will call BitriseModel.swift, and that will contain the following code:
import Foundation

struct BitriseModel {
    var username: String
    var repository: String
    var numberOfProjects: Int
}
In other words, a data model with three parameters: username and repository of type String, and numberOfProjects, of type Int.
First we create an instance of our data model with some data:
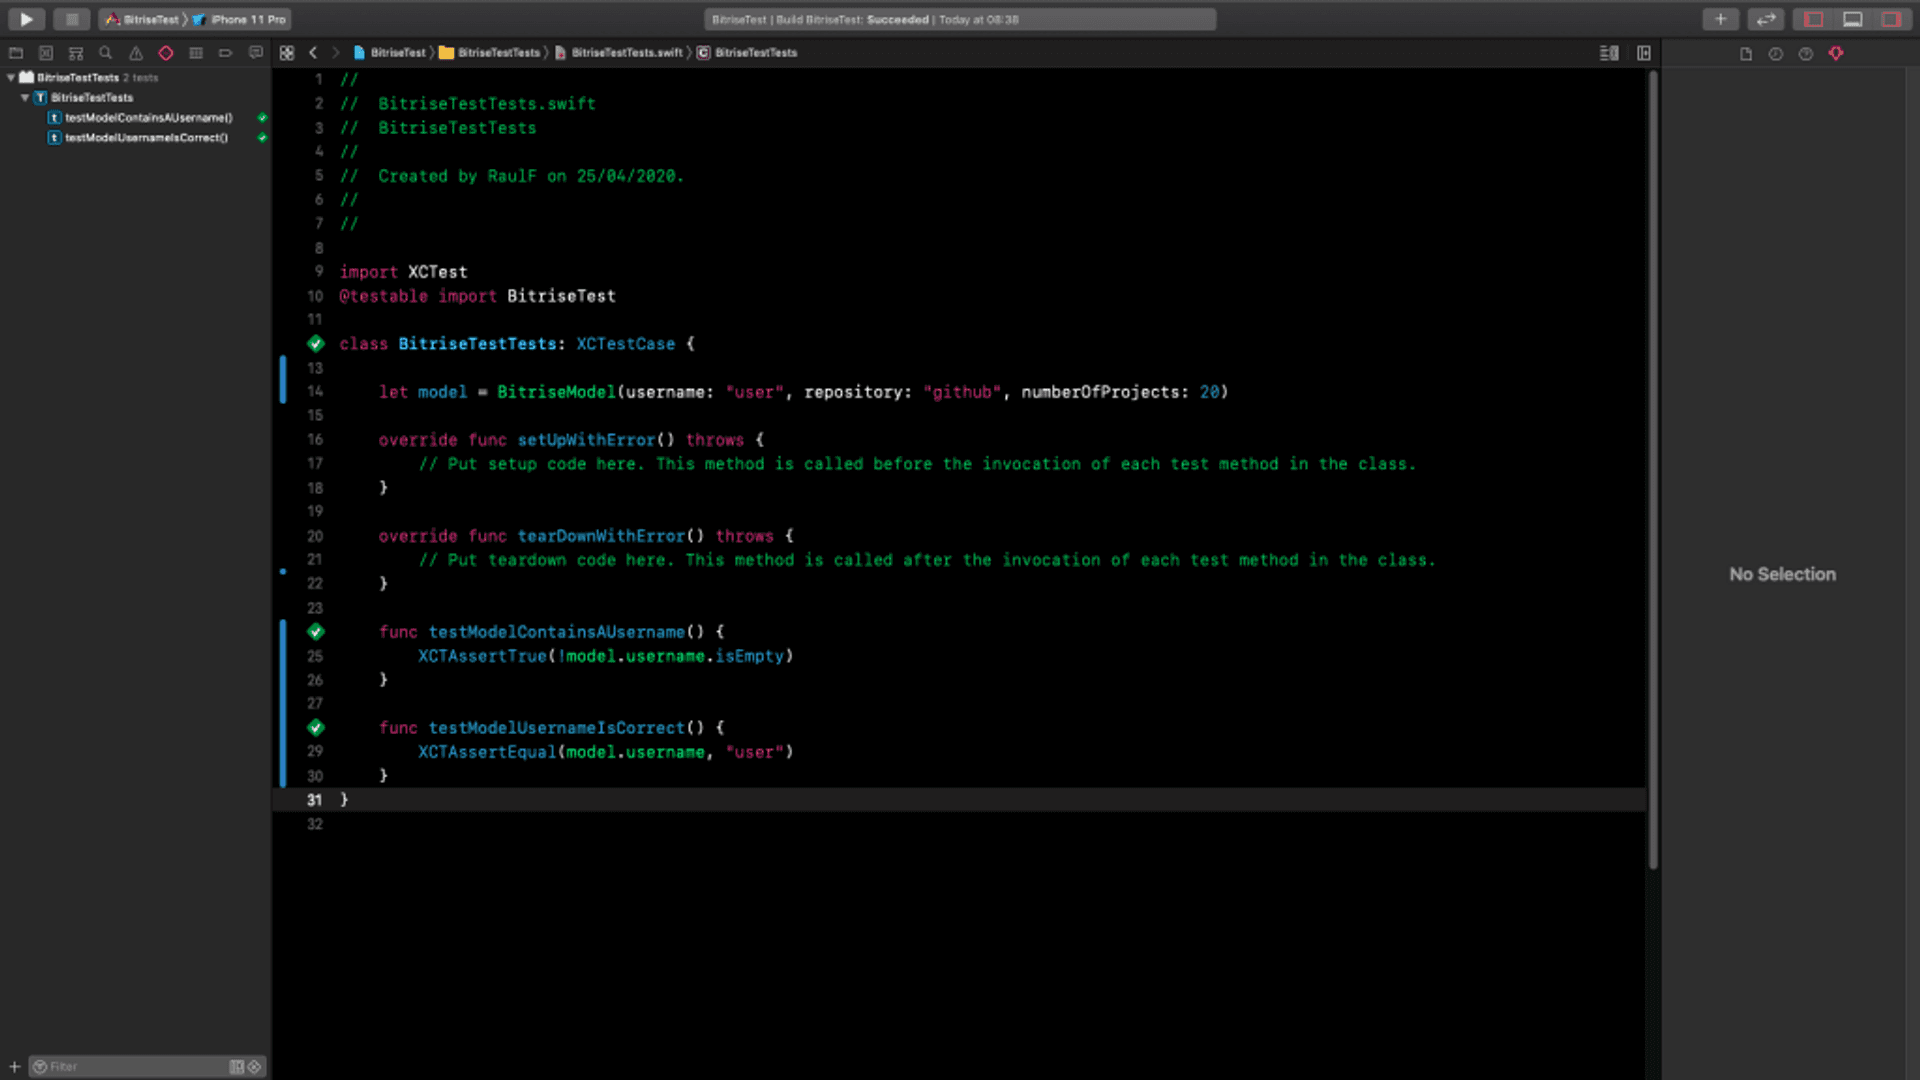
import XCTest
@testable import BitriseTest

class BitriseTestTests: XCTestCase {

    let model = BitriseModel(username: "user", repository: "github", numberOfProjects: 20)

    override func setUpWithError() throws {
        // Put setup code here. This method is called before the invocation of each test method in the class.
    }

    override func tearDownWithError() throws {
        // Put teardown code here. This method is called after the invocation of each test method in the class.
    }
}
Next, we add a couple of simple tests, in which we will verify that the instance of the model we have created contains a username (it is not empty) and that its value is ‘user‘. We do this following the tearDownWithError() function:
func testModelContainsAUsername() {
    XCTAssertTrue(!model.username.isEmpty)
}

func testModelUsernameIsCorrect() {
    XCTAssertEqual(model.username, "user")
}
If we run the unit tests in Xcode (command + U), we see that no error occurs.
Now what we do is upload these changes to the repository. We simply access the project directory in the terminal and write (you can also use any other type of tools that allow the management of repositories):
git add .
git commit -m "Added tests."
git push -u origin master
If, after the last step, we access the Bitrise console, we can see how a compilation process is running.
When it finishes, we see that the compilation of the project has given no errors and that all the tests have been passed.
Failed tests
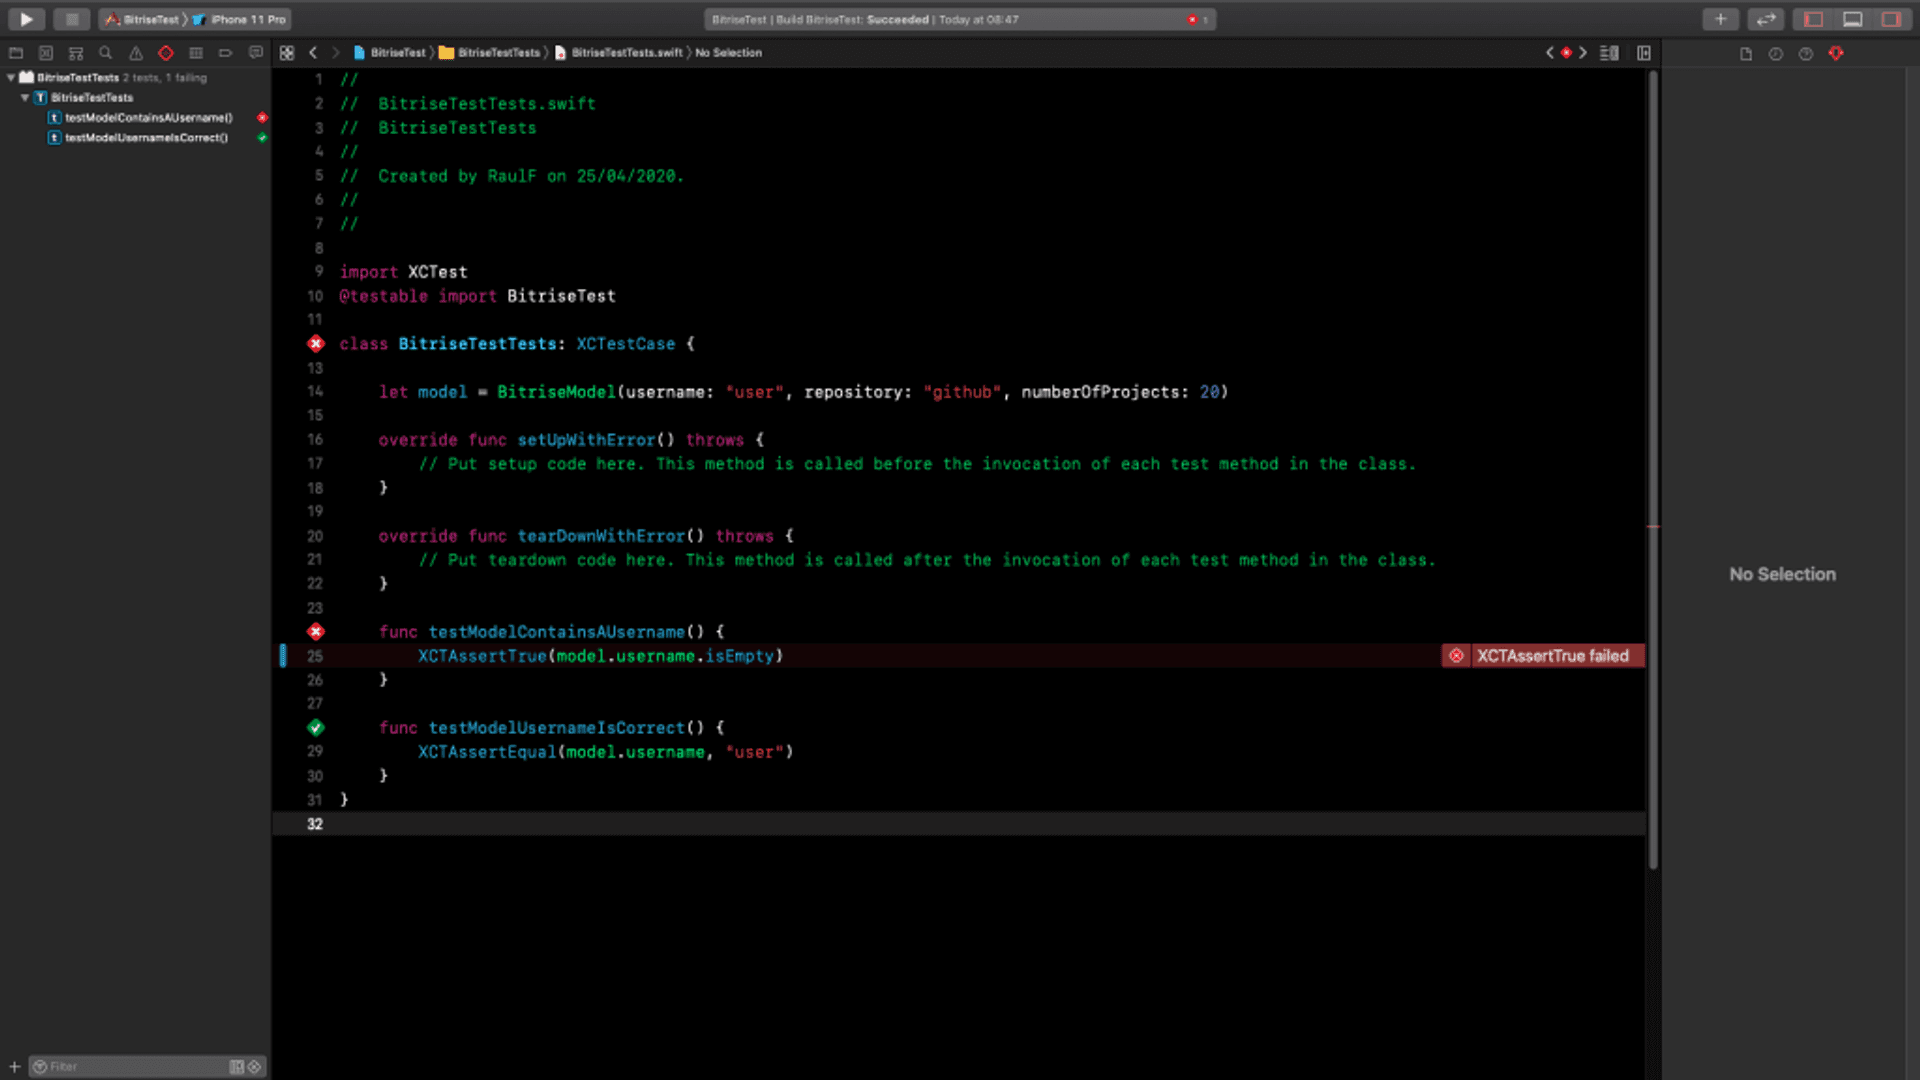
Let’s see what happens now if one of the unit tests gives an error, for this we modify the first of the tests, and instead of checking that the username field is not empty, we will check that it is empty (we remove the ! sign in front of model.username.isEmpty. We run the tests in Xcode and note that indeed that test fails:
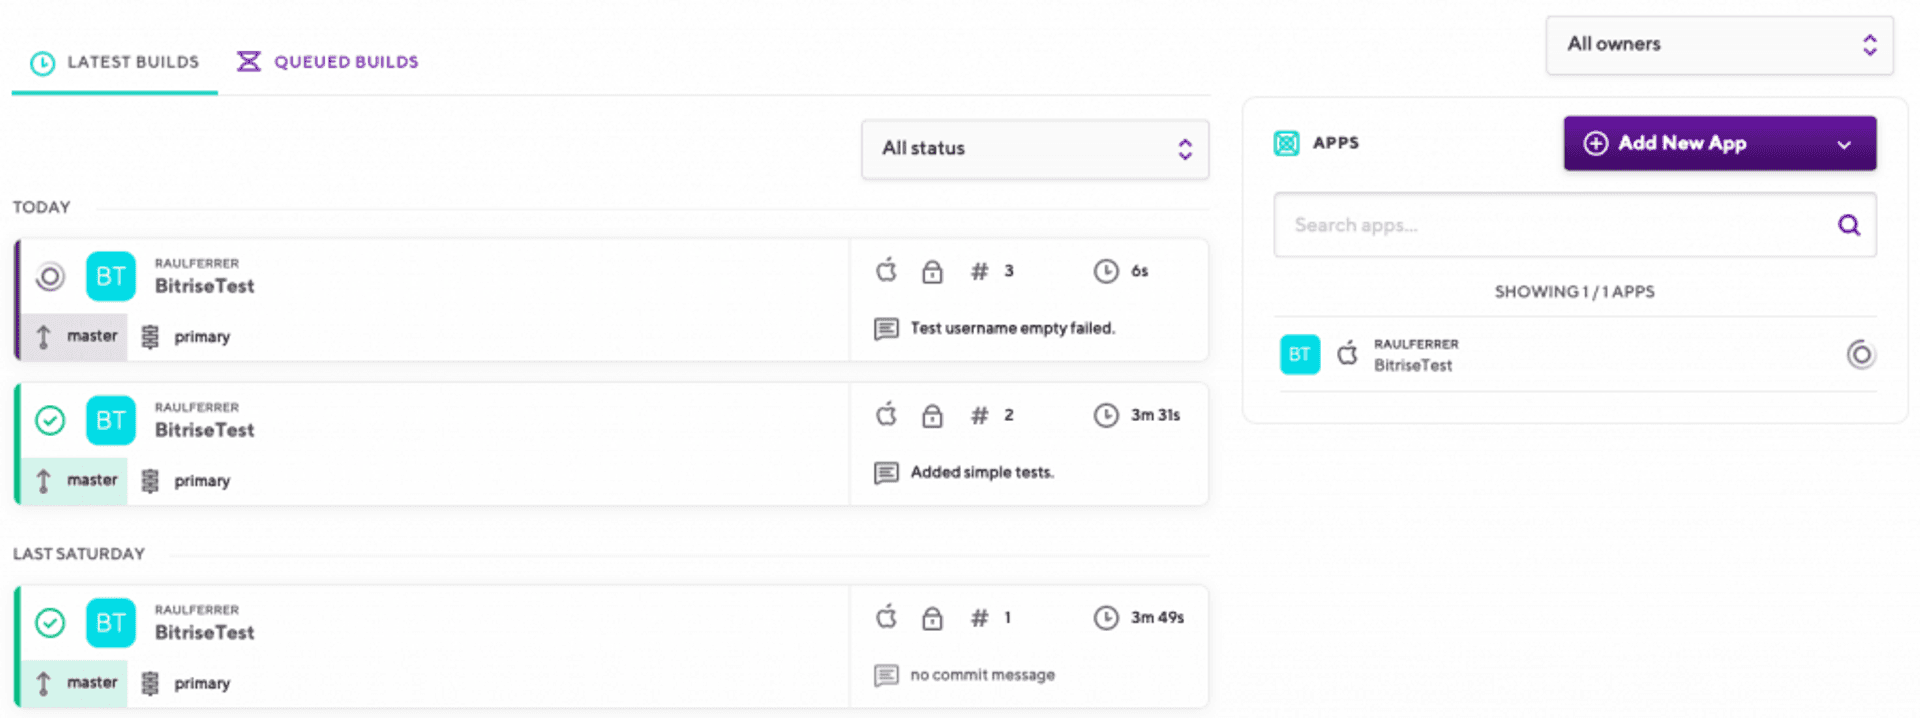
Now, we upload this new code back to the repository, to see how Bitrise behaves. In the Bitrise console we see that the application is being compiled:
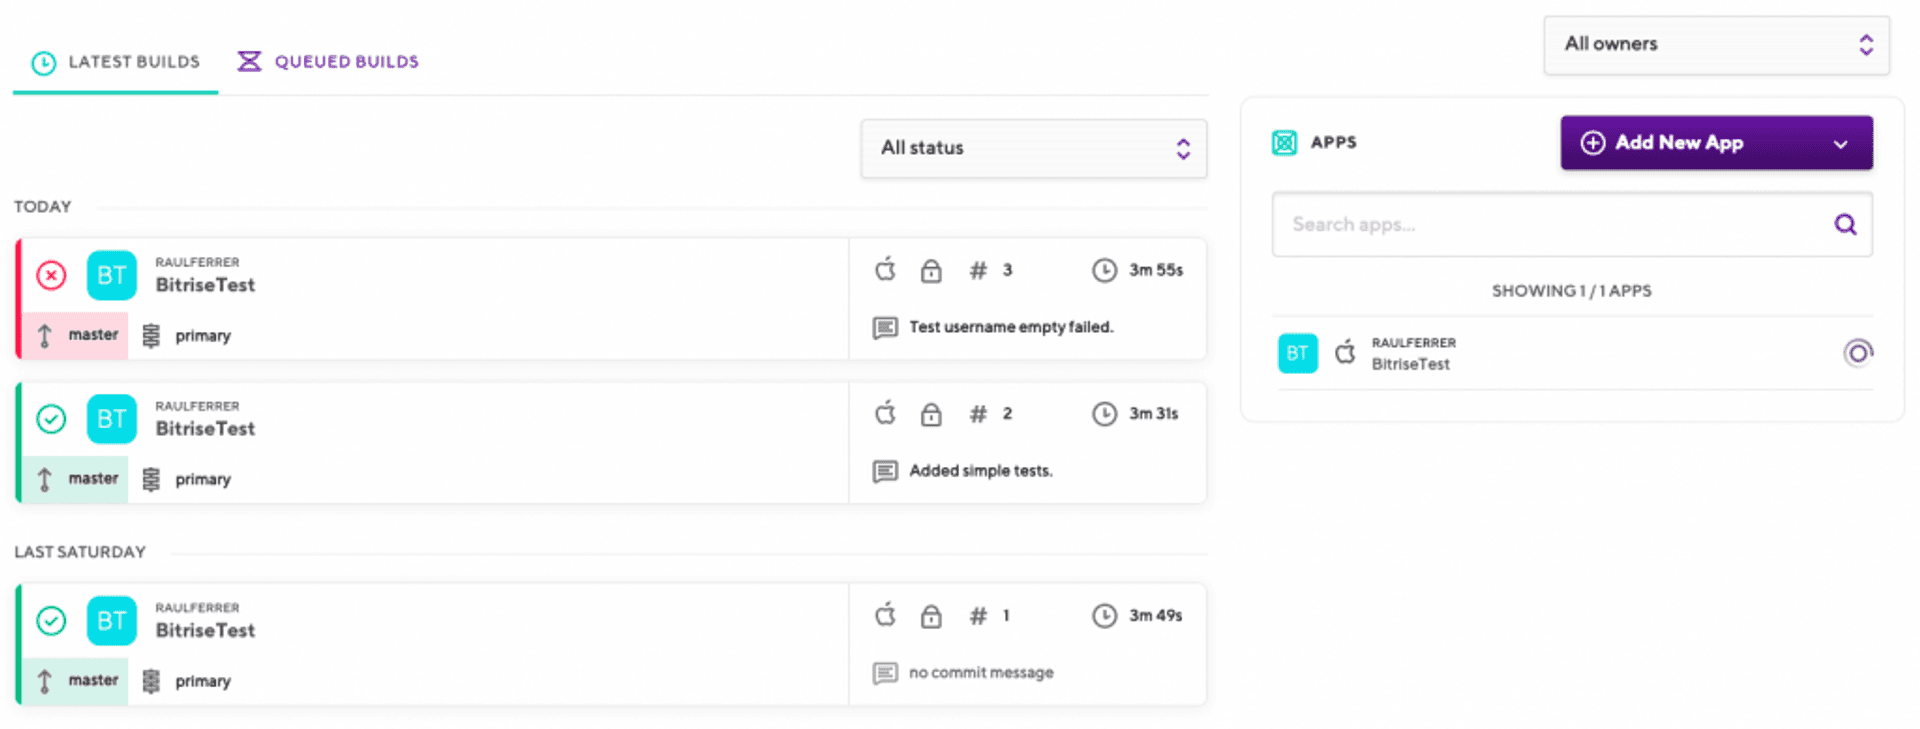
But that in the end an error has occurred (it is red):
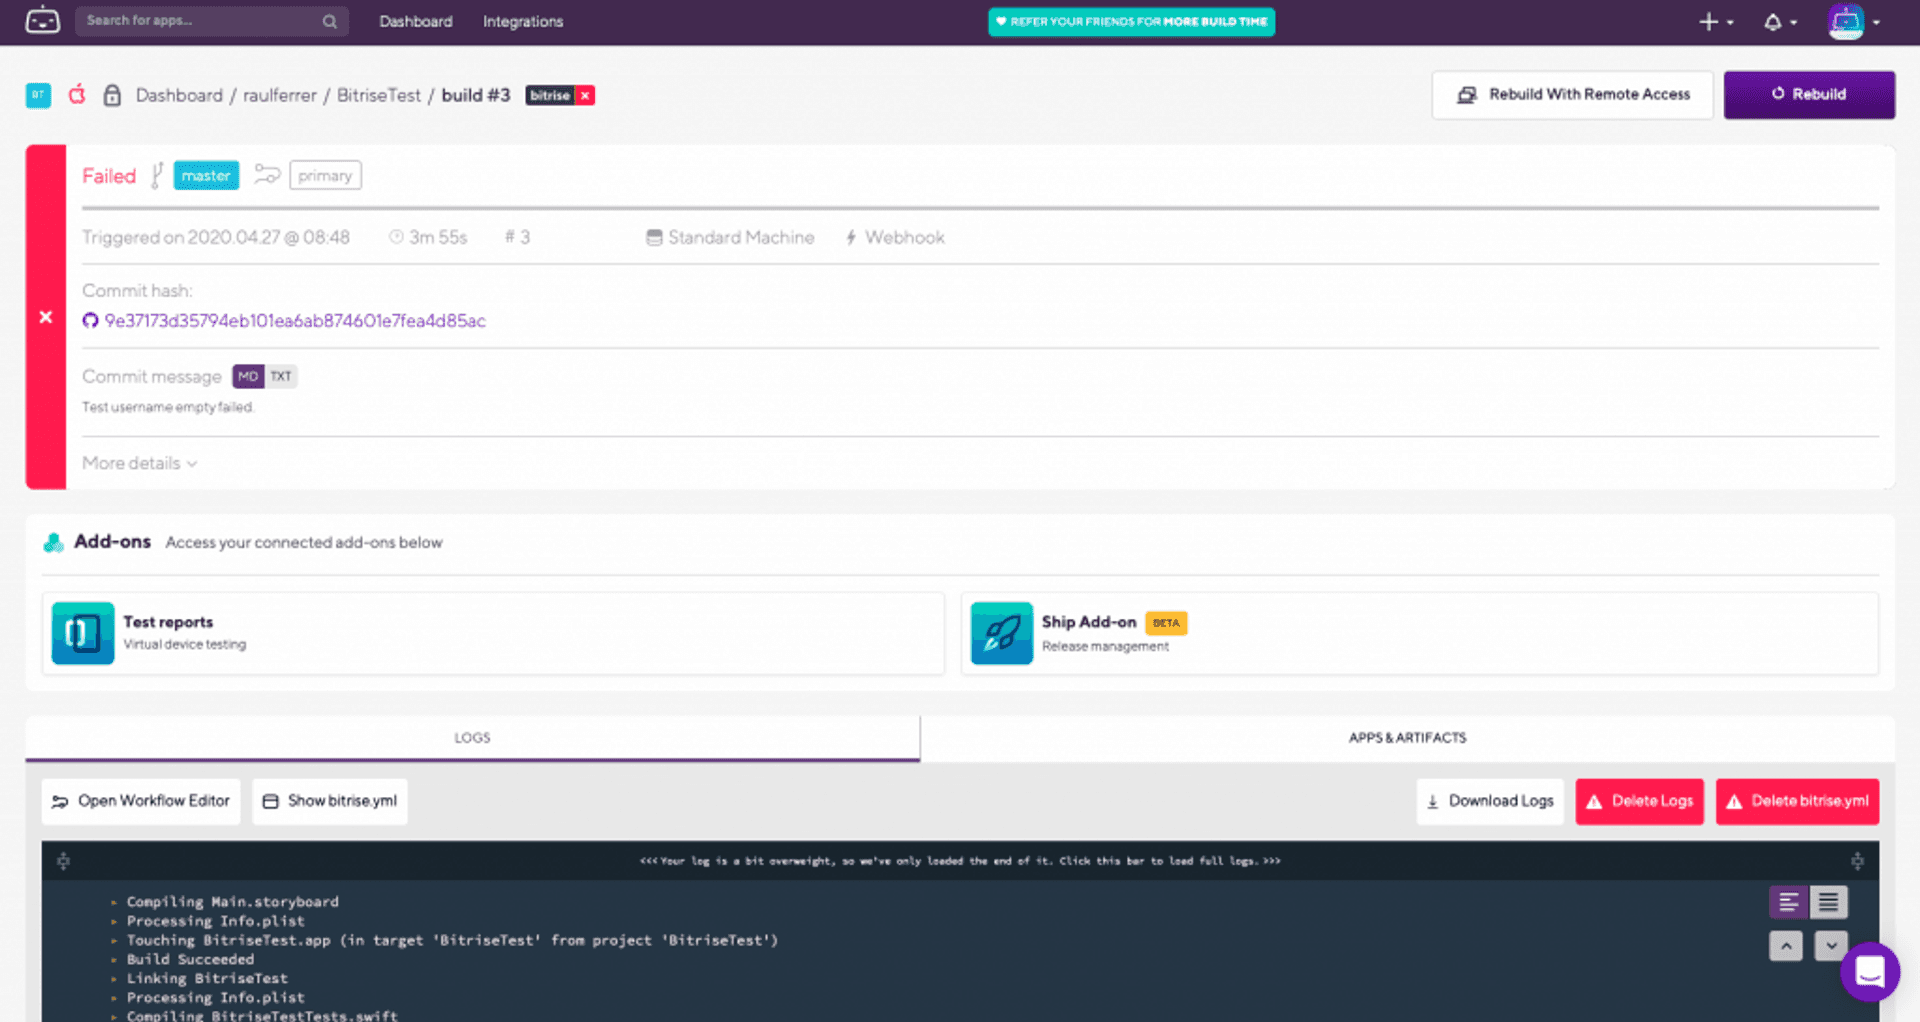
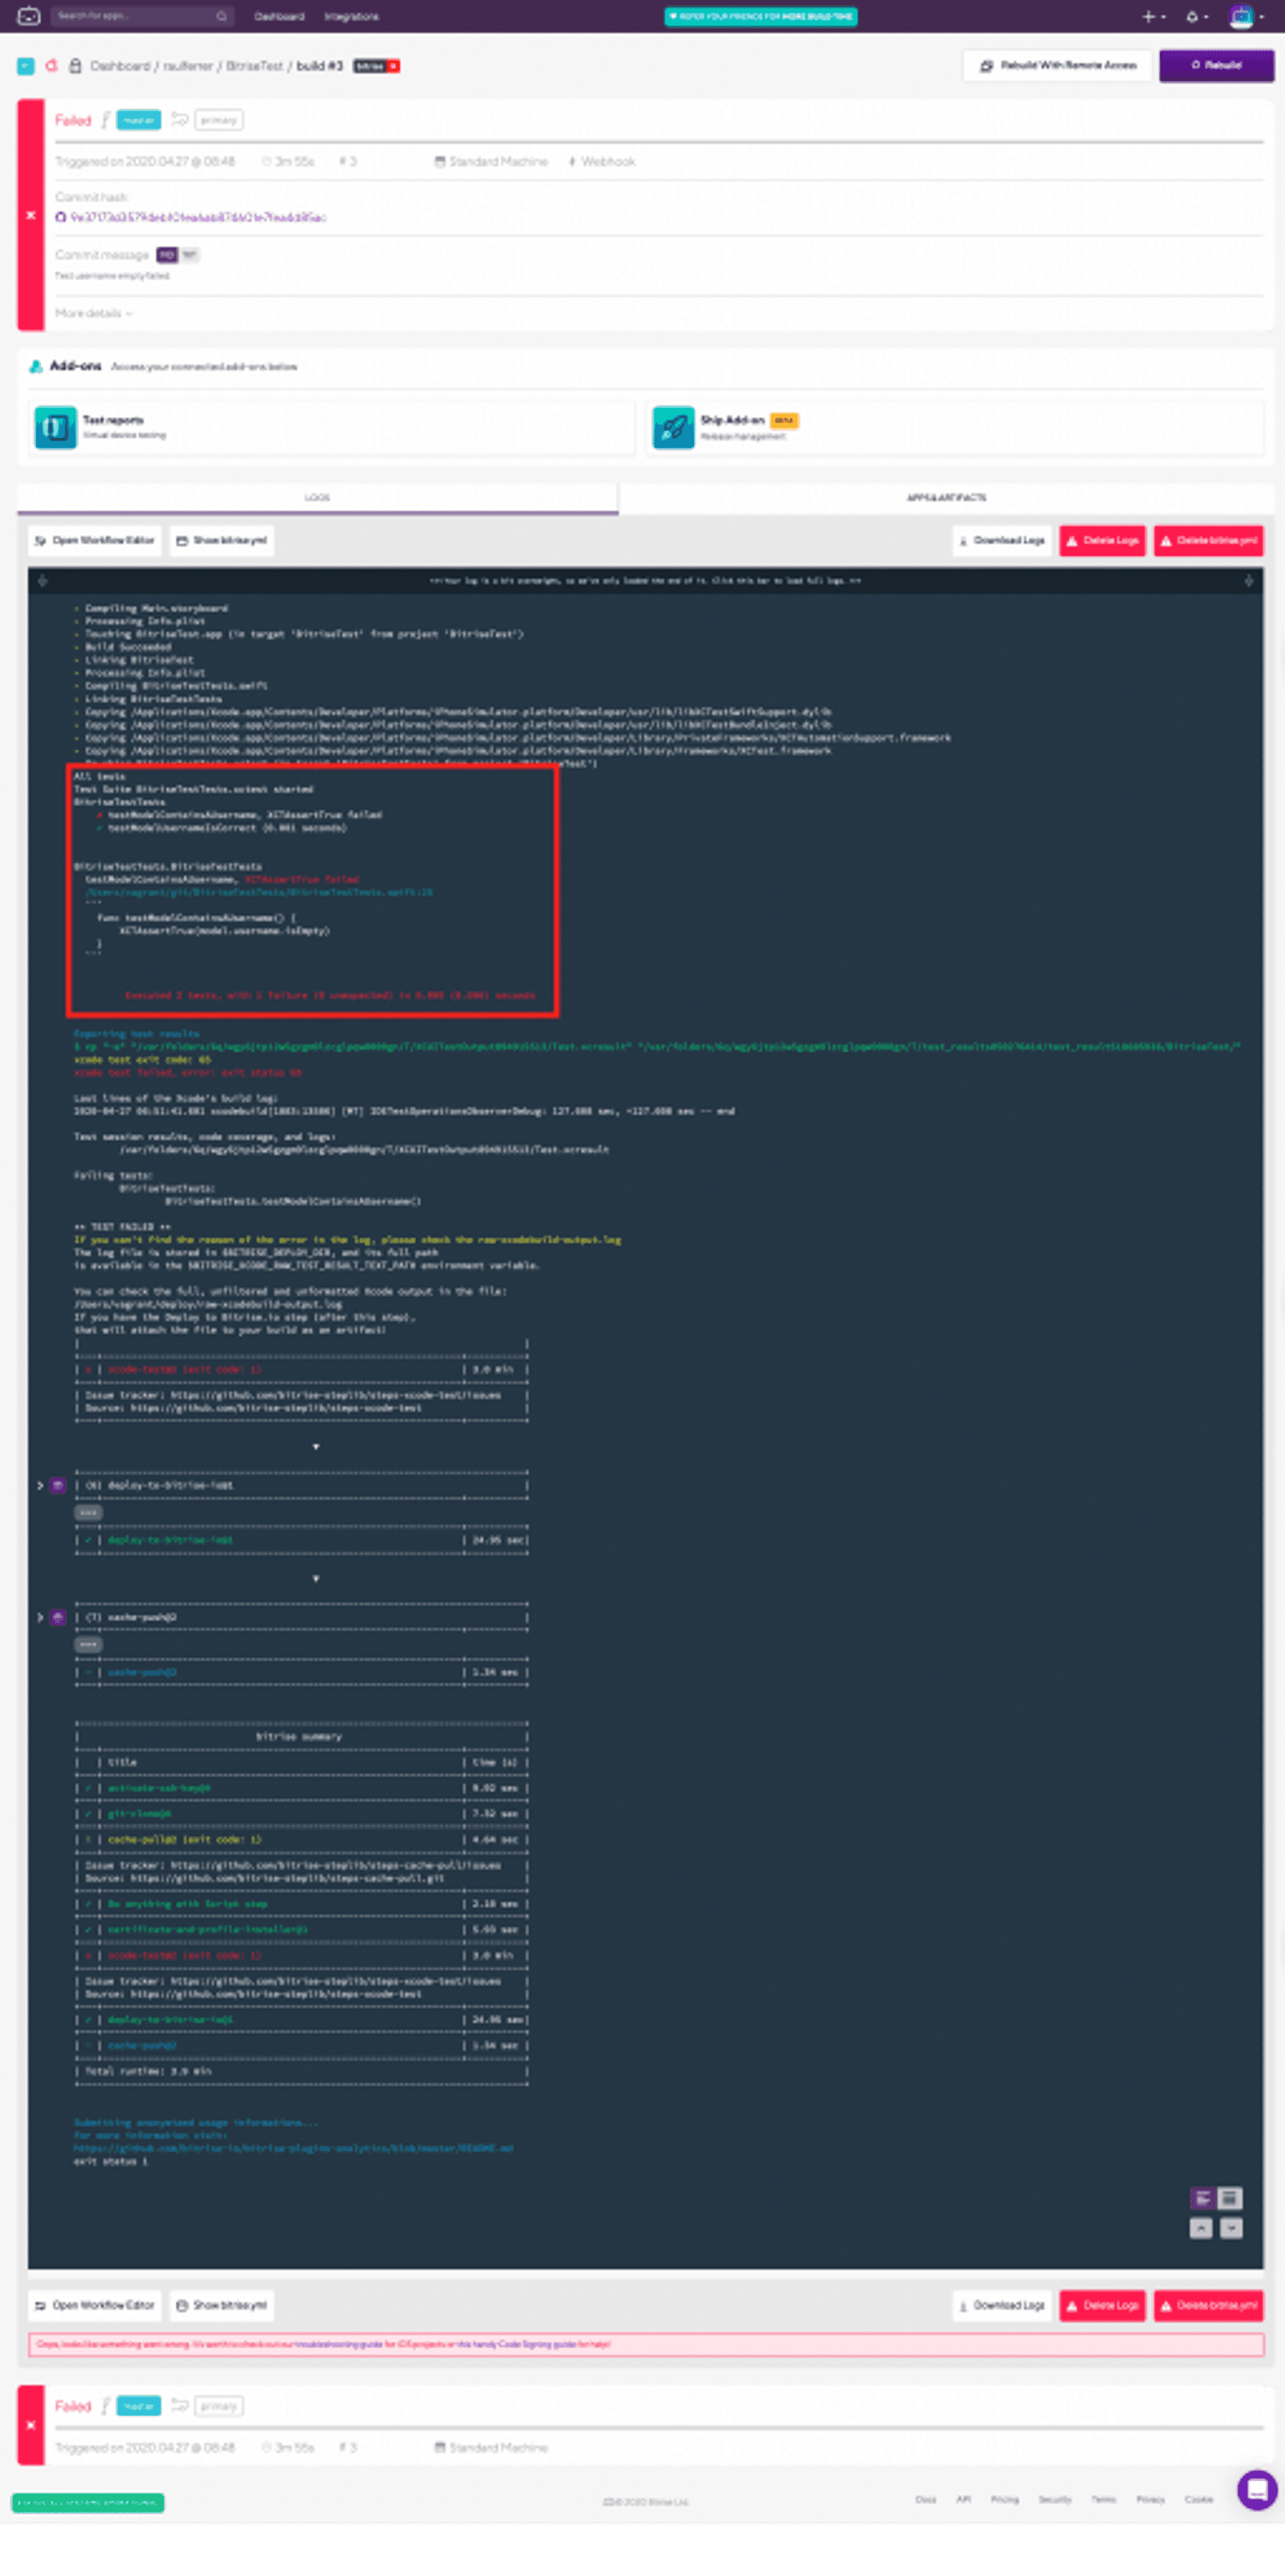
If we now select the compilation, the process log is displayed, where we can see, among many other things, which test has failed:
Workflow review
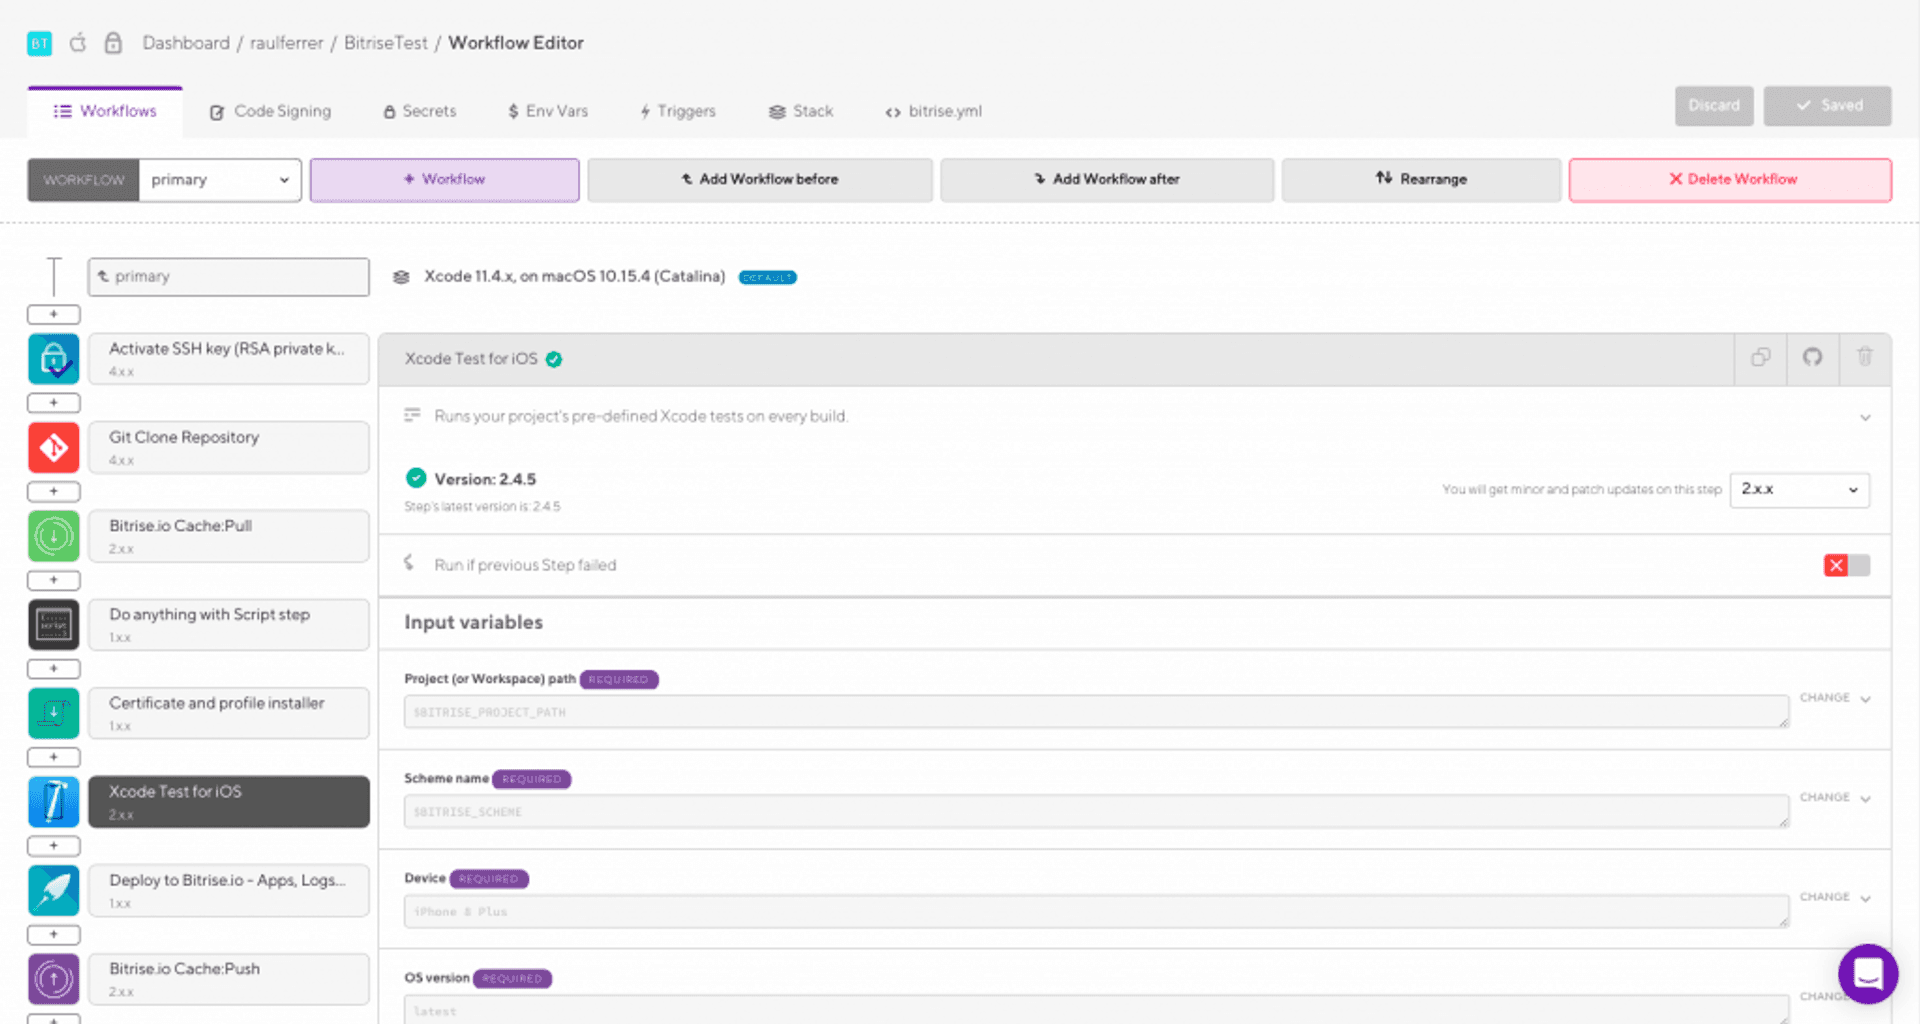
But what has happened during this workflow? To check it, we scroll to the bottom of the page that shows us the log of the process, and select the Open Workflow Editor button, which is on the left.
At this point an interface appears in which we can see numerous options.
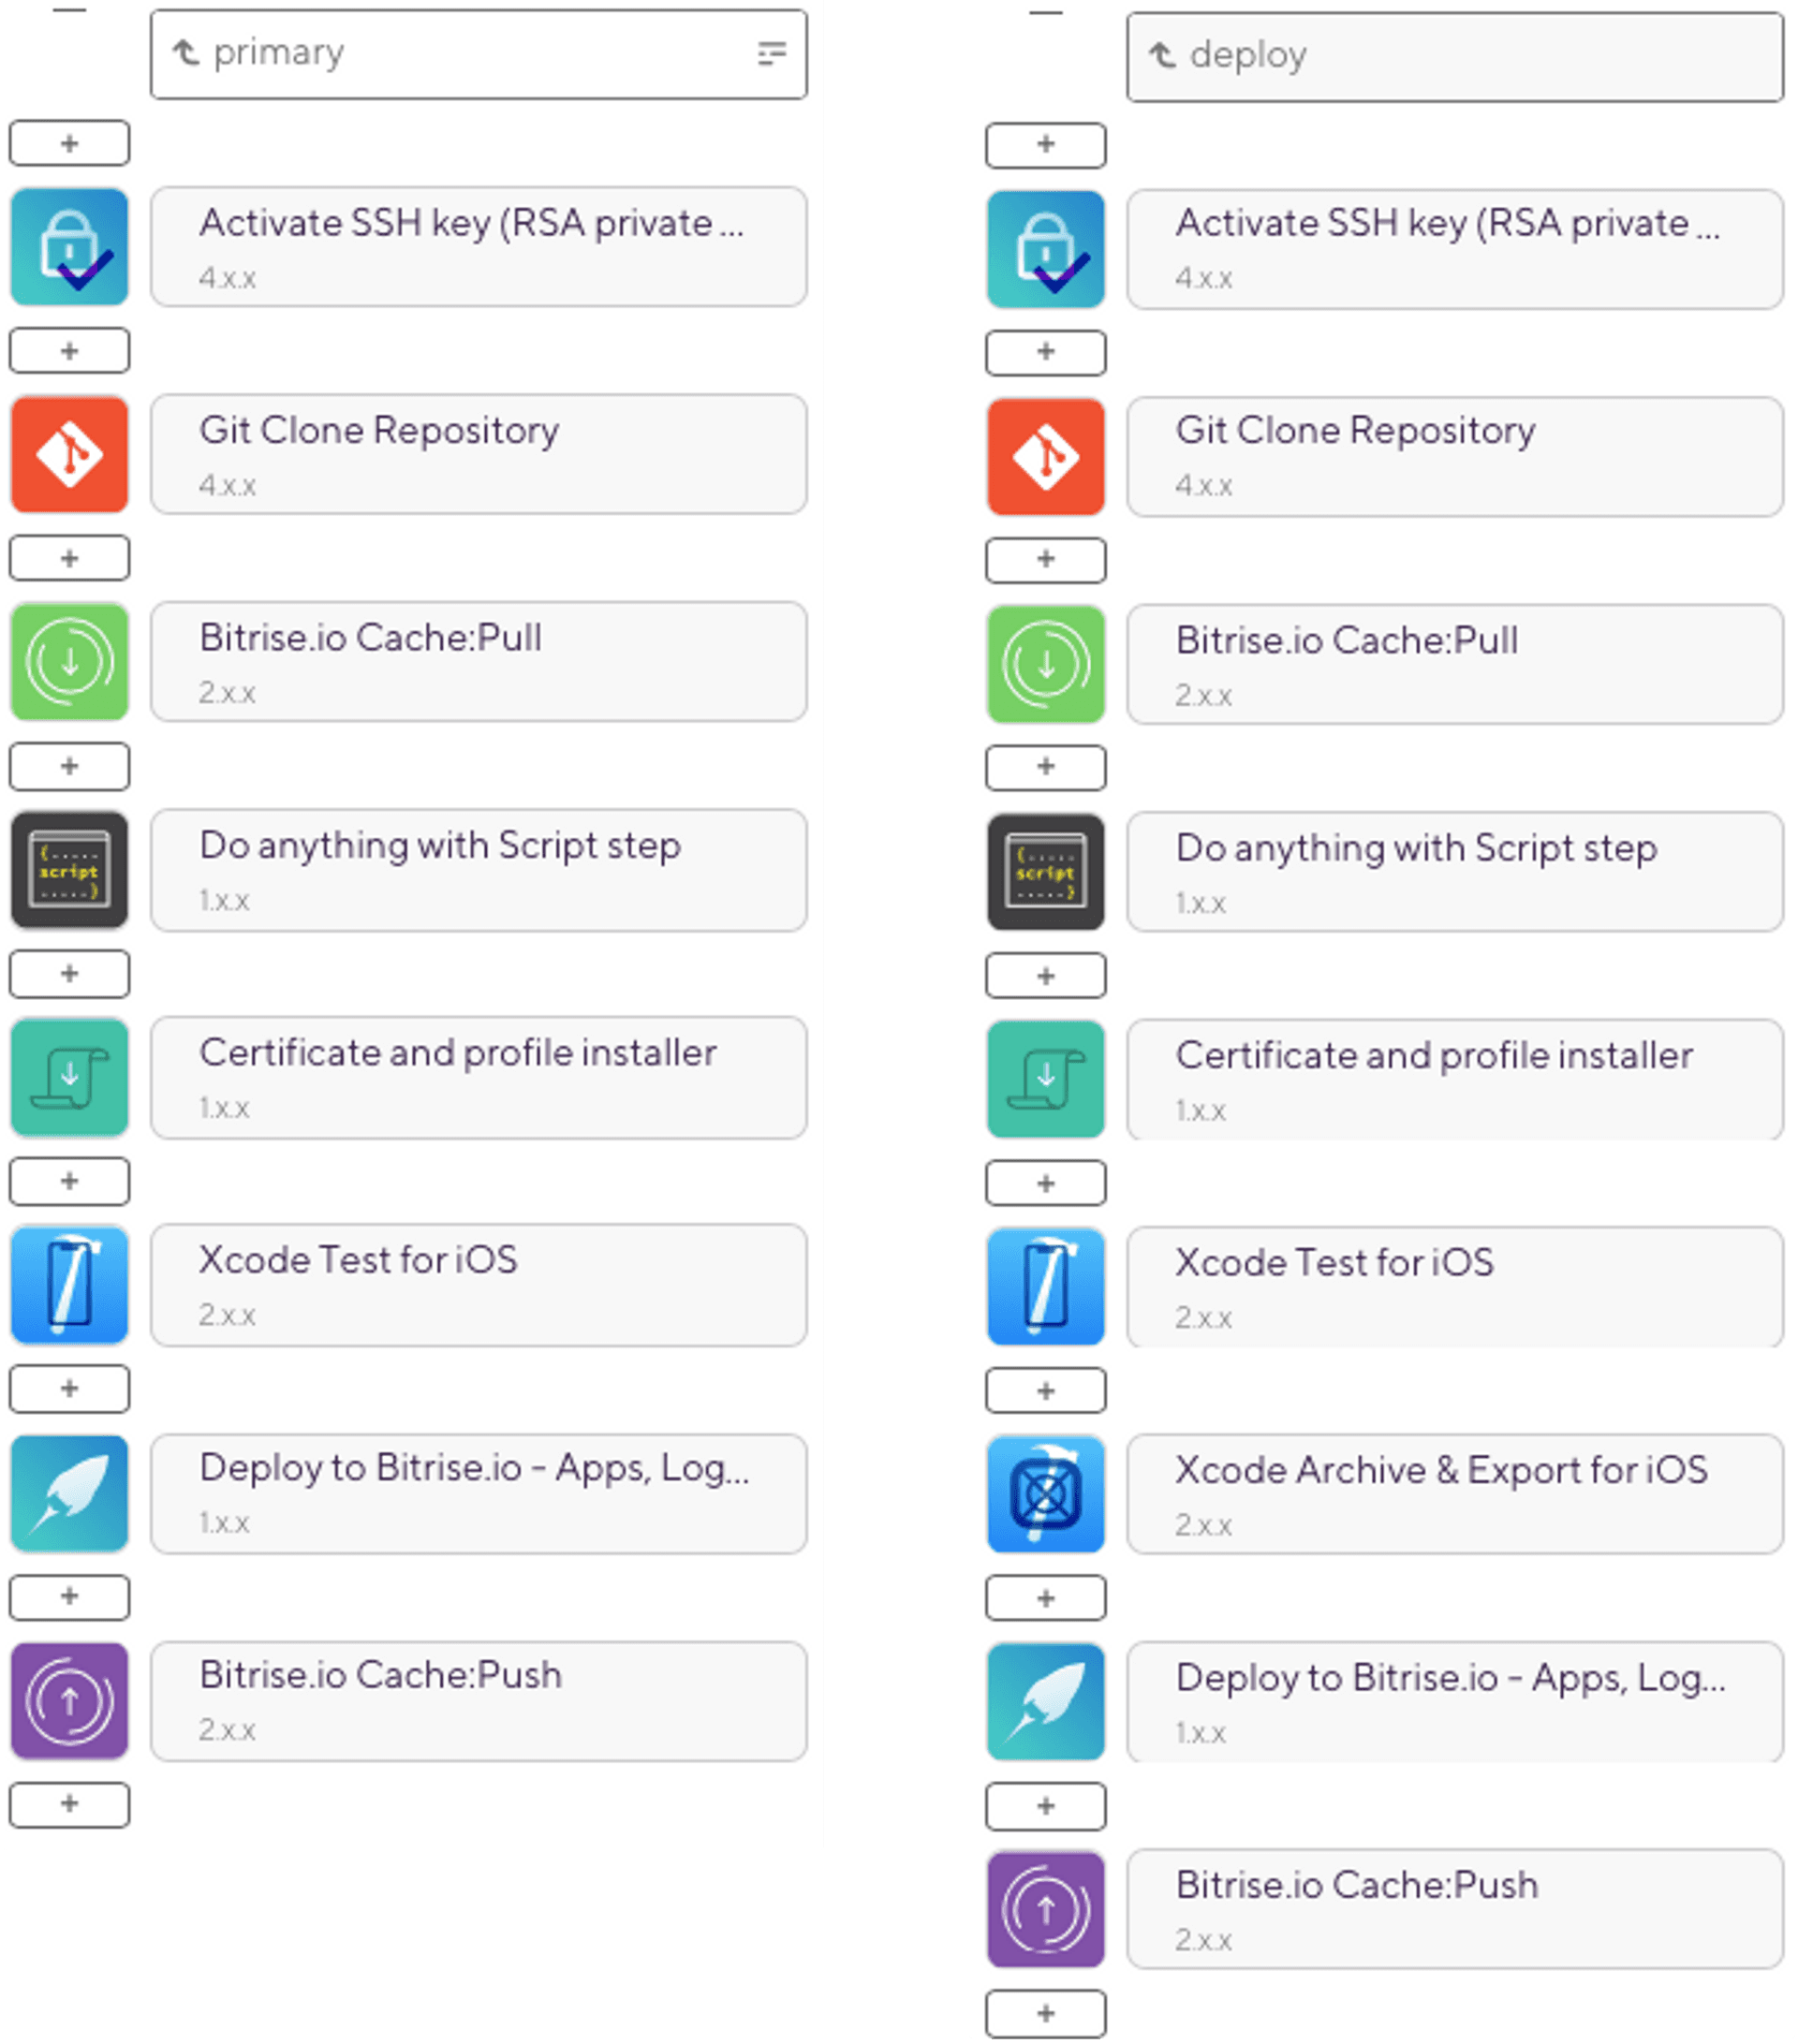
First we look at the left the WORKFLOW option and a small menu that allows us to select between primary and deploy (they are the default workflows):
- primary. This is a default workflow that presents a series of steps that include, for example, cloning the application from the repository, running it, and performing unit or UI tests.
- deploy. This flow is quite similar to the previous one, except that the application deployment process in iTunes Connect (TestFlight or App Store) is added, in this case.
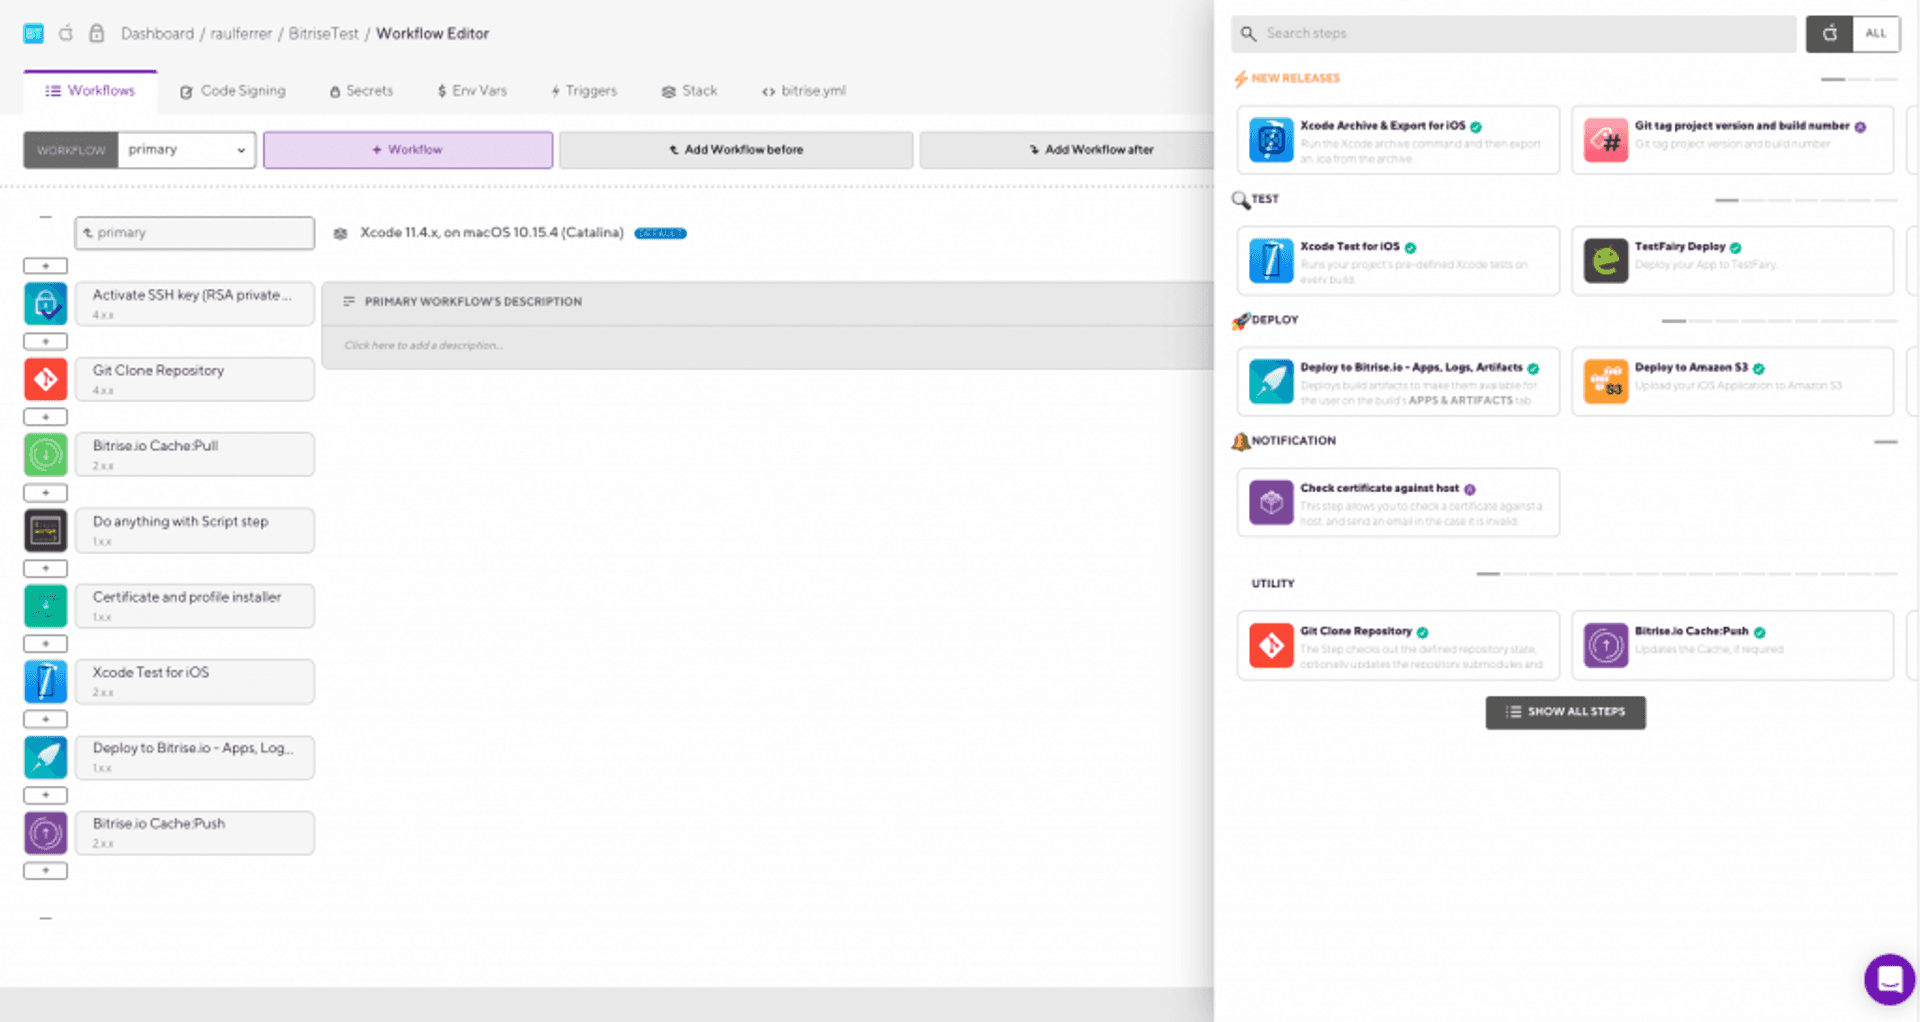
We can modify any of these processes simply by selecting the buttons with the ‘+’ sign that appears between each of the steps in the workflow. This causes a window to be displayed on the right, with numerous modification possibilities:
On this page, in addition to modifying existing workflows, we can create new ones.
Deploying applications with Bitrise
We have just seen that, by default, there are two types of workflow: the primary one (which is the one that has been used to test the unit tests) and the deployment one. Let’s focus on the latter and see how we can automatically deploy an app on iTunes Connect.
If we look at the deploy workflow, we can see a step called ‘Certificate and profile installer‘. As the Bitrise documentation indicates, this step does not require us to configure it, you only have to upload a .p12 certificate and, in the event that this certificate has a password, create an environment variable (Secret Env Var) with the password.
But what if, as in most of my projects, we use automatic code signing (Autommatically manage signing). So we have to replace this step of the workflow with the step called iOS Auto Provision:
Once added, the Distribution type section we indicate, from the drop-down menu that appears, app-store (we also have the development, ad-hoc and enterprise options).
Then we have to add a step that automatically increases the number of the compilation, to avoid problems when uploading the application to iTunes Connect. For this we add the step Set Xcode Project Build Number:
Here, in the Info.plist file path section, we indicate where the project’s Info.plist file is located. In this case it is:
$BITRISE_SOURCE_DIR/BitriseTest/Info.plistThen, in our project we have to change the CFBundleVersion field to:
$BITRISE_BUILD_NUMBERNow, the next step is only necessary in the event that our project is dependent on CocoaPods or Carthage. If this is the case, we must add and configure, depending on the type of dependency Run CocoaPods Install and/or Carthage:
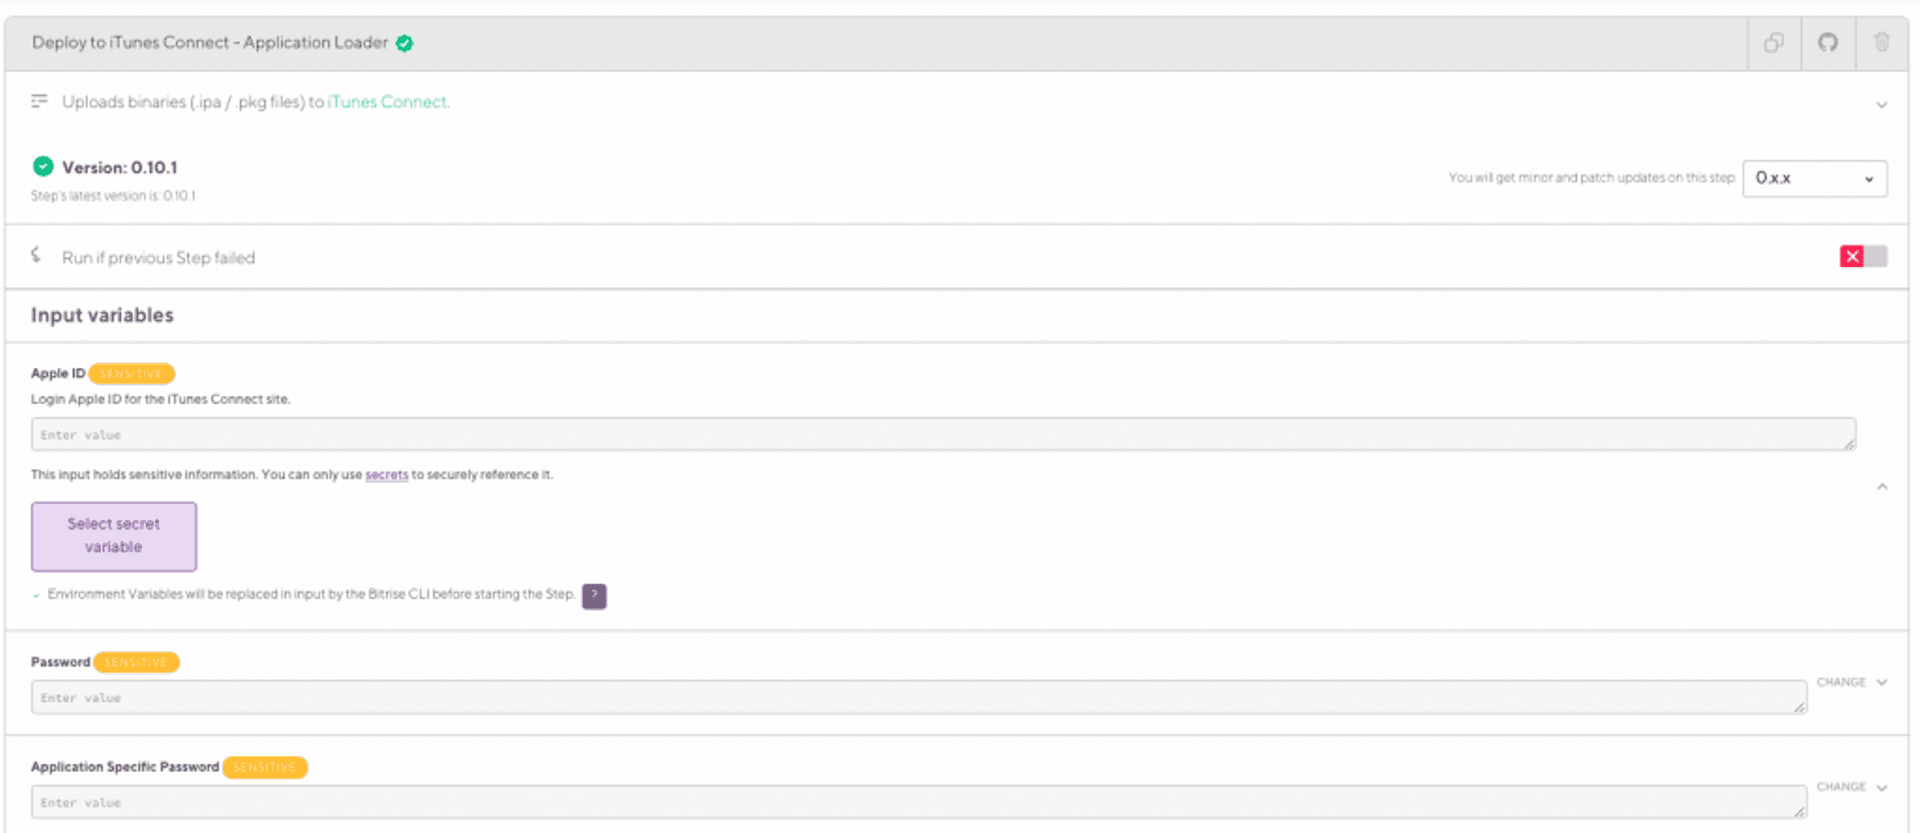
Finally, we add the Deploy to iTunes Connect – Application Loader step, in which the .ipa file will be uploaded to iTunes Connect.
In this step we will have to add the credentials of our project, such as the Apple ID and the password, which is sensitive information (although the process itself tells us how to create secret environment variables).
The deployment process is as follows:
Adding certificates
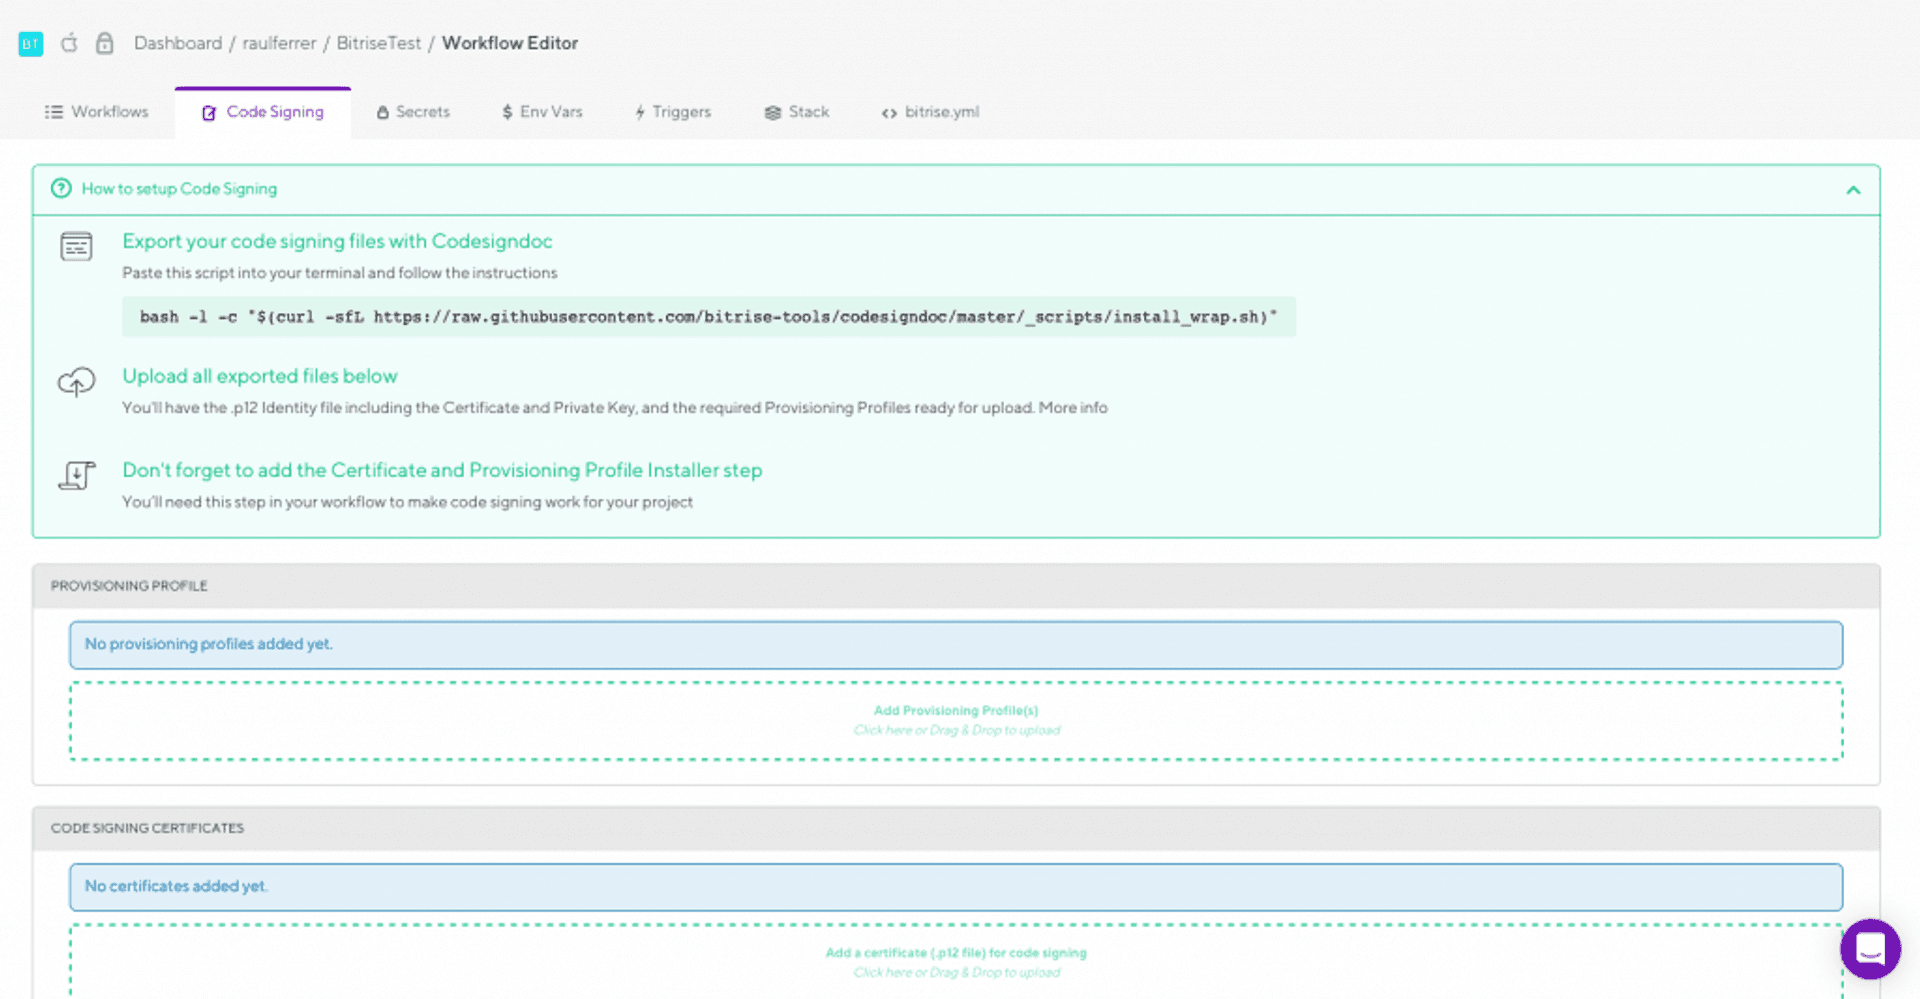
Once we have modified the workflow for the application deployment, we go to the Code Signing tab (which is located next to the Workflows tab). At this point we must add certificates; we simply have to follow the steps that Bitrise tells us.
Secrets and environment variables
In these two tabs we find (and we can edit or create new ones) some of the variables that we use in the process.
Triggers
Although you can run workflows manually in Bitrise, triggers automatically runs workflows. For example, a trigger might be to push a certain branch of a repository. In Bitrise you can define triggers for push, pull request or tag events.
So, for example, in the sample project, we could define a trigger for when we push the devel branch to run the primary workflow, while if the push is to the release branch, the flow runs deploy work.
In the same way we can set triggers for pull request events (in this example, from devel to release):
Or tagging branches:
Stack
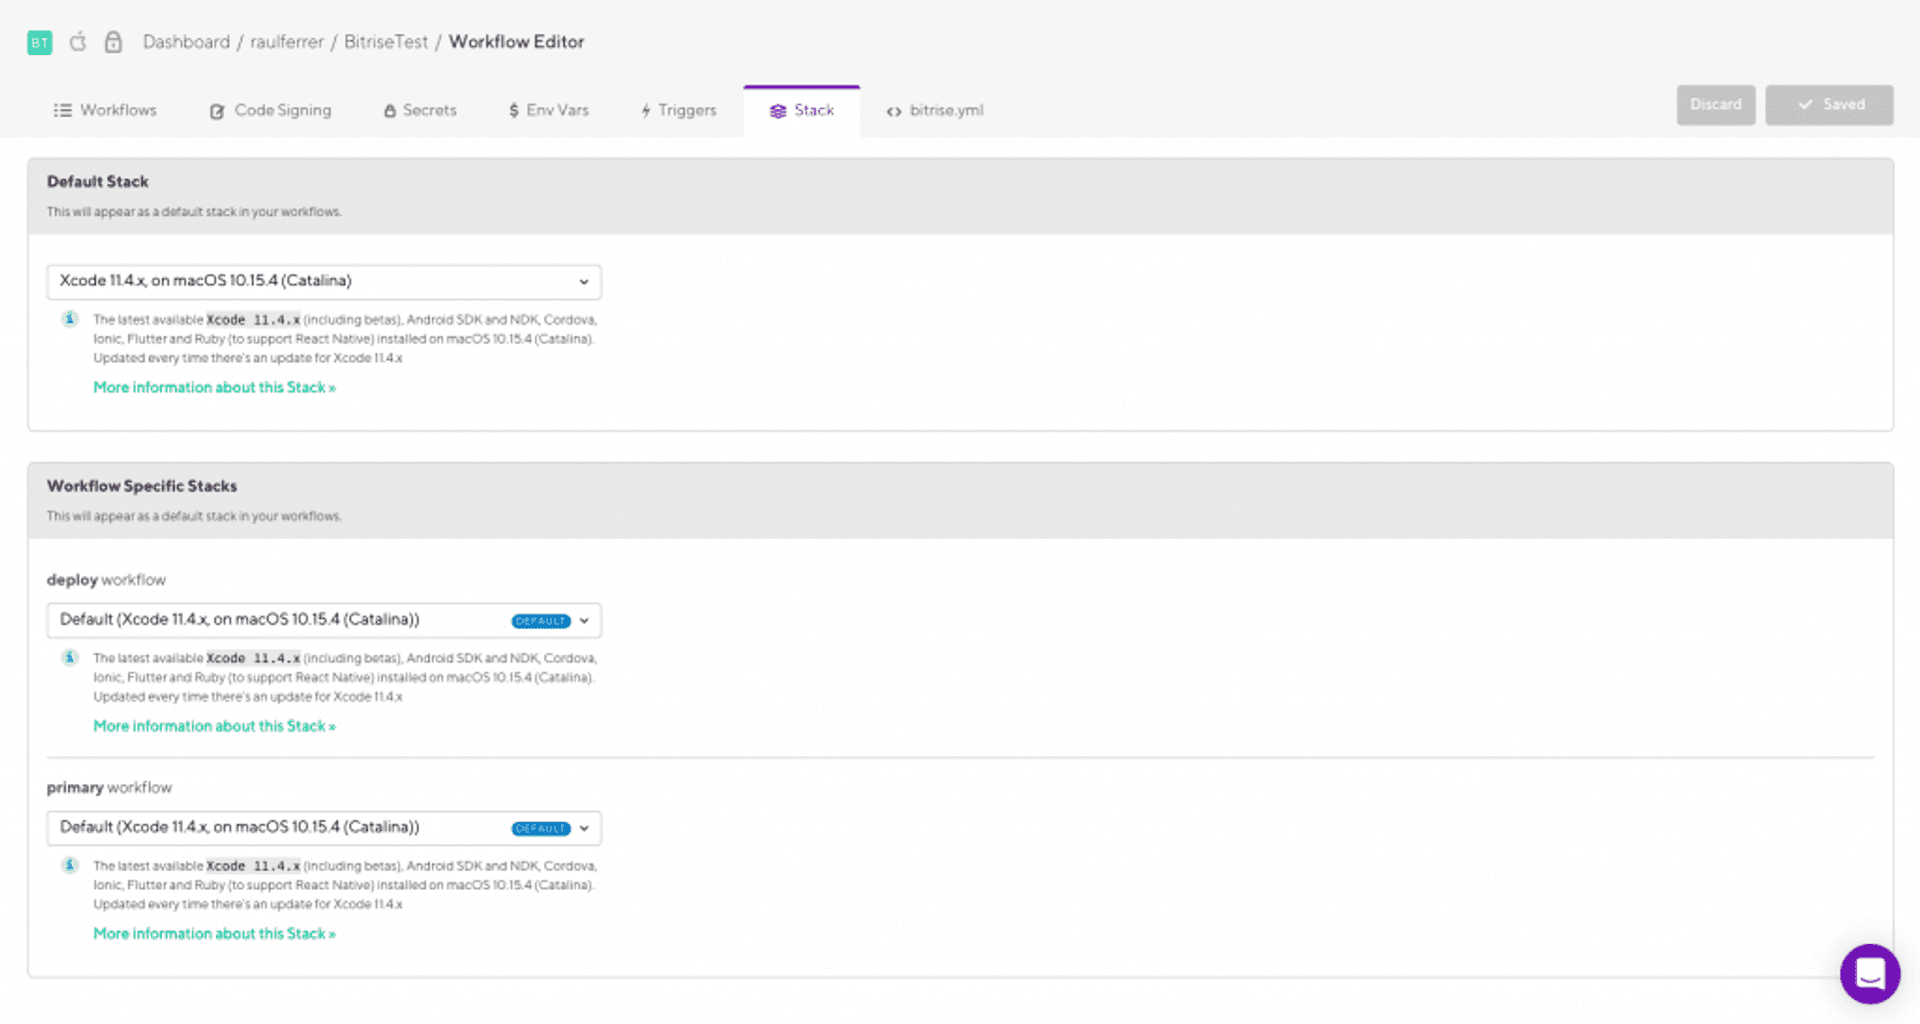
In this section we can see (and modify) the virtual machine that will be used to run the application. We can even select different settings for different workflows.
bitrise.yml
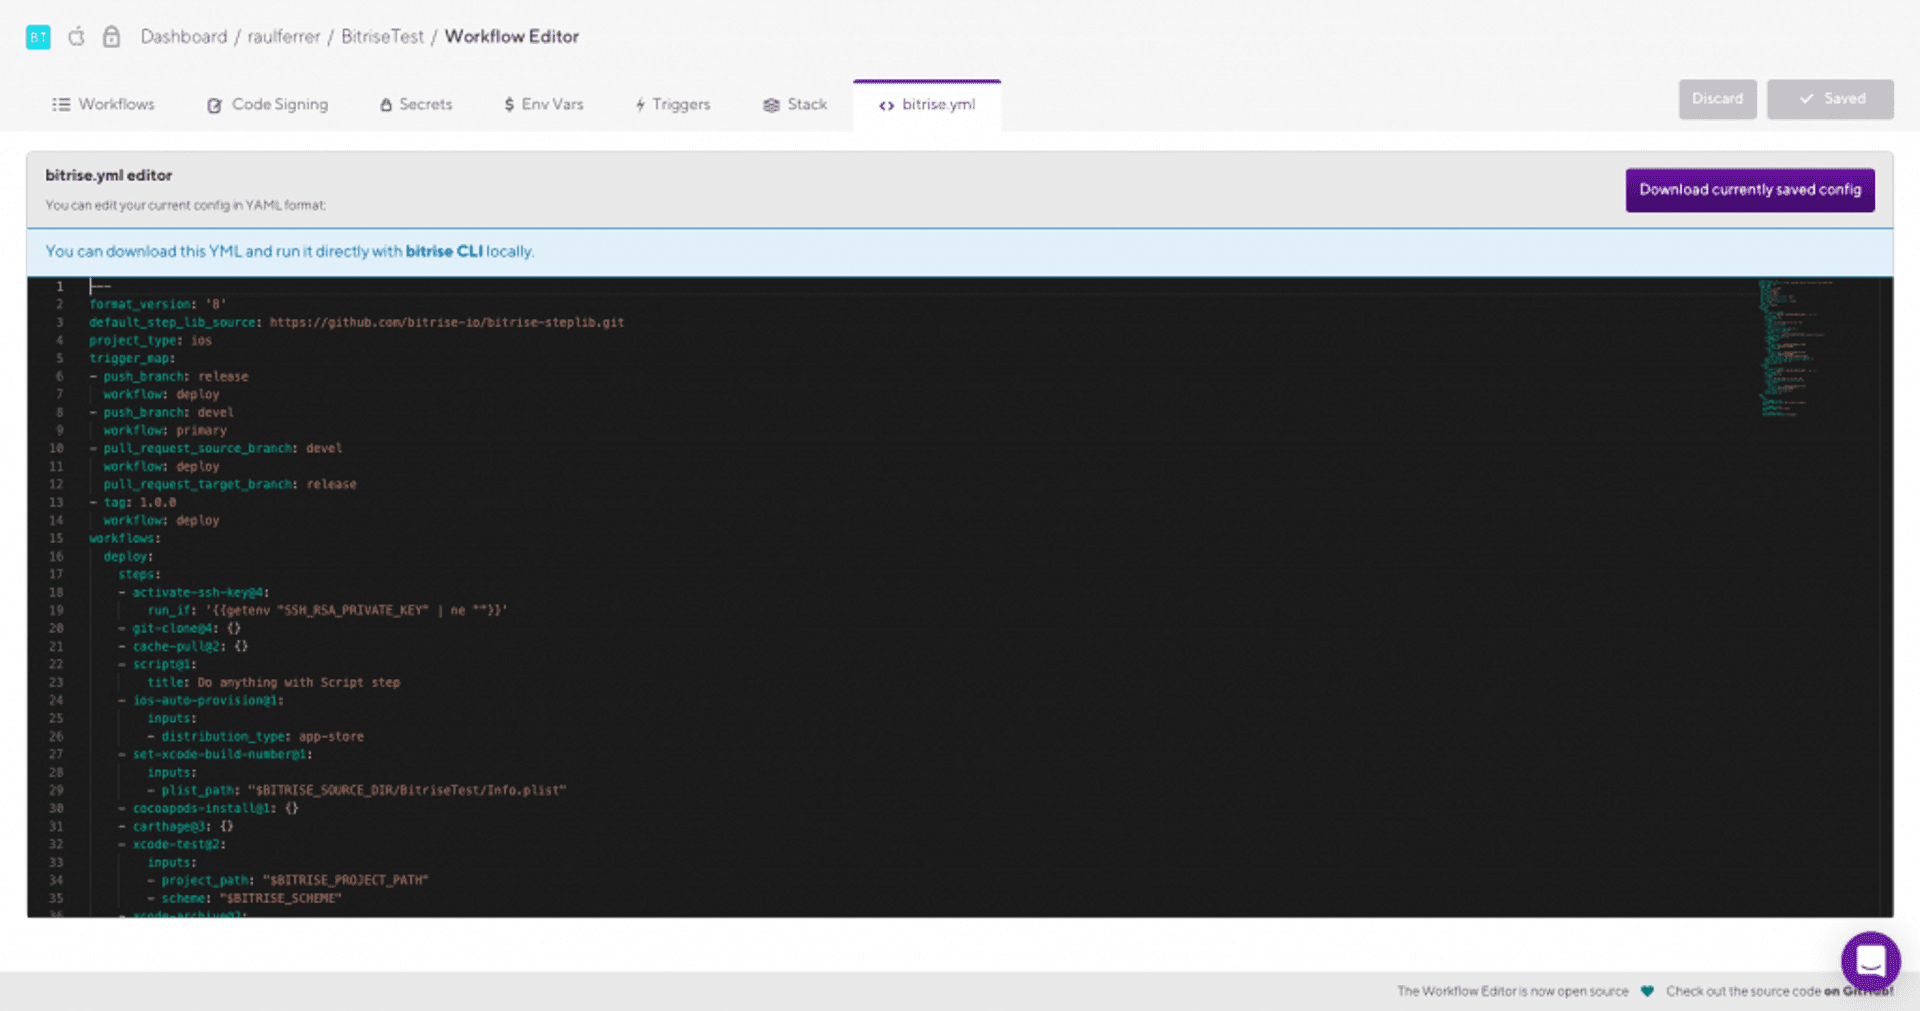
It is the Bitrise configuration file, which we can download and modify if we want to use it on our own machine thanks to Bitrise CLI. Bitrise CLI is the o pen source and offline version of Bitrise to run workflows on our own machine.
Conclusion
This article has only seen how to easily automate the continuous integration and continuous delivery of an iOS application. Bitrise contains numerous configuration and work possibilities (for example, we can link workflows to a Slack account so that it informs us when a workflow ends and its status).
After doing some tests with Bitrise some of the points for and against that I have found are:
Pros
- Facilitates the automation of application integration and deployment processes.
- Very configurable.
- Large library of steps for building workflows.
- Good documentation.
- Specific for mobile (iOS, Android).
Cons
- Sometimes setup can be a little tricky.
- Slow on some compilations (the example project, extremely simple, takes about 3 min to run). This can be a problem for large projects if you have Free or Developer accounts, which have a 45 min limit.

