Continuous Integration and Continuous Delivery (CI/CD) with GitHub Actions
Continuous Integration and Continuous Delivery
What is Continuous Integration and Continuous Delivery of software? What does CI/CD mean? When different developers work together in an application, if the merge of code occurs at the same time, numerous problems can occur: conflicts between different developers’ code, errors … which makes this process slow. This is where Integration and continuous distribution comes in.
Continuous Integration (CI)
Continuous integration (CI) allows different developers to upload and merge code changes in the same repository branch on a frequent basis. Once the code has been uploaded, it is validated automatically by means of unit and integration tests (both the uploaded code and the rest of the components of the application). In case of an error, this can be corrected more simple.
Continuous Delivery (CD)
In the Continuous Delivery (CD) the new code introduced and that has passed the Continuous Integration process is automatically published in a production environment (this implementation may require manual approval). What is intended is that the repository code is always in a state that allows its implementation in a production environment.
Continuous Deployment (CD)
In Continuous Deployment (CD), all changes in the code that have gone through the previous two stages are automatically implemented in production.
Tools to perform Continuous Integration and Continuous Delivery
There are numerous tools to configure and perform the entire Continuous Integration and Continuous Delivery process:
- Jenkins. Free.
- TravisCI. Free for open-source repository.
- Nevercode. Commercial.
- CircleCI. Commercial (there is a limited free version).
- Bitrise. Commercial (there is a limited free version).
- Visual Studio App Center. Commercial (there is a limited free version).
GitHub Actions
GitHub Actions is a new tool to perform the CI/CD process, introduced in October 2018, launched in beta in August 2019, and finally distributed in November 2019. GitHub Actions is also paid, although it has a free version with some limitations.
Example of using Github Actions in an iOS/Swift project
To show how to use Github Actions in the CI / CD process on iOS, I will use my own project (based on a Sean Allen course).
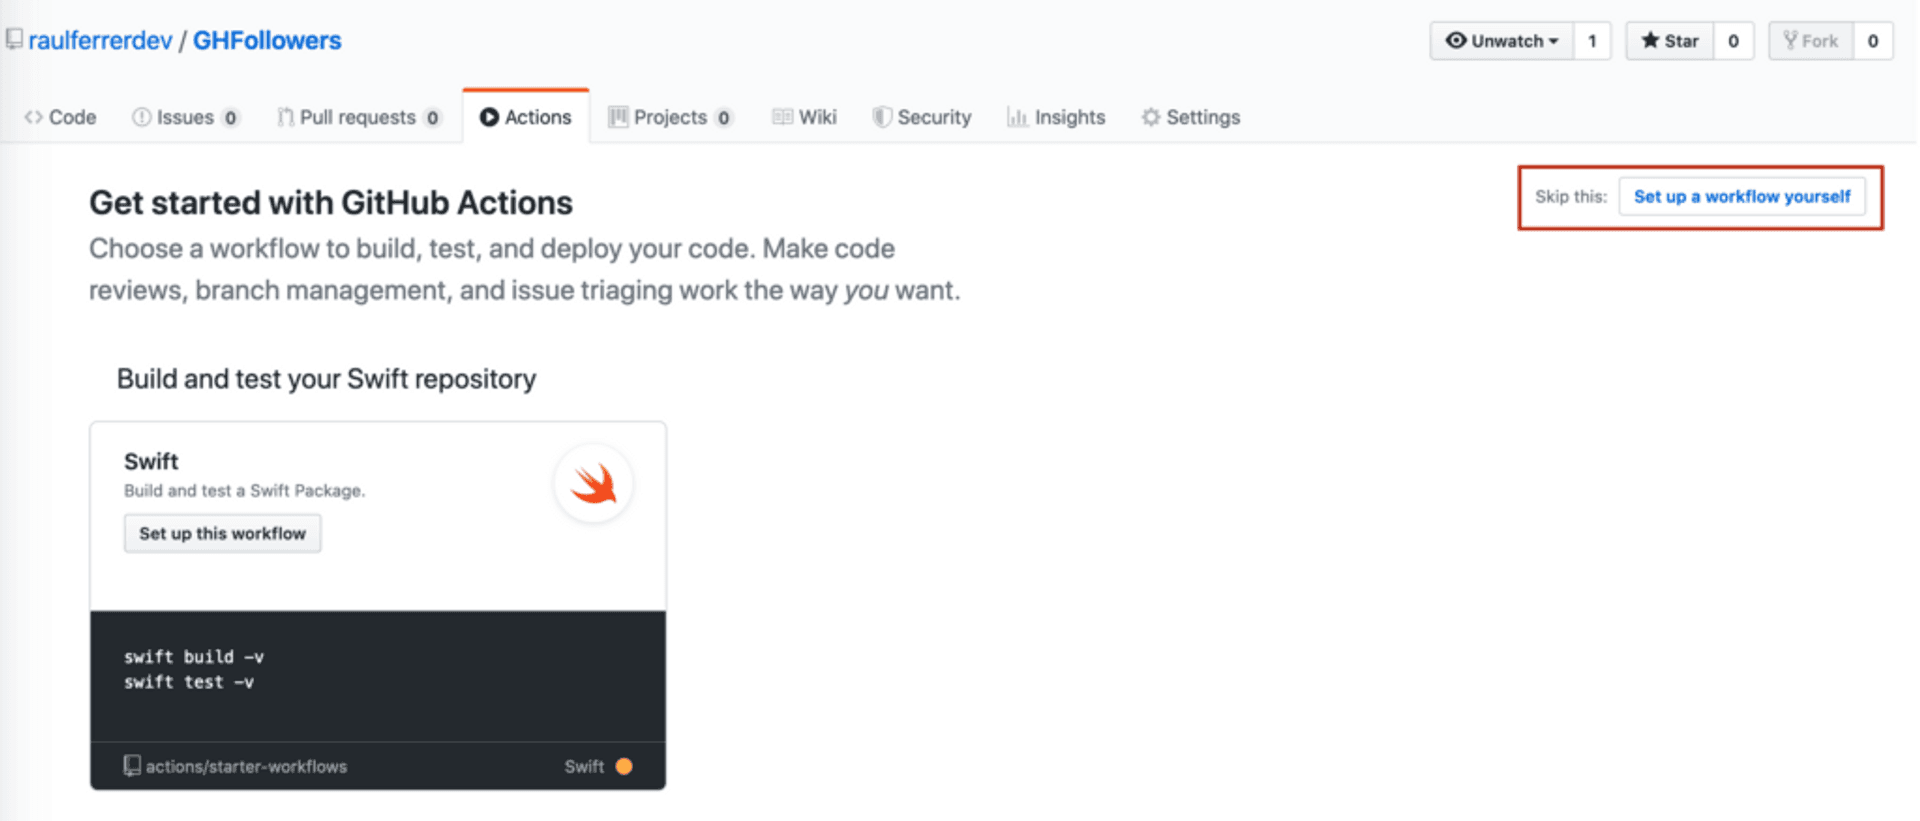
First, we enter our GitHub project and access the Actions tab:
We access a screen that allows us to choose between a predefined workflow or establish our own. In our case we will choose to establish our own.
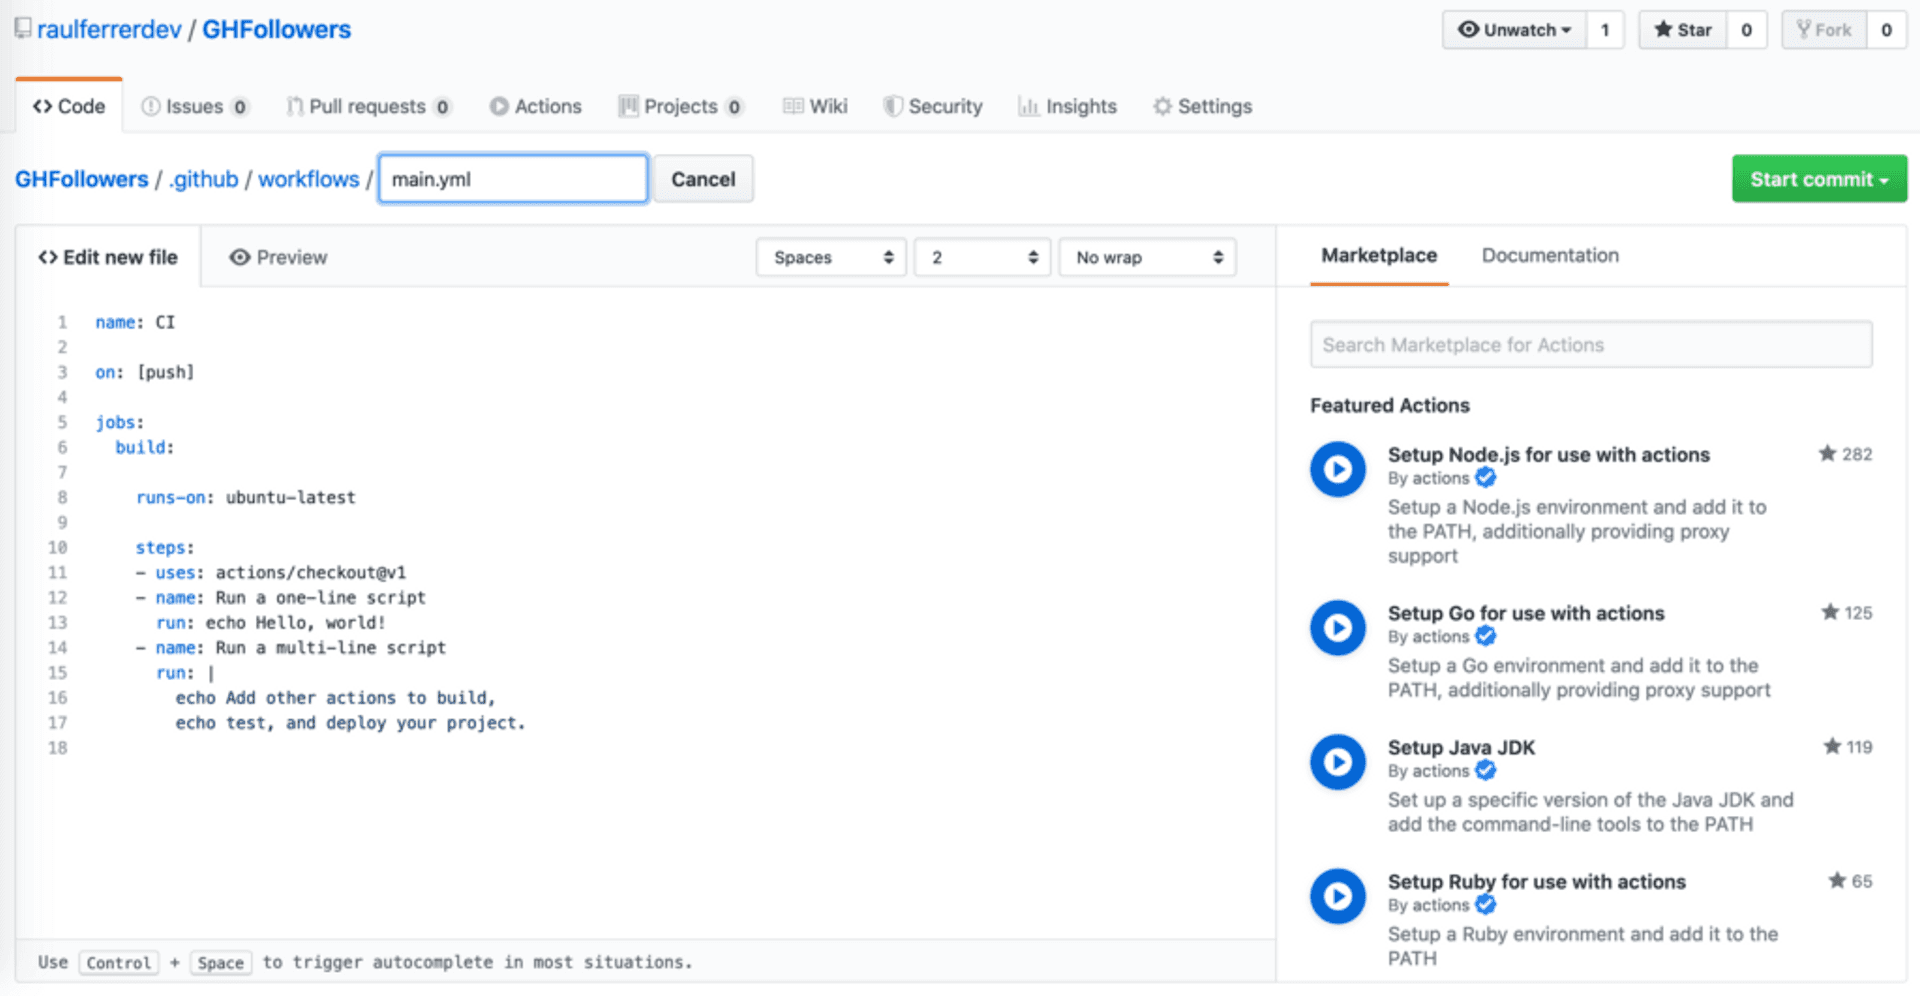
We see how there is a workflow in a file called main.yml, which is in .github/workflows/. We can have different files with different workflows.
Now we will change the content of the file so that on the one hand it executes the application and, on the other, with the programmed tests.
<script src="https://gist.github.com/raulferrerdev/e07a8341d8ee7c223c25074dcd3afaf4.js"></script>name
It is a label for our workflow.
on
Github executes workflows that are defined with the on key. In our case any push event. We can also define a specific branch. For example, push events in the devel branch:
 on:
   push:
     branches:
     - devel
jobs
Each workflow is made up of one or more jobs. In our case there is only one.
runs-on
This parameter contains the type of virtual machine in which the code will be executed. In this case we will use macos-latest (to see the different types of virtual machines available you can access here).
strategy and matrix
A strategy creates a matrix of environments in which to execute the work. Each matrix allows to establish a set of different configurations of the virtual environment. In our case, we set the iOS simulator, with the operating system 13.2.2 and an iPhone 11 Pro Max device:
 strategy:
         matrix:
           destination: ['platform=iOS Simulator,OS=13.2.2,name=iPhone 11 Pro Max']
steps
A step is a sequence of tasks. In the example we are seeing, the first step is to check the repository so that the workflow can access it. In this case to the master branch.
 - name: Checkout
   uses: actions/checkout@master
In the second step the application is built in the environment defined above (destination):
 - name: Build
     run: |
        xcodebuild clean build -project GHFollowers.xcodeproj -scheme GHFollowers -destination "${destination}" CODE_SIGN_IDENTITY="" CODE_SIGNING_REQUIRED=NO ONLY_ACTIVE_ARCH=NO
     env:
       destination: ${{ matrix.destination }}
Finally, in the last step the tests created in the application are executed:
 - name: Test
   run: |
           xcodebuild clean test -project GHFollowers.xcodeproj -scheme GHFollowersTests -destination "${destination}" CODE_SIGN_IDENTITY="" CODE_SIGNING_REQUIRED=NO ONLY_ACTIVE_ARCH=NO
   env:
          destination: ${{ matrix.destination }}
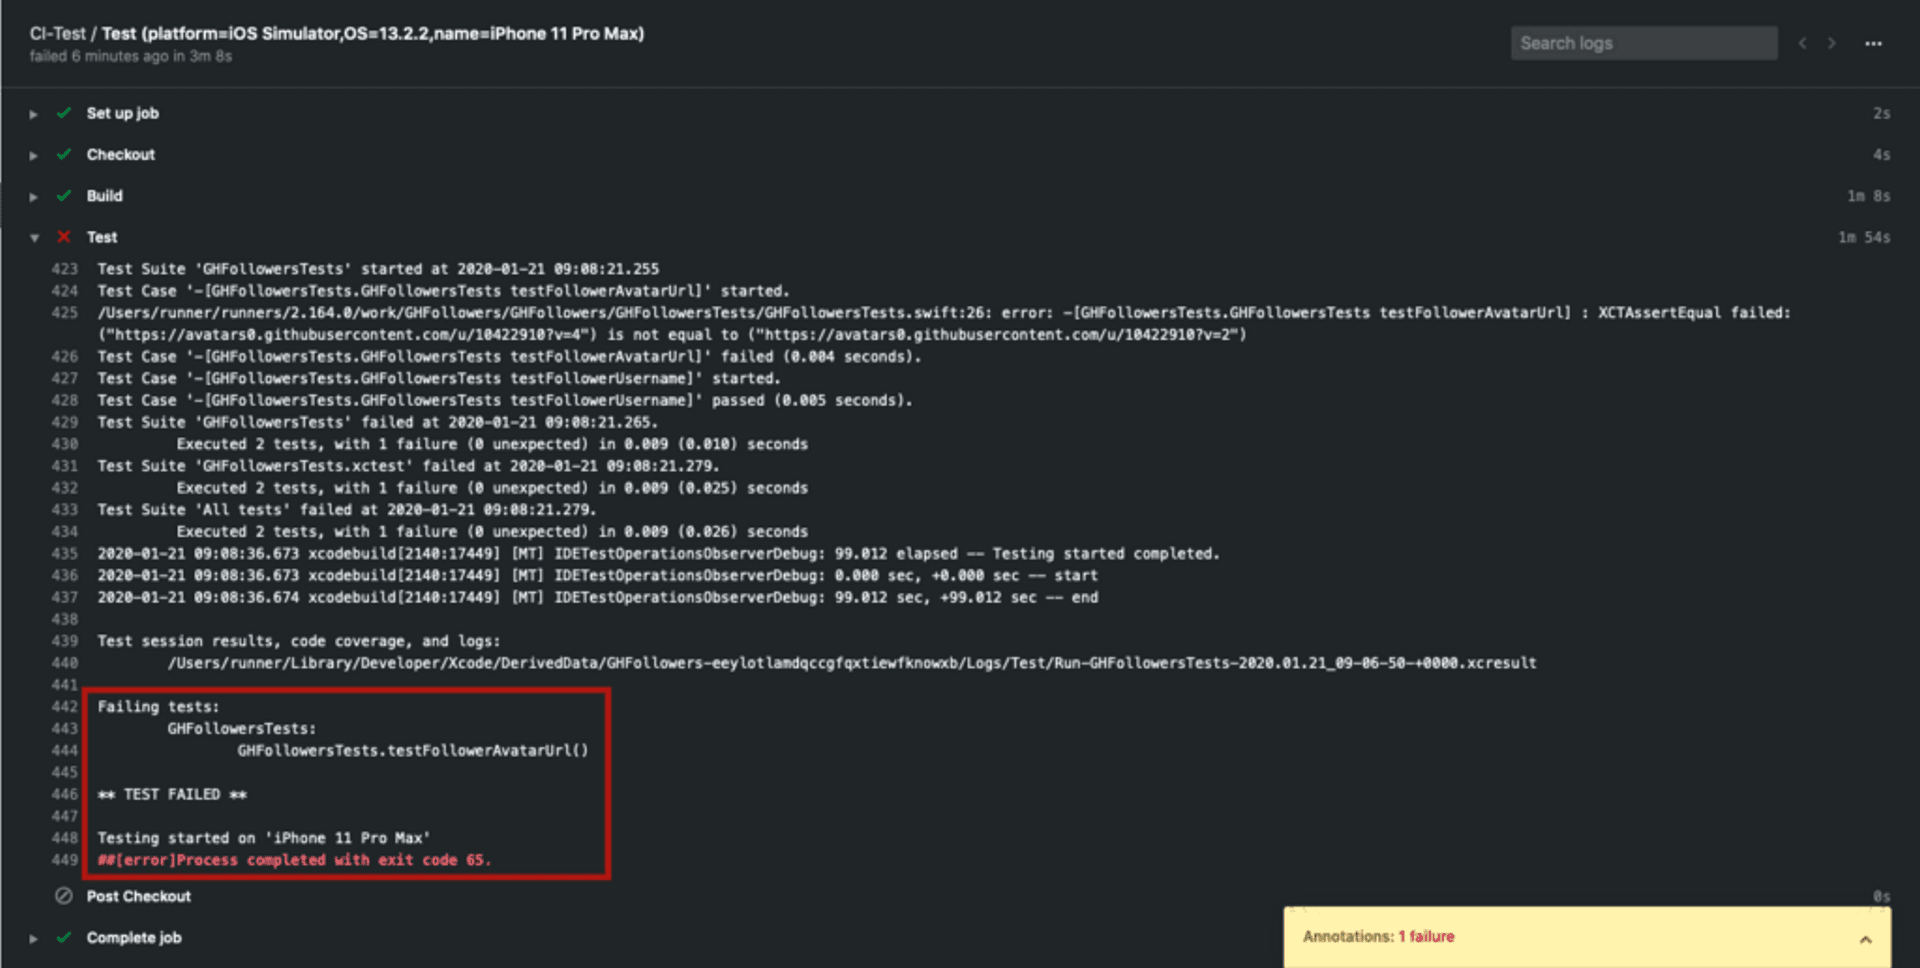
When we upload code to the repository, this workflow will run. If we access the Actions tab of the repository again, we can see a list of the times the workflow has been executed. In this case, if no error has occurred, we obtain the following:

