Introduction
SwiftUI is a framework that works in a declarative way to create User Interfaces (UI). SwitUI was introduced by Apple in 2019 with the intention of eventually replacing UIKit, which works imperatively.
The fact that SwiftUI is a declarative framework means that User Interfaces can be generated simply by describing the state of the interface, and leaving the implementation details up to the framework itself. This makes the User Interface development process faster and easier.
This SwiftUI declarative syntax allows applications to show the status of the application at all times, that is, we always have it updated.
Starting the project
In order to develop applications with SwiftUI we need some minimum requirements such as using XCode11+ (currently the Xcode version is 14.1) and iOS13+.
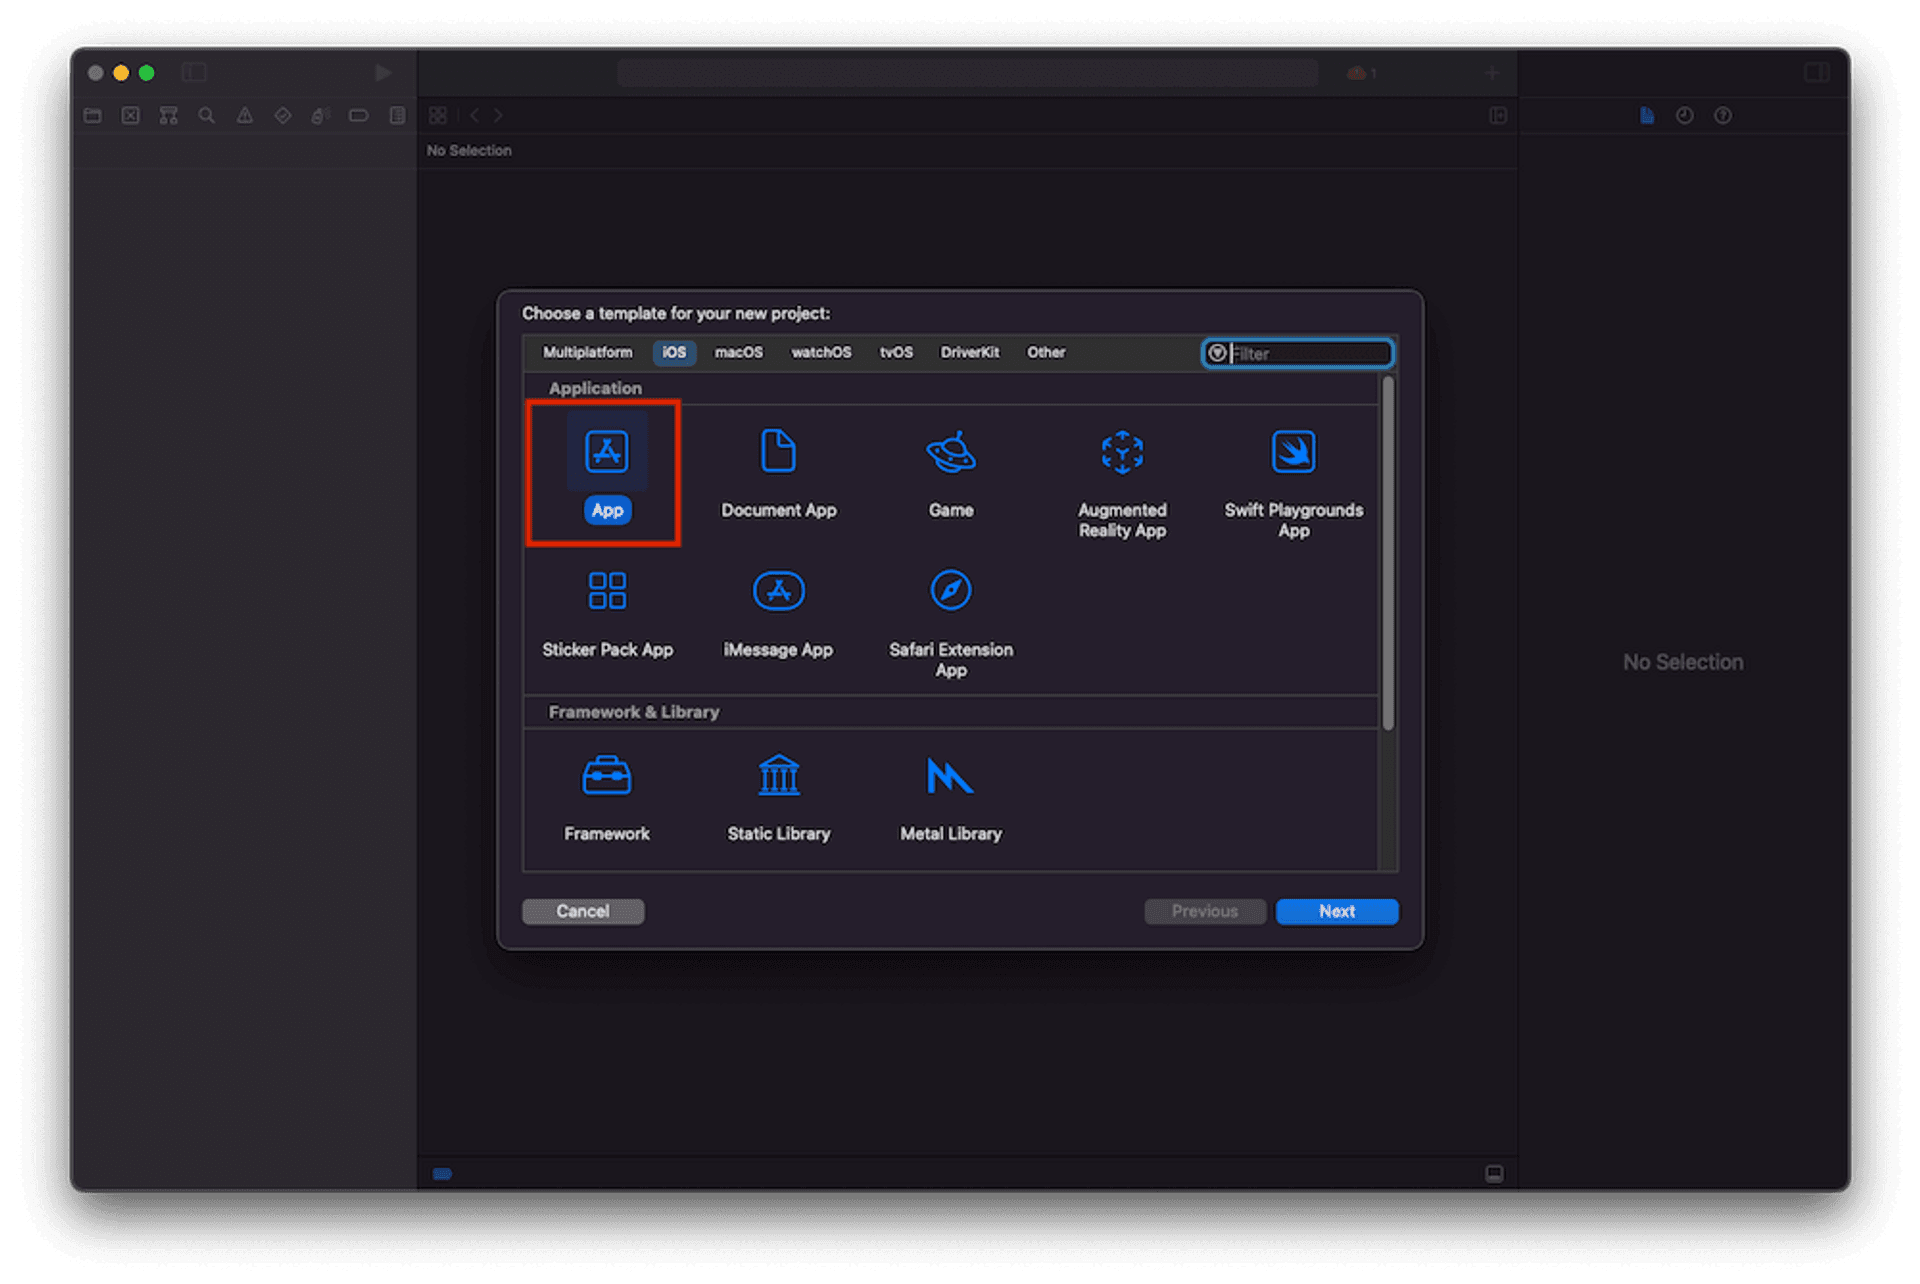
The first step is to create a new project in Xcode. The first window that appears is to select the type of project: in this case we will choose App.
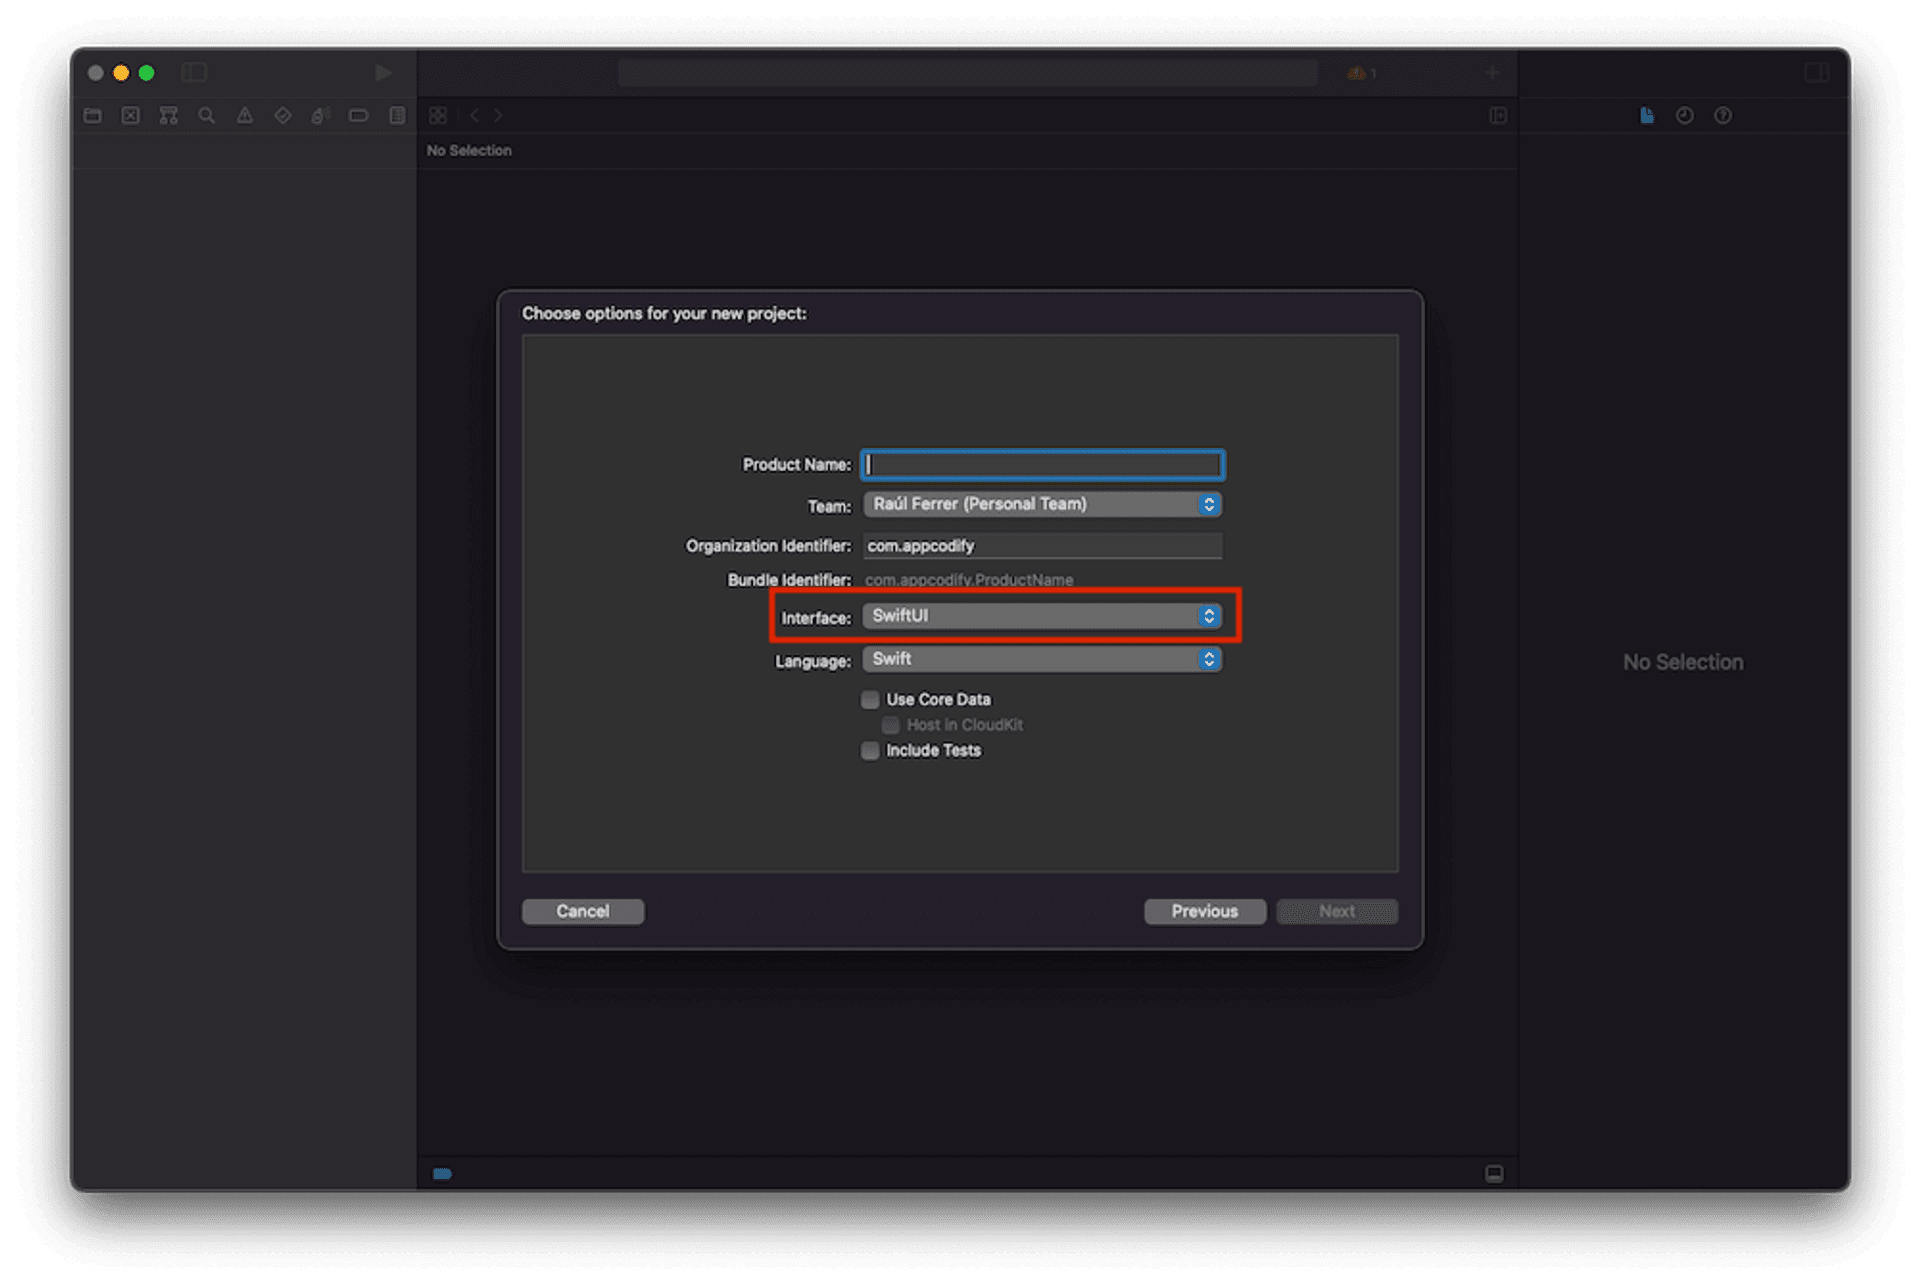
Next, we get the screen with the basic information of our project, the name of the project, its identifier… What we must make sure is that the Interface field has SwiftUI selected.
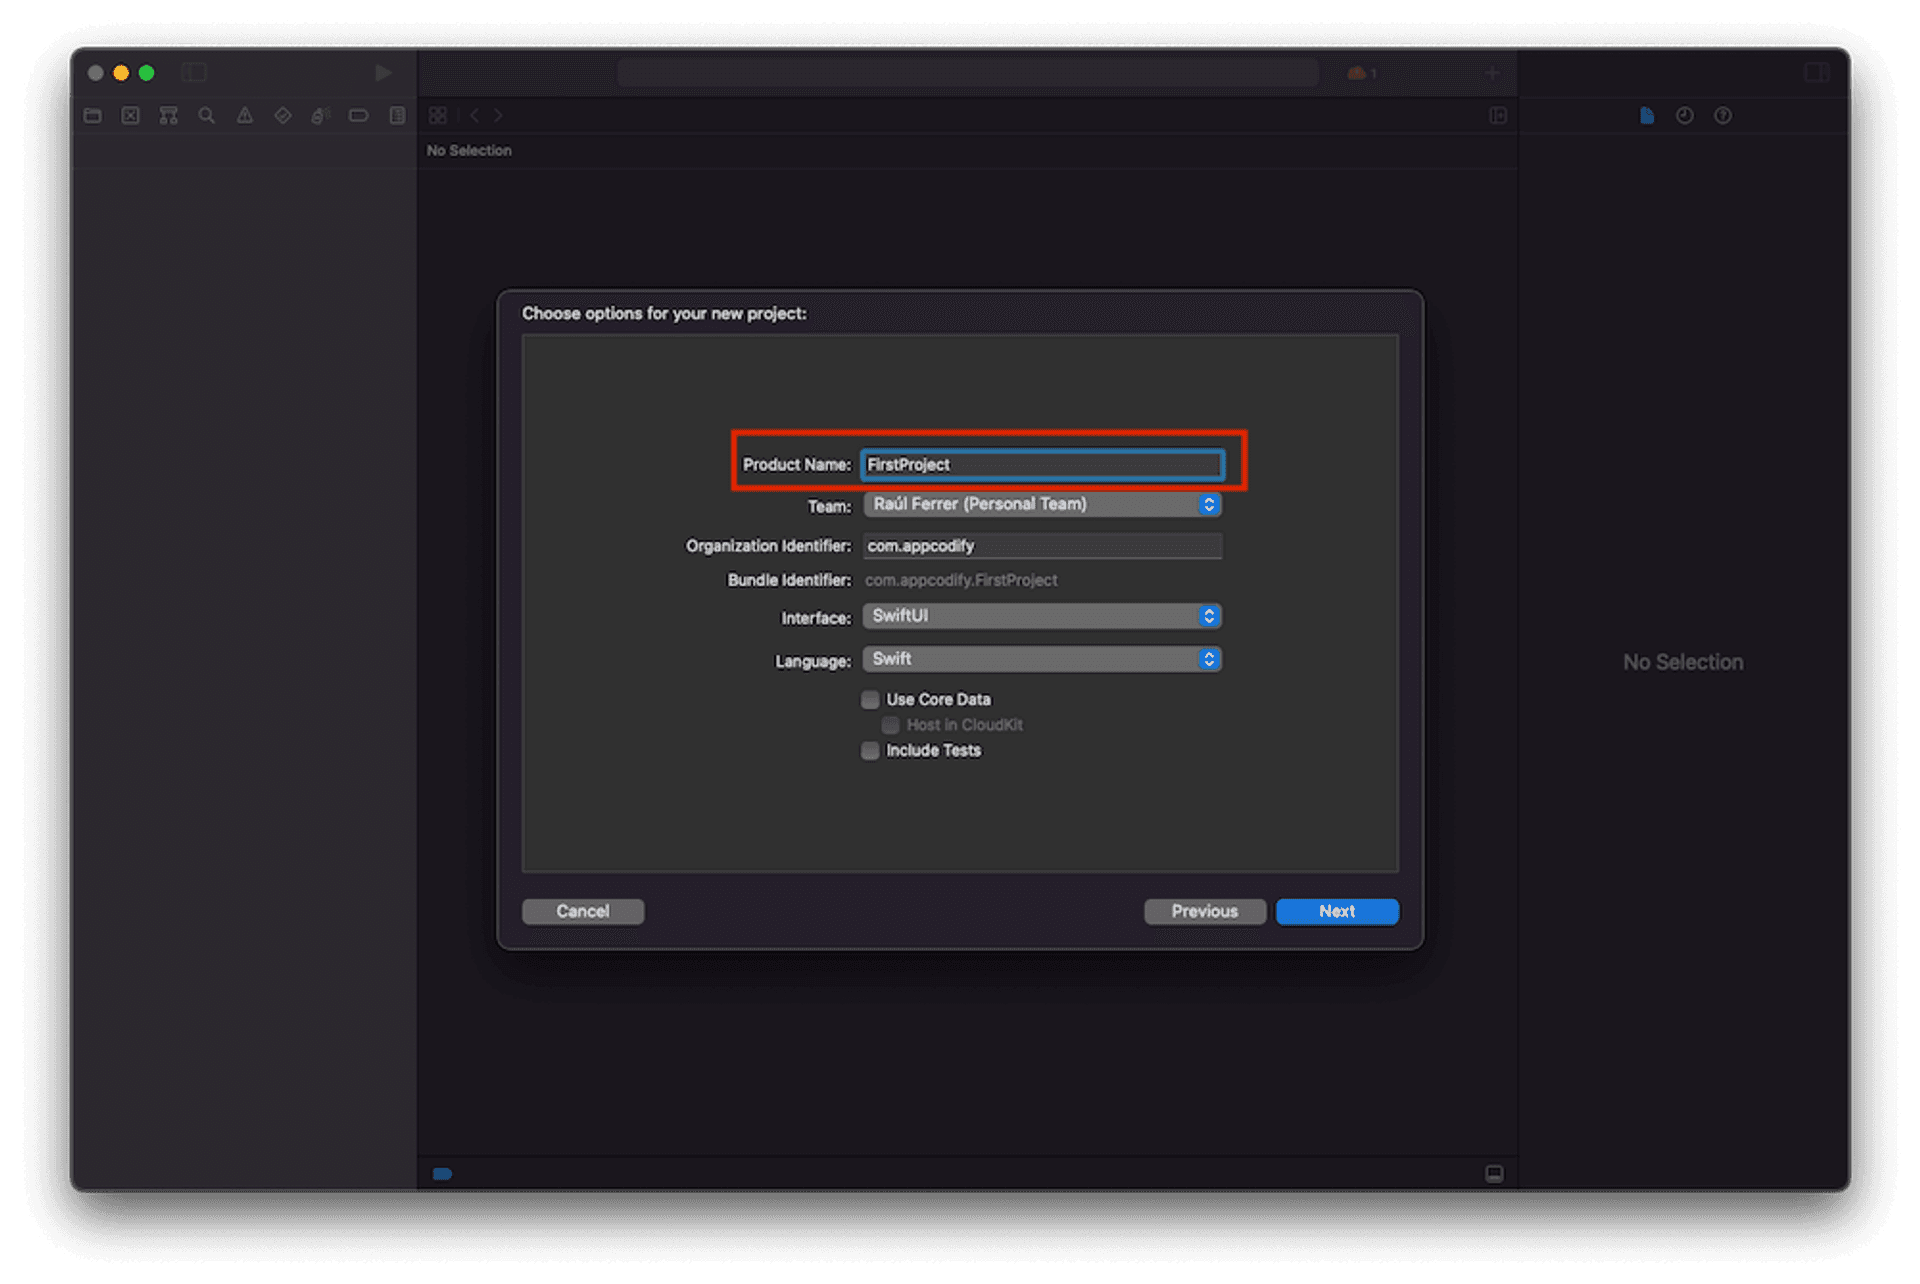
We give the project a name and then the Next button.
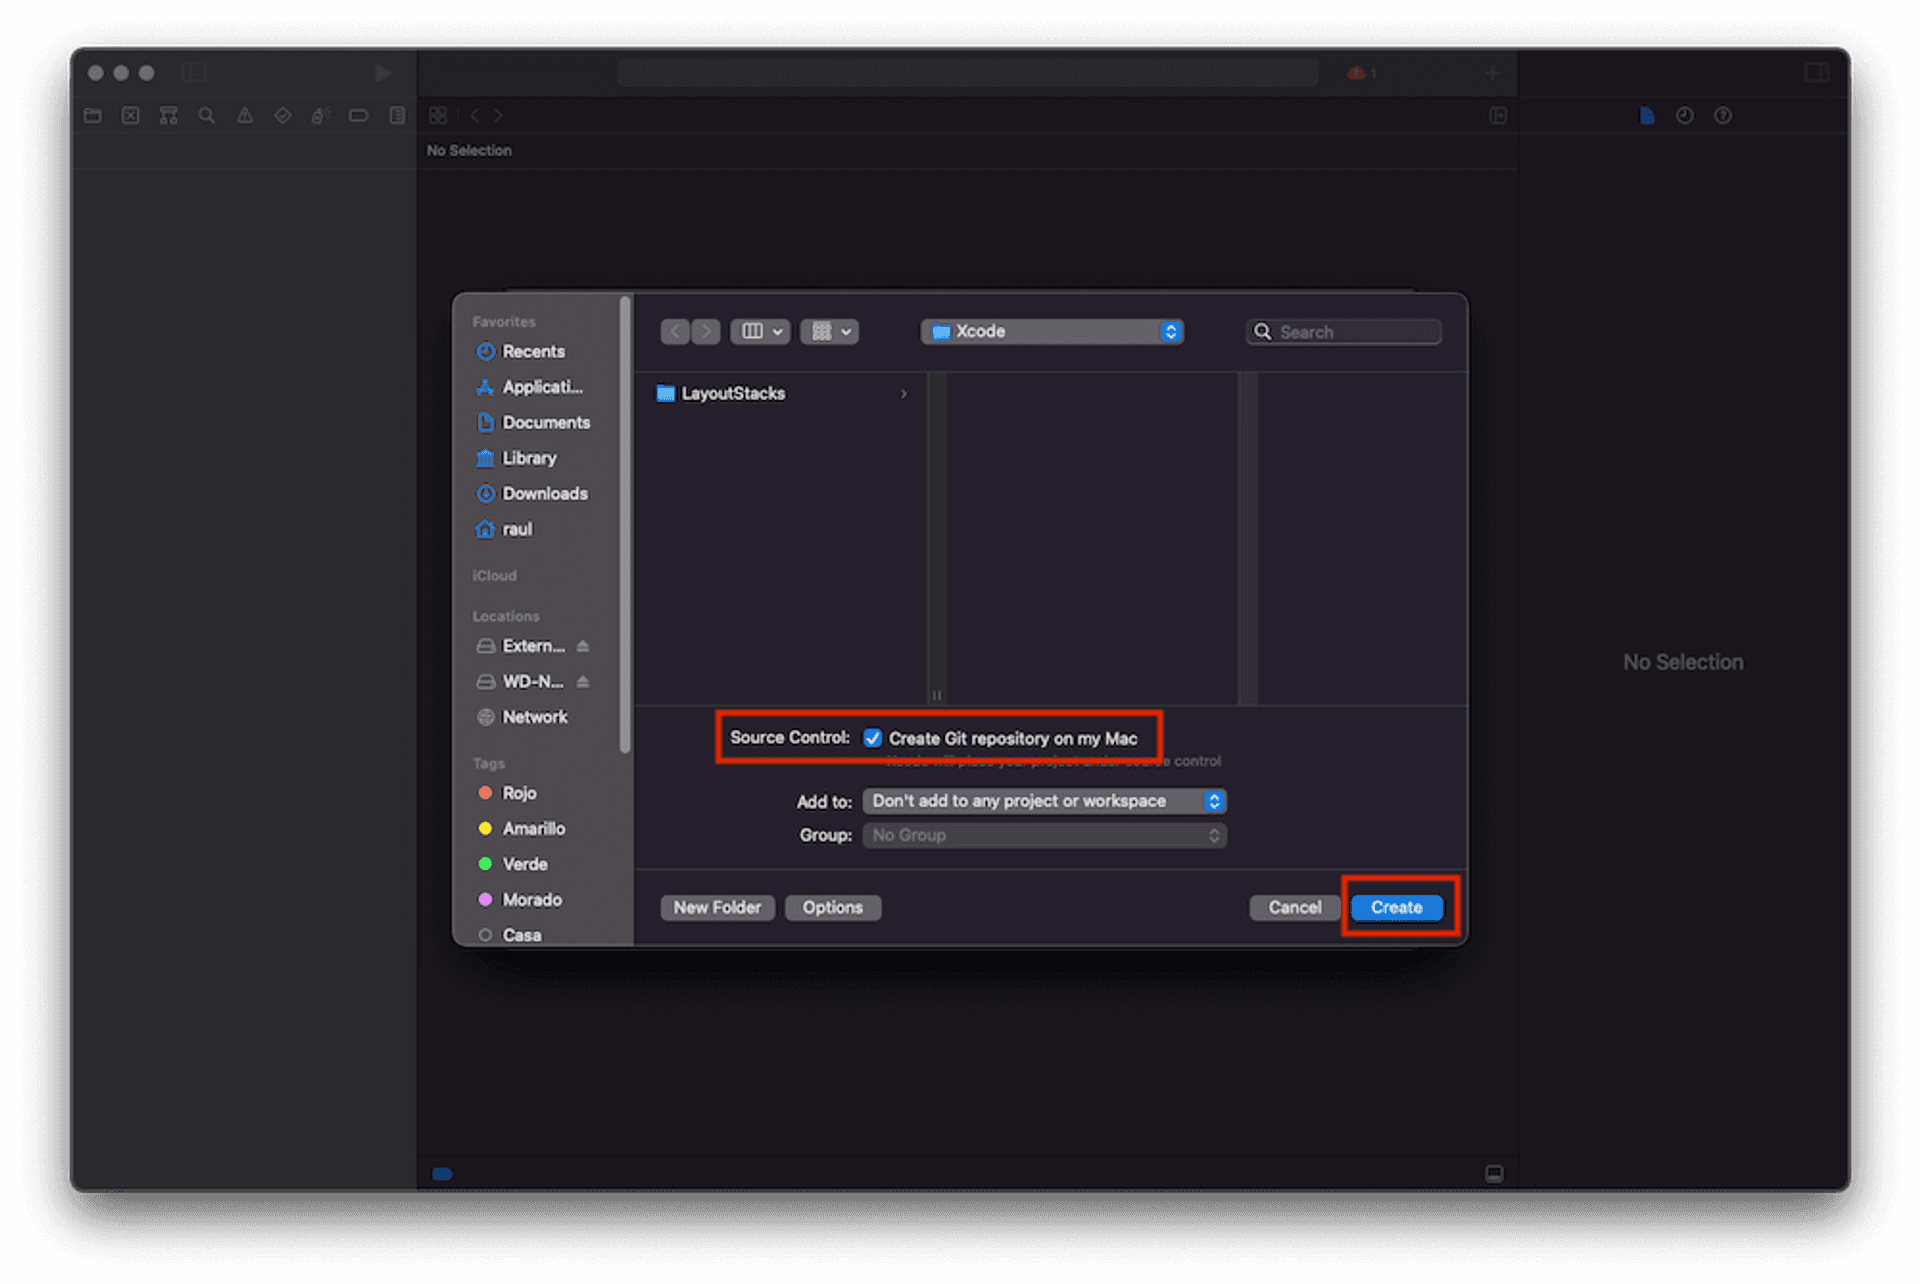
On the next screen we choose where we want the project to be saved and if we want version control (Git) to be activated.
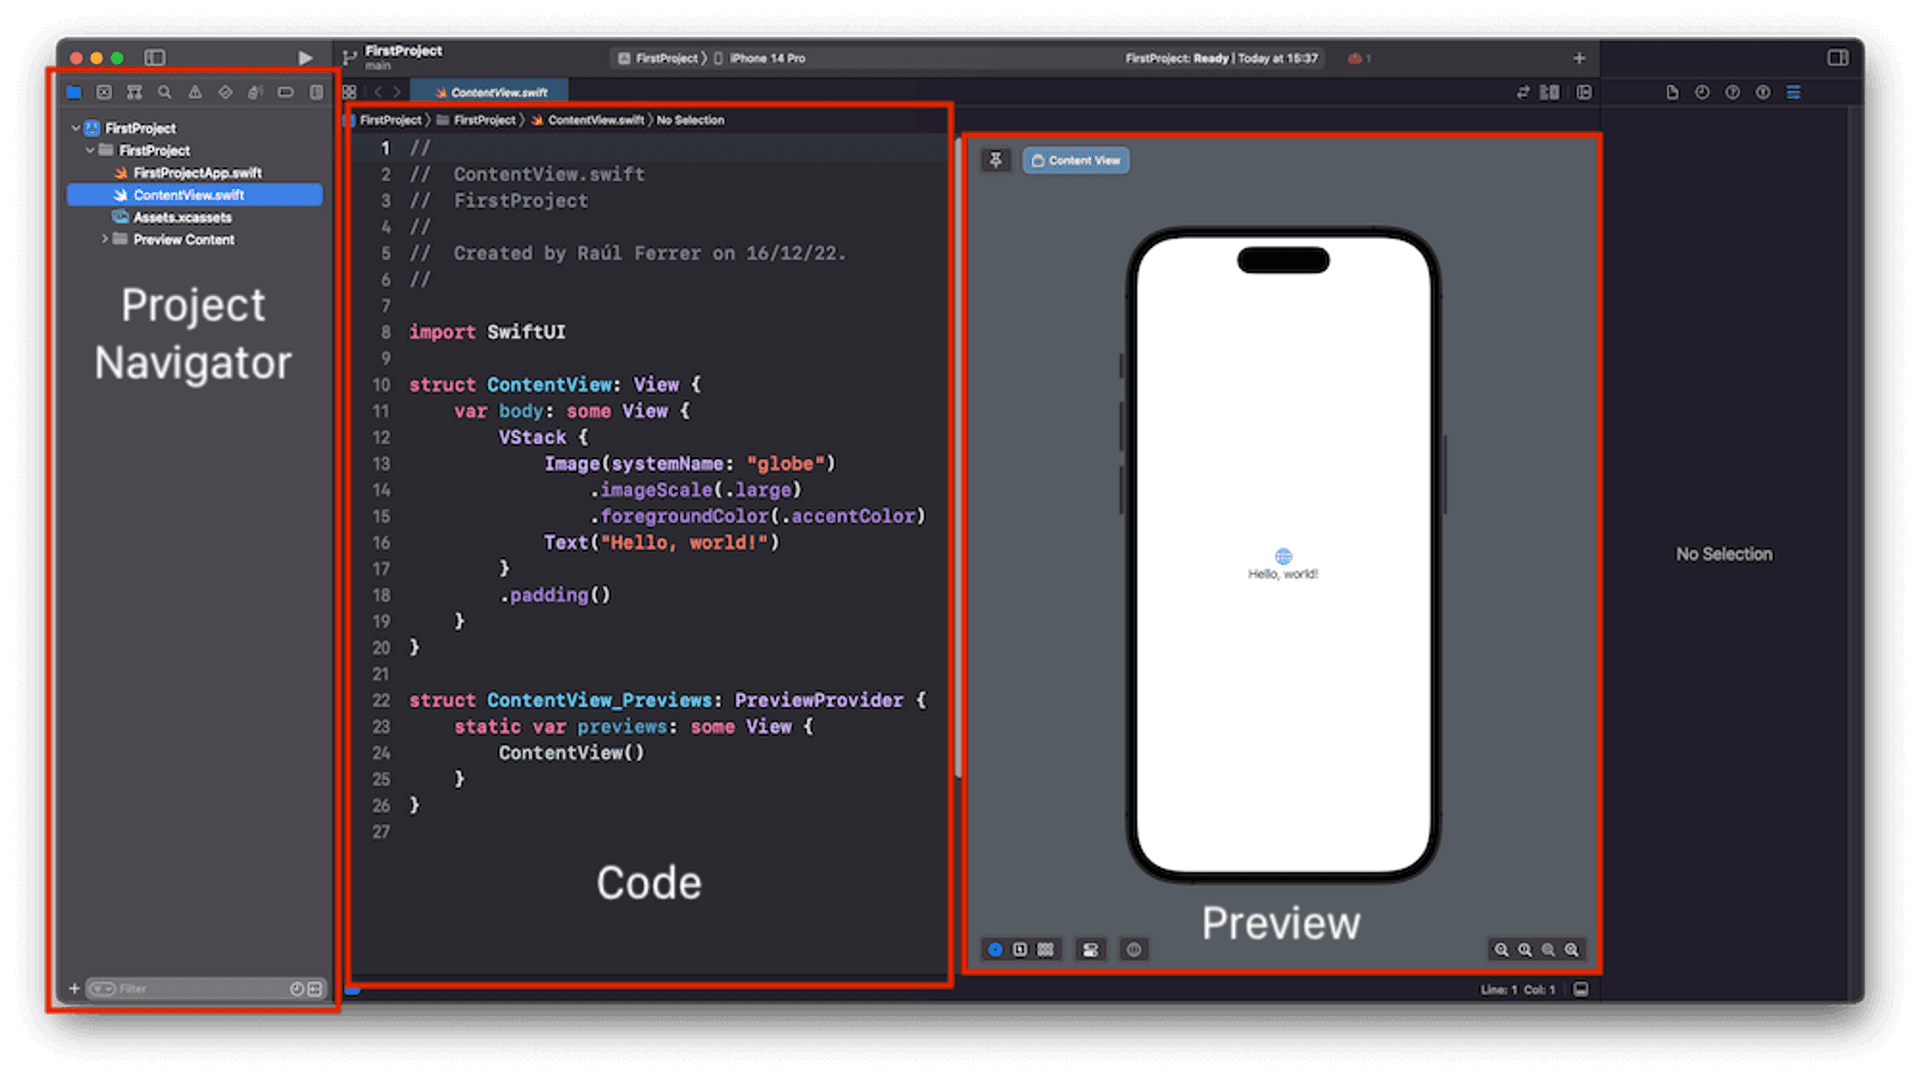
Clicking on the Create button will generate the project and the Xcode work desk will appear. In this we can see on the left the Project Navigator (in which we can see the files that make up the project, in the center the code of the selected file and on the left the preview of the view (in the event that the selected file is a view and have the preview code).
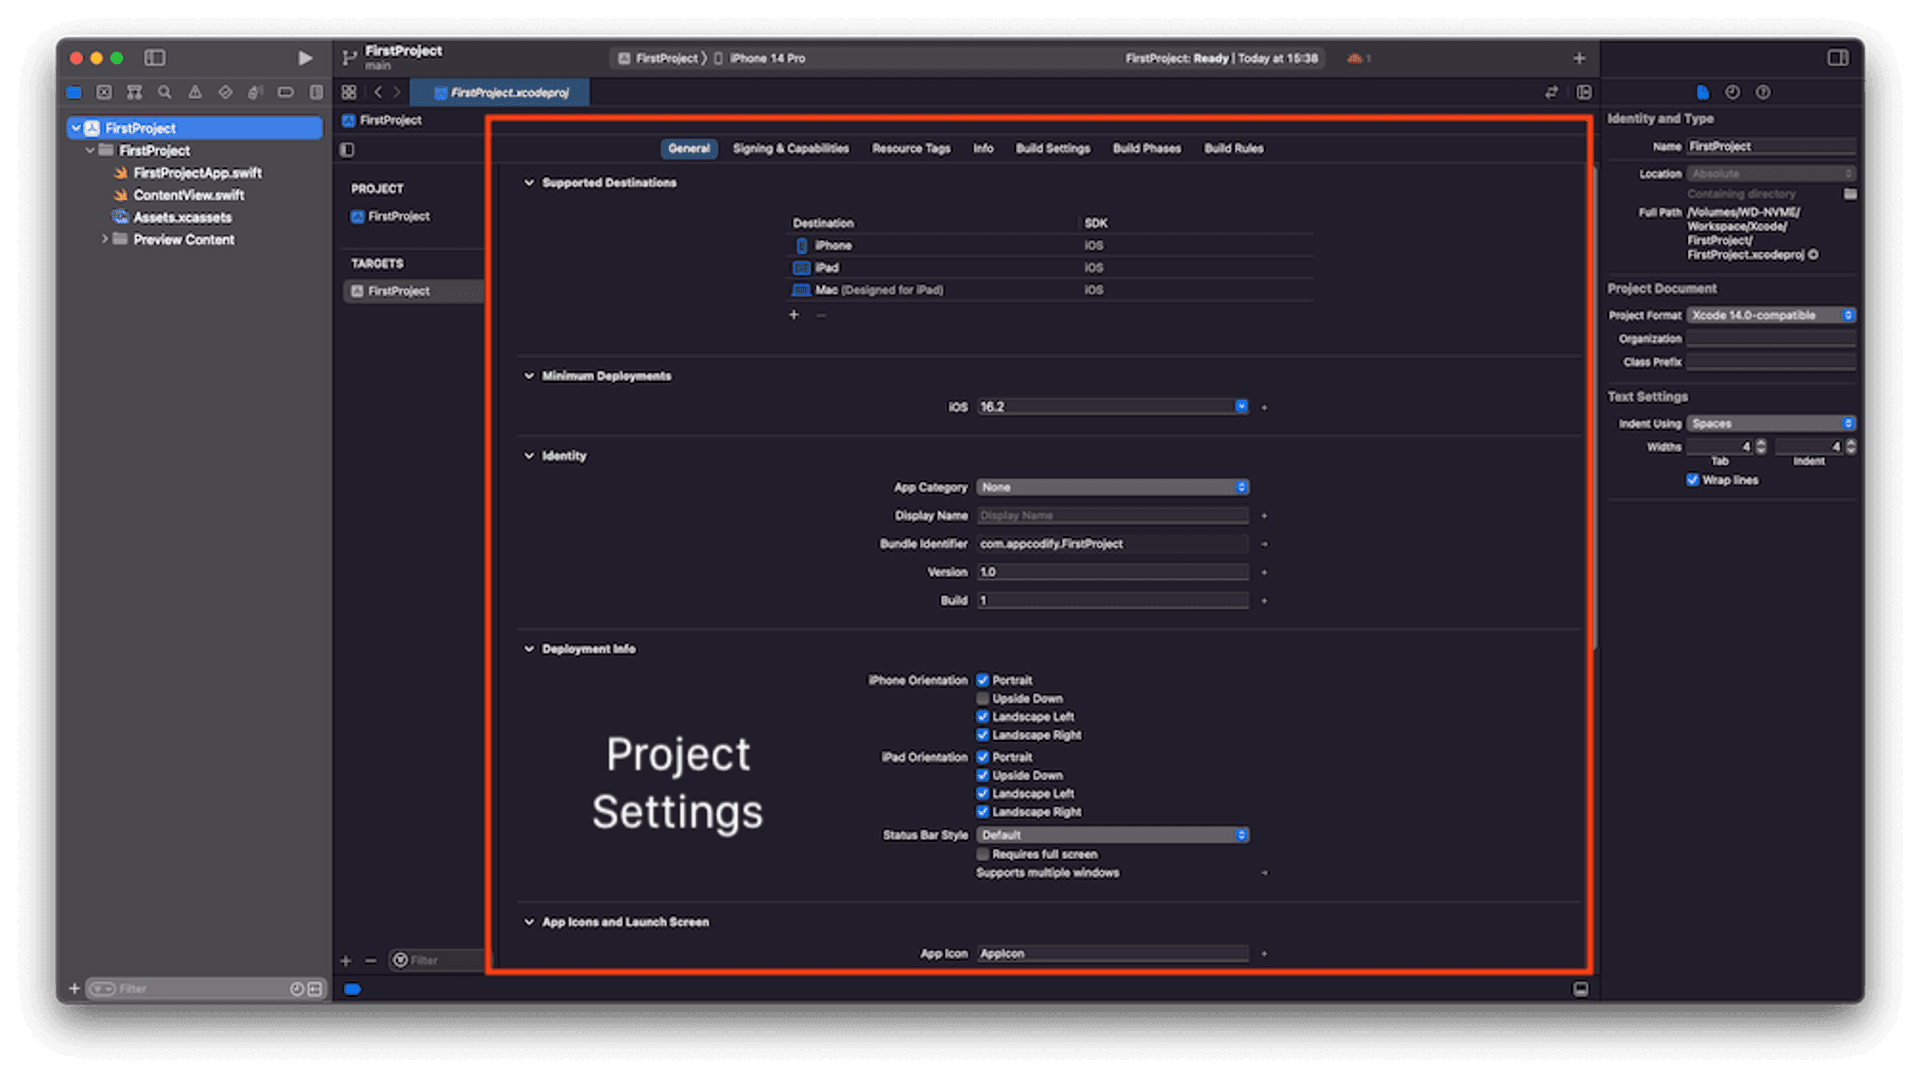
If we now select the name of the project in the Project Manager, the screen appears that allows us to indicate, among other things, the minimum version of the operating system in which the application will work, for which orientations the application will be available (portrait, landscape)…
Understanding the project files
When our FirstProject is created, some files are created: FirstProjectApp.swift, ContentView.swift, Assets.xcassts and a group called Preview Content.
FirstProjectApp
The code in this file defines a struct called FirstProjectApp that conforms to the App protocol.
import SwiftUI

@main
struct FirstProjectApp: App {
    var body: some Scene {
        WindowGroup {
            ContentView()
        }
    }
}
The App protocol is a special protocol in SwiftUI that represents an app’s main entry point. The @main attribute tells the Swift compiler to use this struct as the entry point for the app.
The App protocol requires that you implement a single property called body, which is of type some Scene. In this case, the body property is defined as a WindowGroup that contains a single ContentView.
The WindowGroup is a container view that manages a collection of windows. When you create a new project in Xcode using the SwiftUI framework, a single window is created for you by default. The ContentView is the root view of the app, and it is displayed in the window when the app launches.
ContentView
The ContentView file contains the code for the first scene of our app:
import SwiftUI

struct ContentView: View {
    var body: some View {
        VStack {
            Image(systemName: "globe")
                .imageScale(.large)
                .foregroundColor(.accentColor)
            Text("Hello, world!")
        }
        .padding()
    }
}

struct ContentView_Previews: PreviewProvider {
    static var previews: some View {
        ContentView()
    }
}
The ContentView struct conforms to the View protocol, which is a fundamental building block of the SwiftUI framework. The View protocol requires that you implement a single property called body which is of type some View.
In this case, body contains a VStack structure (which aligns the elements it contains in a column), in which we find two elements: an Image component (with a globe icon) and a Text component (with the text “Hello, world!”). This view will be displayed on the screen when the app launches.
The ContentView_Previews struct is used to generate a preview of the ContentView in Xcode’s preview canvas. It allows you to see how the ContentView will look at design time without having to run the app.
You can customize the ContentView struct and add additional views as needed to create the layout and user interface for your app. The ContentView is the root view of your app, and it can contain any number of child views and layout elements.
Assets
The image assets and other resources that you can use in your app are kept in the Assets.xcassets directory. Icons, pictures, and launch screens are just a few examples of the image assets you can utilize in your program.
Preview Content
This group contains the Review Content.xcassets. This is another catalog that allows us to store all those assets that we are going to use only in the design of the application.
