How to test push notifications in Xcode 11.4 simulator
Push notifications are the messages that are sent, to an application installed on a device, from a server. In the case of iOS applications, the Apple Push Notifications Service (APN) is used. Until now, the only way to test these notifications was on physical devices. However, this has changed with the beta version of Xcode 11.4, with which we can already test the push notifications in the simulator.
Enable notifications in the simulator
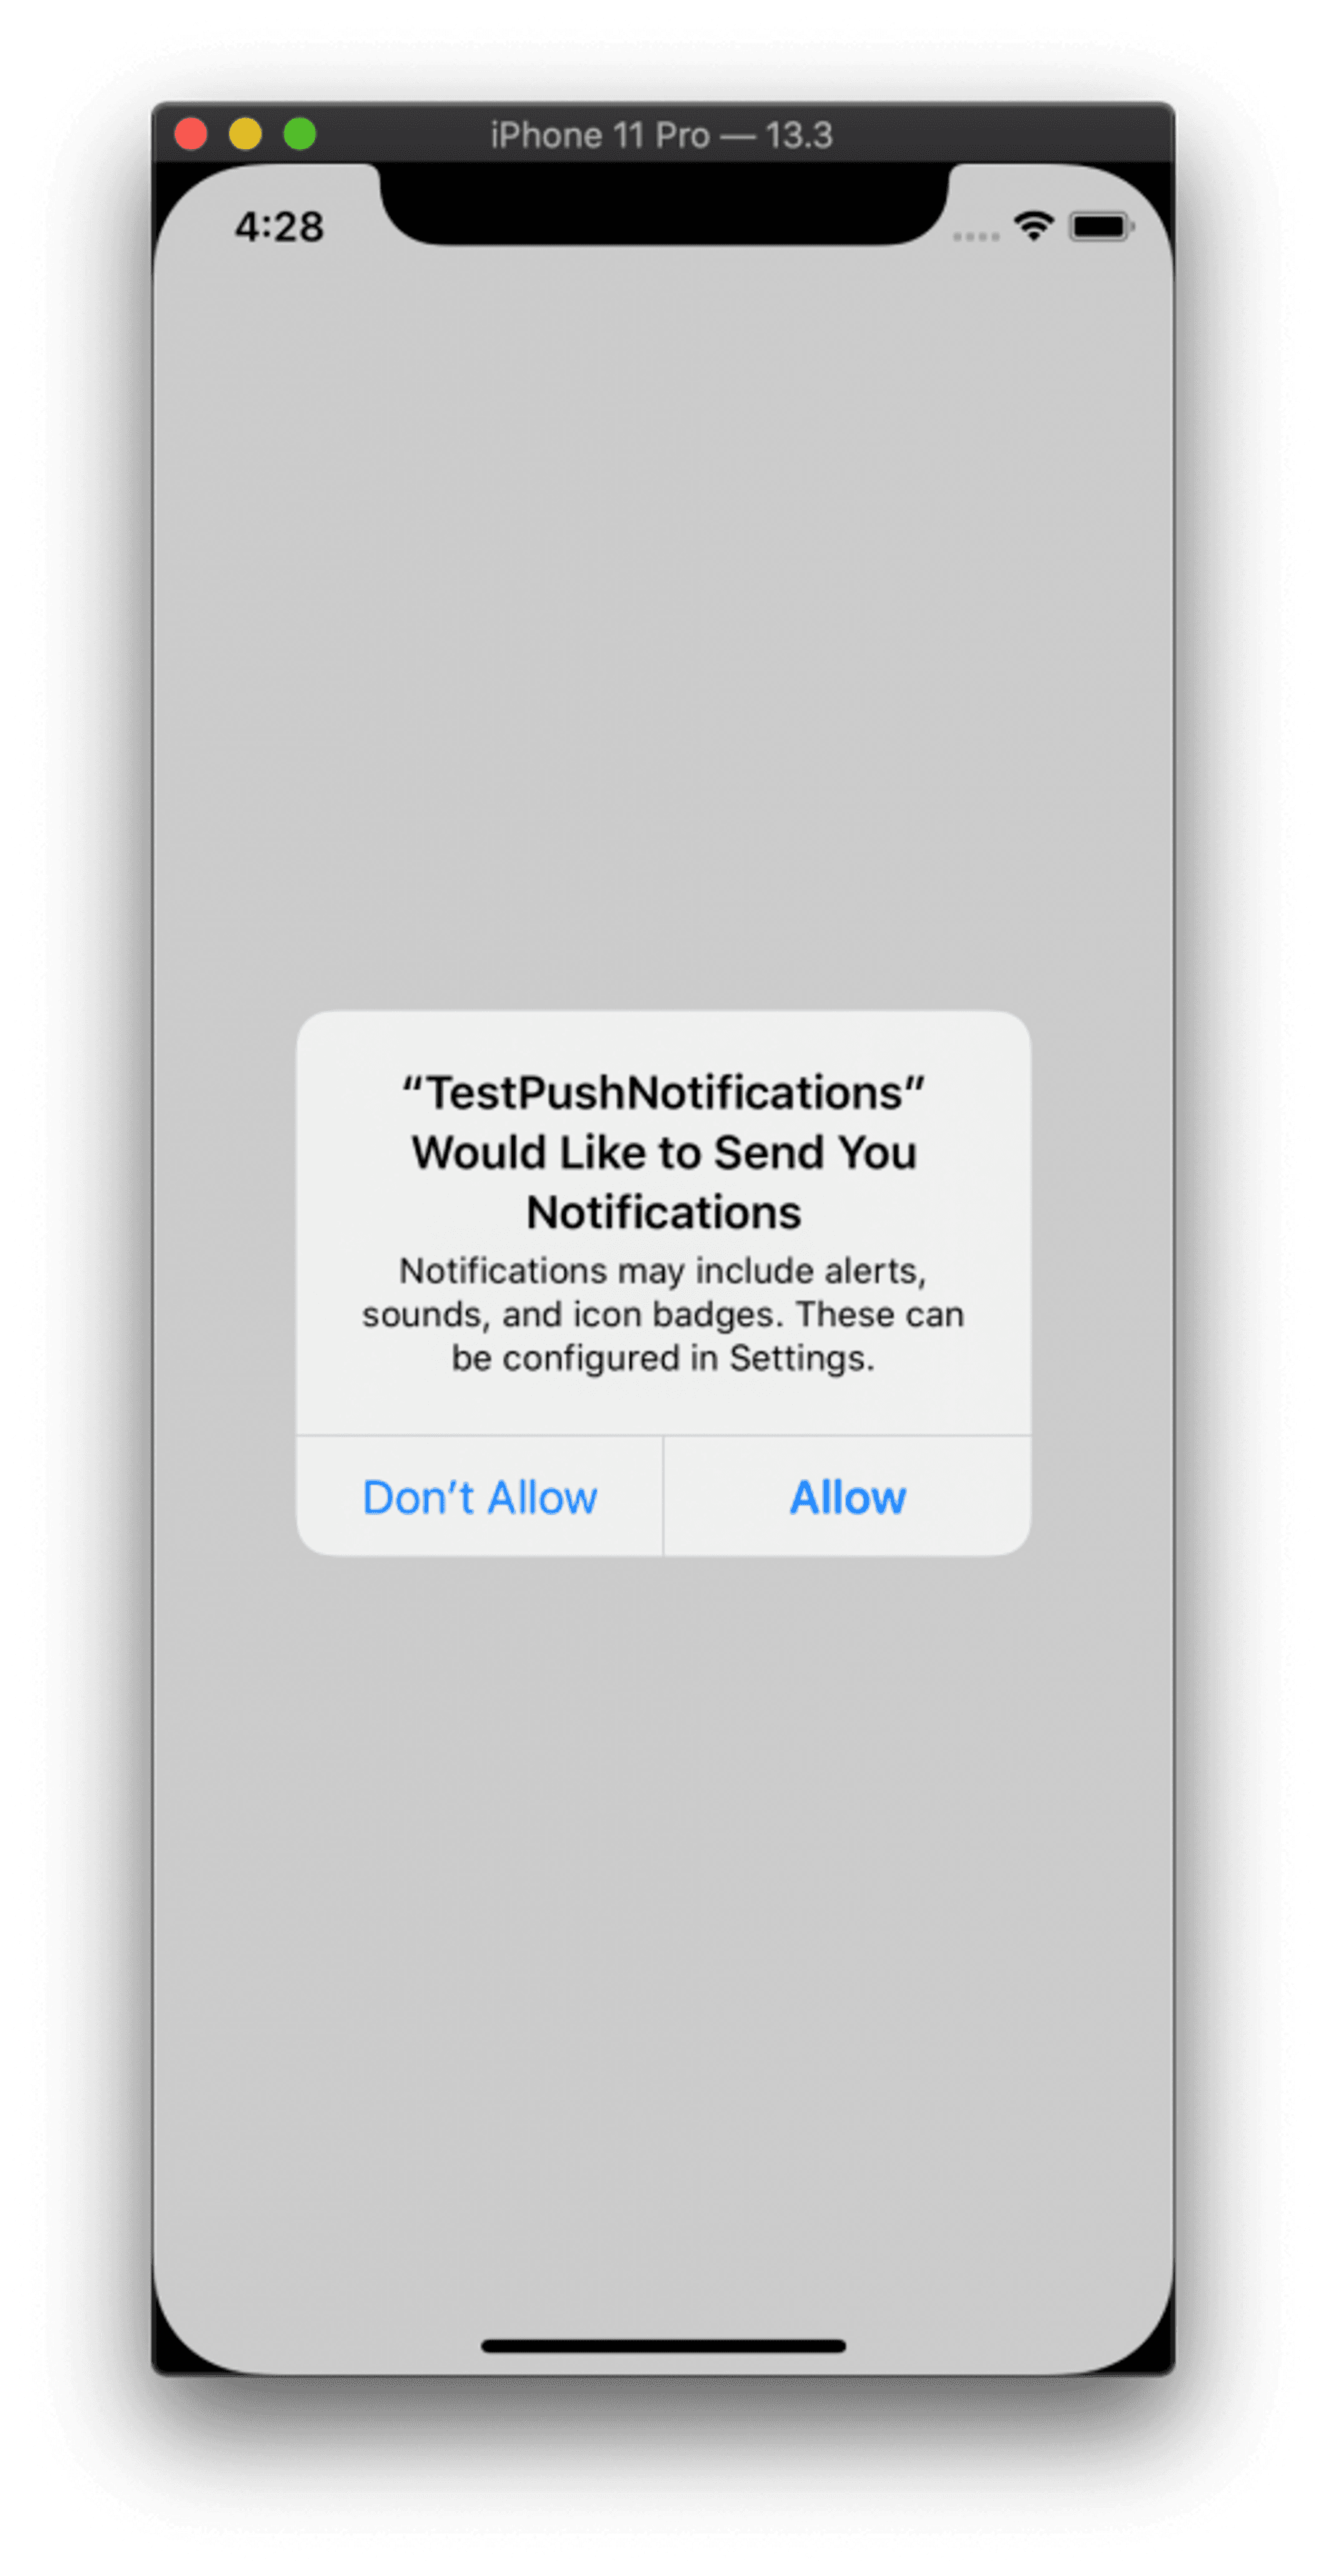
First, before testing the push notifications in the simulator, we have to ask the user for permission to show the notifications. We can do this by including the following code, for example, in the AppDelegate class:
func application(_ application: UIApplication, didFinishLaunchingWithOptions launchOptions: [UIApplication.LaunchOptionsKey: Any]?) -> Bool {
    // Override point for customization after application launch.
    registerForPushNotifications()
    return true
}

func registerForPushNotifications() {
    UNUserNotificationCenter.current().requestAuthorization(options: [.alert, .sound, .badge], completionHandler: {(granted, error) in
        if granted {
            DispatchQueue.main.async() {
                UIApplication.shared.registerForRemoteNotifications()
            }
        }
    })
}
The values that we pass in the options parameter is a list with the authorisation options for the user:
- badge. It allows updating the ‘badge’ of the application.
- sound. It allows to execute sounds.
- alert. Show alerts.
- carPlay. It allows to show notifications in a CarPlay environment.
- criticalAlert. Run sound for critical alerts. This value ignores the ‘Do Not Disturb’ option of the device, and requires special permission from Apple to be used.
- providesAppNotificationSettings. It allows to show a button in the notifications.
- provisional. If only this option is used, the user will not require authorisation, but it will be displayed silently in the Notification Center.
- announcement. Let Siri read the messages automatically and transmit them to the AirPods.
In the event that the user has given permission (granted == true), then we use UIApplication.shared.registerForRemoteNotifications() to register with Apple’s push notification service. This call must be made from the main thread, to avoid receiving a runtime warning.
We can also do a function that allows us to know what permissions the user has given by, if once given any permission, then he has withdrawn it from the Settings option:
func getRegisteredPushNotifications() {
    UNUserNotificationCenter.current().getNotificationSettings { settings in
        print("Notification settings: \(settings)"
    }
}
This function will let us know what permissions the user has given or not and, therefore, what functions of the application may or may not be enabled depending on those permissions. In this way we will only ask the user for permission if we have not done so before.
To know exactly what the status of the permit is, we complete the previous function as follows:
func getRegisteredPushNotifications() {
    UNUserNotificationCenter.current().getNotificationSettings({ settings in
        switch settings.authorizationStatus {
        case .authorized, .provisional:
            print("The user agrees to receive notifications.")
        case .denied:
            print("The user refuses to receive notifications.")
        case .notDetermined:
            print("The permission has not been determined, you can ask the user.").
        }
    })
}
If we put together everything seen so far, we get the following code in AppDelegate.swift:
import UIKit
import UserNotifications


@UIApplicationMain
class AppDelegate: UIResponder, UIApplicationDelegate {

    func application(_ application: UIApplication, didFinishLaunchingWithOptions launchOptions: [UIApplication.LaunchOptionsKey: Any]?) -> Bool {
        // Override point for customization after application launch.

        getPushNotifications()

        return true
    }

    // MARK: UISceneSession Lifecycle
    func application(_ application: UIApplication, configurationForConnecting connectingSceneSession: UISceneSession, options: UIScene.ConnectionOptions) -> UISceneConfiguration {
        return UISceneConfiguration(name: "Default Configuration", sessionRole: connectingSceneSession.role)
    }

    func application(_ application: UIApplication, didDiscardSceneSessions sceneSessions: Set<UISceneSession>) {
    }


    func getPushNotifications() {
        UNUserNotificationCenter.current().getNotificationSettings { (settings) in
            switch settings.authorizationStatus {
            case .notDetermined:
                self.getRegisteredPushNotifications()
            case .authorized:
                DispatchQueue.main.async {
                    UIApplication.shared.registerForRemoteNotifications()
                }
            case .denied:
                print("Permission denied.")
                // The user has not given permission. Maybe you can display a message remembering why permission is required.
            default:
                break
            }
        }
    }


    func getRegisteredPushNotifications() {
        UNUserNotificationCenter.current().requestAuthorization(options: [.alert, .sound, .badge], completionHandler: { (granted, error) in
            if granted {
                DispatchQueue.main.async {
                    UIApplication.shared.registerForRemoteNotifications()
                }
            }
        })
    }
}
Sending push notifications to the simulator
Once we have configured in our application the permissions to receive push notifications, we will test the sending of these notifications in the simulator. If you look at what Apple has published for Beta 2 of XCode 11.4, we can find:
Simulator supports simulating remote push notifications, including background content fetch notifications. In Simulator, drag and drop an APNs file onto the target simulator. The file must be a JSON file with a valid Apple Push Notification Service payload, including the “aps” key. It must also contain a top-level “Simulator Target Bundle” with a string value that matches the target application‘s bundle identifier.simctl also supports sending simulated push notifications. If the file contains “Simulator Target Bundle” the bundle identifier is not required, otherwise you must provide it as an argument (8164566):
xcrun simctl push <device> com.example.my-app ExamplePush.apnsThat is, we can simulate the notification in two different ways:
- Create an APN file and drag it directly over the simulator.
- Use the terminal to execute the command shown.
Drag APNs file
First of all we have to create an APN file, as Apple shows in its documentation:
{
    "Simulator Target Bundle": "com.testapp.TestPushNotifications",
    "aps": {
        "alert": {
            "title": "Push Notification",
            "subtitle": "Test Push Notifications",
            "body" : "Testing Push Notifications on iOS Simulator",
        }
    }
}
This file has been modified with the Simulator Target Bundle parameter, with which we indicate to the simulator the identifier of our application. This value is what we have defined when configuring the application: Find bundle identifier. How to test push notifications on simulator.
Now we can test the push notifications simply by dragging the file over the simulator:
Sending notifications by command line
The second way that Apple indicates to test push notifications is through the command line:
xcrun simctl push <device> com.example.my-app ExamplePush.apnsIn this case, we need two parameters:
- The identifier of the application, which we have already obtained in the previous case.
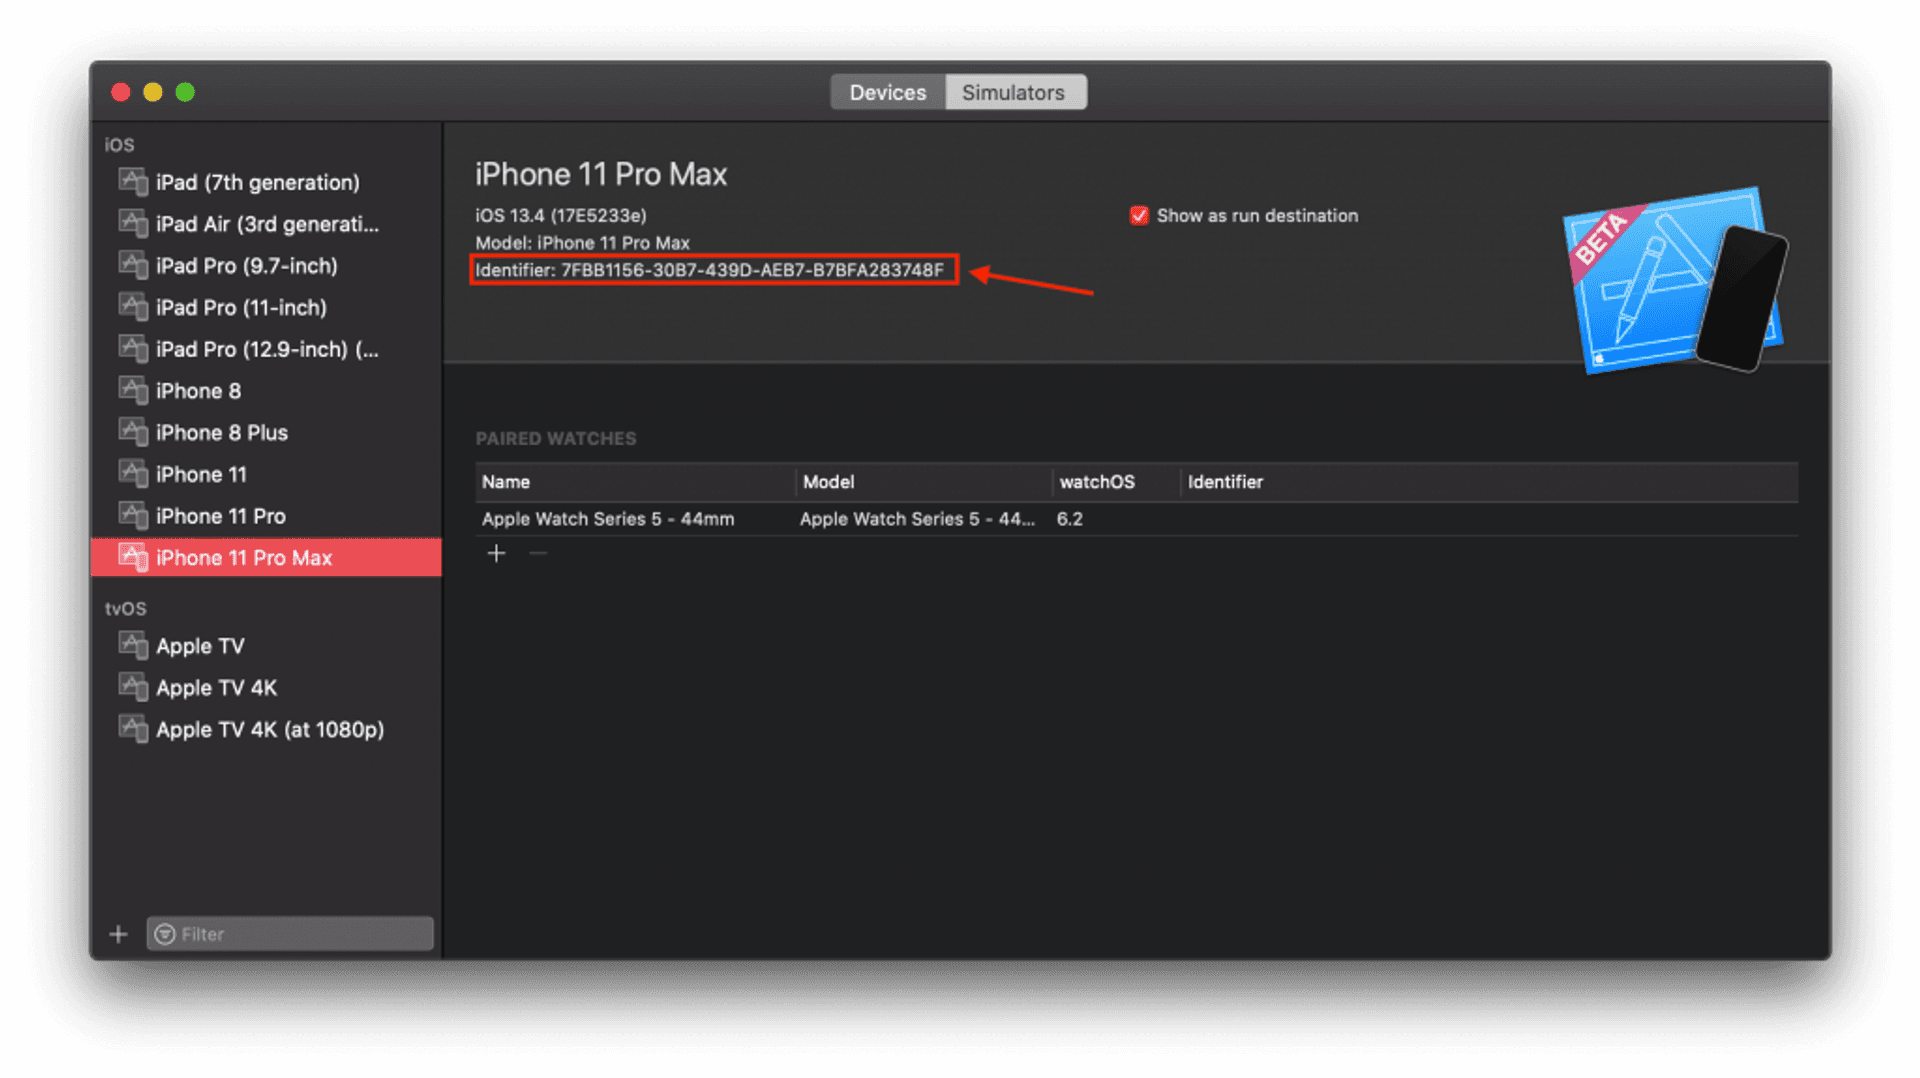
- The device identifier in the simulator. For this we have to go to the Window > Devices and Simulators menu.
Then, in the screen that appears we select the Simulators tab and the simulator that we are using. The parameter we need is the one indicated as Identifier.
In the case we are seeing the command will be:
xcrun simctl push 7FBB1156-30B7-439D-AEB7-B7BFA283748F com.testapp.TestPushNotifications pushTest.apnsConclusion
Thanks to this new functionality that we can see in the beta version of Xcode 11.4, we can already test the push notifications, and the behavior of our applications when receiving them, from the simulator itself, without the need of a physical device.


